Maker, Woodworking

Today’s Project: Puzzle Storage

I just finished building a 16-puzzle storage box so that we can consolidate all of our board puzzles from three different smaller boxes to one large one.

Not a lot to say about this one; it’s just a Baltic birch box with a bunch of little supports along each side. I used lock rabbets to join the box sides and 1/4″ plywood for the back.

Standard
David Tewes

An Aleutian Latrine

Can you help me determine the author of a humorous World War II poem about toilets?

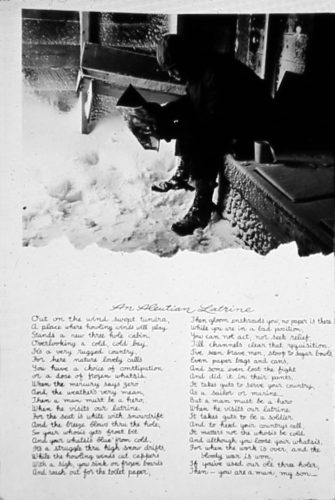
While I was clearing out my late father-in-law’s attic, I came across three cases of Kodachrome slides taken by his late cousin David Tewes, who had been a soldier stationed in Alaska during World War II. Among the slides was a group of photos taken in Attu, Alaska during the War, and one of those photos, labeled “An Aleutian Latrine — Our XMas Card”, contained an unattributed poem and a shot of a soldier doing his “business” in the snow.

The poem is transcribed below.

An Aleutian Latrine

An Aleutian Latrine

Out on the wind swept tundra,
A place where howling winds will play
Stands a new three hole cabin
Overlooking a cold, cold bay.
It’s a very rugged country,
For here nature lovely calls.
You have a choice of constipation
Or a dose of frozen whatsis.
When the mercury says zero
And the weather’s very mean,
Then a man must be a hero,
When he visits our latrine.
For the seat is white with snowdrift
And the breeze blows thru the hole,
So your whosis gets frost bit
And your whatsis blue from cold.
It’s a struggle thru high snow drifts,
While the howling winds cut cappers
With a sigh, you sink on frozen boards
And reach out for the toilet paper.
Then gloom surrounds you, no paper is there
While you are in a bad position.
You can not act, nor seek relief,
Till channels clear that requisition.
I’ve seen brave men stoop to sugar bowls
Even paper bags and cans
And some even lost the fight
And did it in their pants.
It takes guts to serve your country,
As a sailor or marine…
But a man must be a hero
When he visits our latrine.
It takes guts to be a soldier,
And to heed your country’s call.
It matters not the whosis be cold
And although you loose your whatsis.
For when the work is over,
and the bloody war is won,
If you’ve used our ole three holer
Then — you are a man, my son.

* “whatsis” and “whosis” are placeholder words used to avoid giving offense. Use the rhyme scheme to decode their secret meaning!

I have not been able to find another copy of this poem; Google definitely doesn’t know about it.  I would love to track down the author if the author is known.

It’s possible that David wrote this poem, although he did not sign his name to it. Based on his photos and his hobbies shown in his other photographs, I wouldn’t be surprised if he did write it.

Chris Steller pointed out on Twitter that the author Dashiell Hammett was stationed in the Aleutian Islands at the same time that David was there. It would stand to reason, however, that if Hammett had written the poem, David would have wanted to note that, since Hammett was well-known for his book and movie The Maltese Falcon.

The rest of David’s photos from Attu are posted on the website I built to showcase his photography, in case you can find any clues therein.  Any and all tips, ideas, or wild speculations are welcome in the comments below!


Standard
Automattic, Christmas, CNC, Maker, Woodworking, X-Carve

An Automattic Bowl

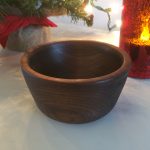
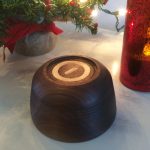
For part of the gift I sent through the Secret Santa exchange at work this year, I decided to make a bowl with the Automattic company logo inlaid in the bottom.  I’ve never made a bowl or done an inlay before, so this was definitely a wise decision that would not backfire.

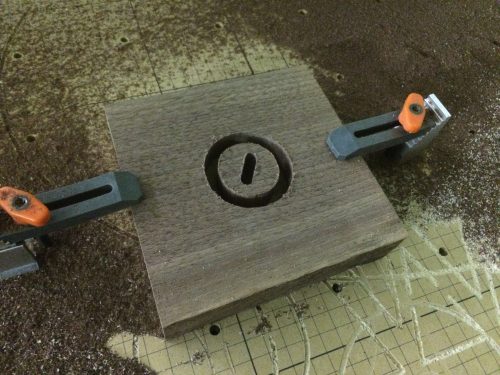
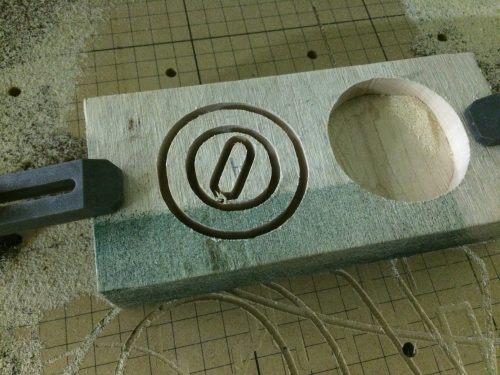
I started by using my X-Carve to carve out a deep recess in some walnut to receive the inlay.  The plan at this point was to have the inlay visible on both the outside and inside bottoms of the bowl, so I carved it about an inch and a half deep to give me plenty of room for error. (<– Foreshadowing.)

I cut the inlaid pieces out of some maple, since it would have a natural contrast with the dark walnut.

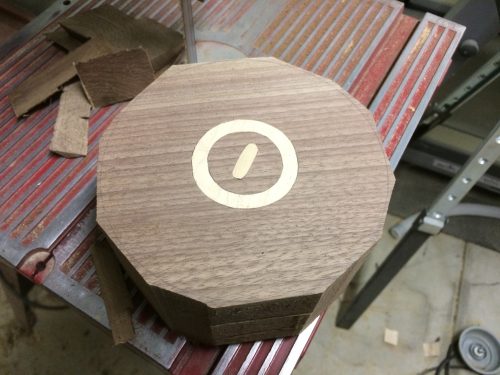
I glued the maple in, flattened the surface, and cut the walnut to a roughly circular blank on the bandsaw.

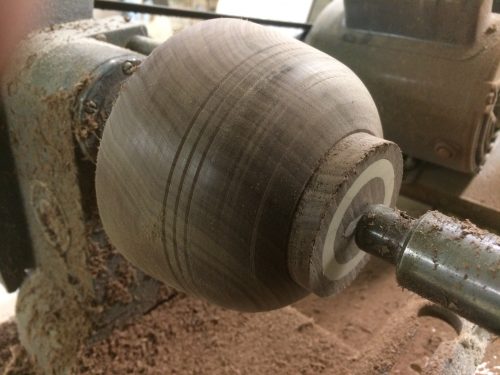
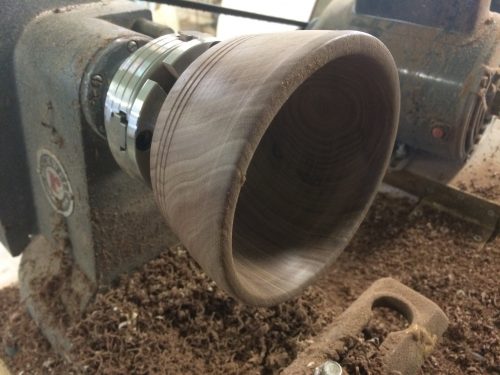
I mounted the blank on the lathe and carved the outside profile of the bowl. Because I made the blank by gluing two pieces of walnut together (top to bottom), I added three decorative grooves: one on the seam to hide it, and one on either side for good measure. The grain lined up well enough that it’s hard to tell that it’s not one solid piece.

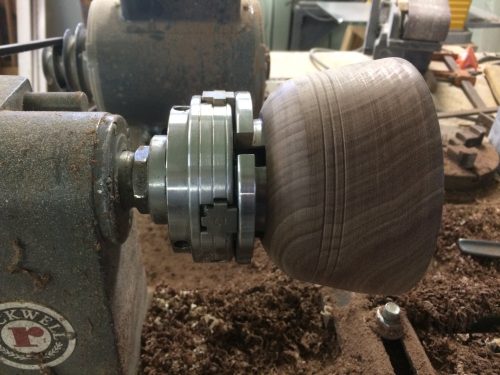
The lathe chuck I was originally going to use would have tightened around the tenon.(In the photo above, the tenon is the protruding portion on the right side that contains the inlay.)  Unfortunately, it broke, and the chuck I ended up using (shown below) needed a recess to expand into, so I cut all of the tenon off (and then some). Because of this change, there wasn’t enough of the inlay left to have it visible on both the inside and outside of the bowl.

I hollowed out the inside of the bowl, being careful not to go too deep.

After finishing the bowl with Watco Danish oil, I let it cure, and then I mailed it off to my unsuspecting coworker along with some treats to fill it.  If he doesn’t like corporate wooden dishware, I hope he at least likes American candy.

Standard
Epoxy, Life, Maker

How to Make Your Very Own Kidney Stone Paperweight

On today’s episode of Finkstructables, I’m going to be walking you through the steps to make your very own kidney stone paperweight.

Step 1: Create a kidney stone.

I made this stone with my right kidney, but you could use your left one if you like. Now, you want the stone to be large enough that it’s easy to see but small enough that it doesn’t cause you crippling pain on its way out. I nailed the former but overshot it on the latter. Oops!

Step 2: Encase the stone in resin.

I used this “crystal clear” epoxy resin, although I learned after the fact that it only stays clear if you pour it in increments of less than a quarter inch. I did the entire thing in two one-inch pours, and the heat generated by the curing process discolored the resin, turning it yellow. Oops!

You should use a mold that is made for casting resin so that you can easily remove the block once it’s done curing:

This mold was supposedly ok to use with resin, which I guess it was. It just wasn’t reusable with resin. Oops!

Now that you have easily removed your crystal clear block of resin from the mold, cut it into a projection of a 2-dimensional kidney shape. I used my bandsaw for this step:

Then, trim off the edges at about a 45º angle, bringing it closer to a 3-D representation of a kidney.

Be careful to prevent the warm resin shavings from sticking to your bandsaw bearings and hardening in place, or your saw might not want to start the next time you use it. Oops!

Begin sanding the resin, first removing any saw marks, and then removing all of the scratches from the previous grit level. I sanded mine with 80, 120, 200, 600, 1000, and 2000 grit paper.

Once you’ve exhausted your sandpaper options, switch to rubbing compound. I used these polishing wheels by chucking them into my drill press.

After polishing the entire paperweight with rubbing compound, it should look something like this:

Now you can move on to polishing compound. This will give your kidney a glossy shine, and if you neglected to get all the bubbles out when you poured, your stone will appear to be floating in a sea of resiny stars.

And that’s it! Now every time you use your paperweight, you’ll remember all of the fun times you and your stone shared together.

That paper’s not going anywhere. Thanks, kidney stone!

Standard