
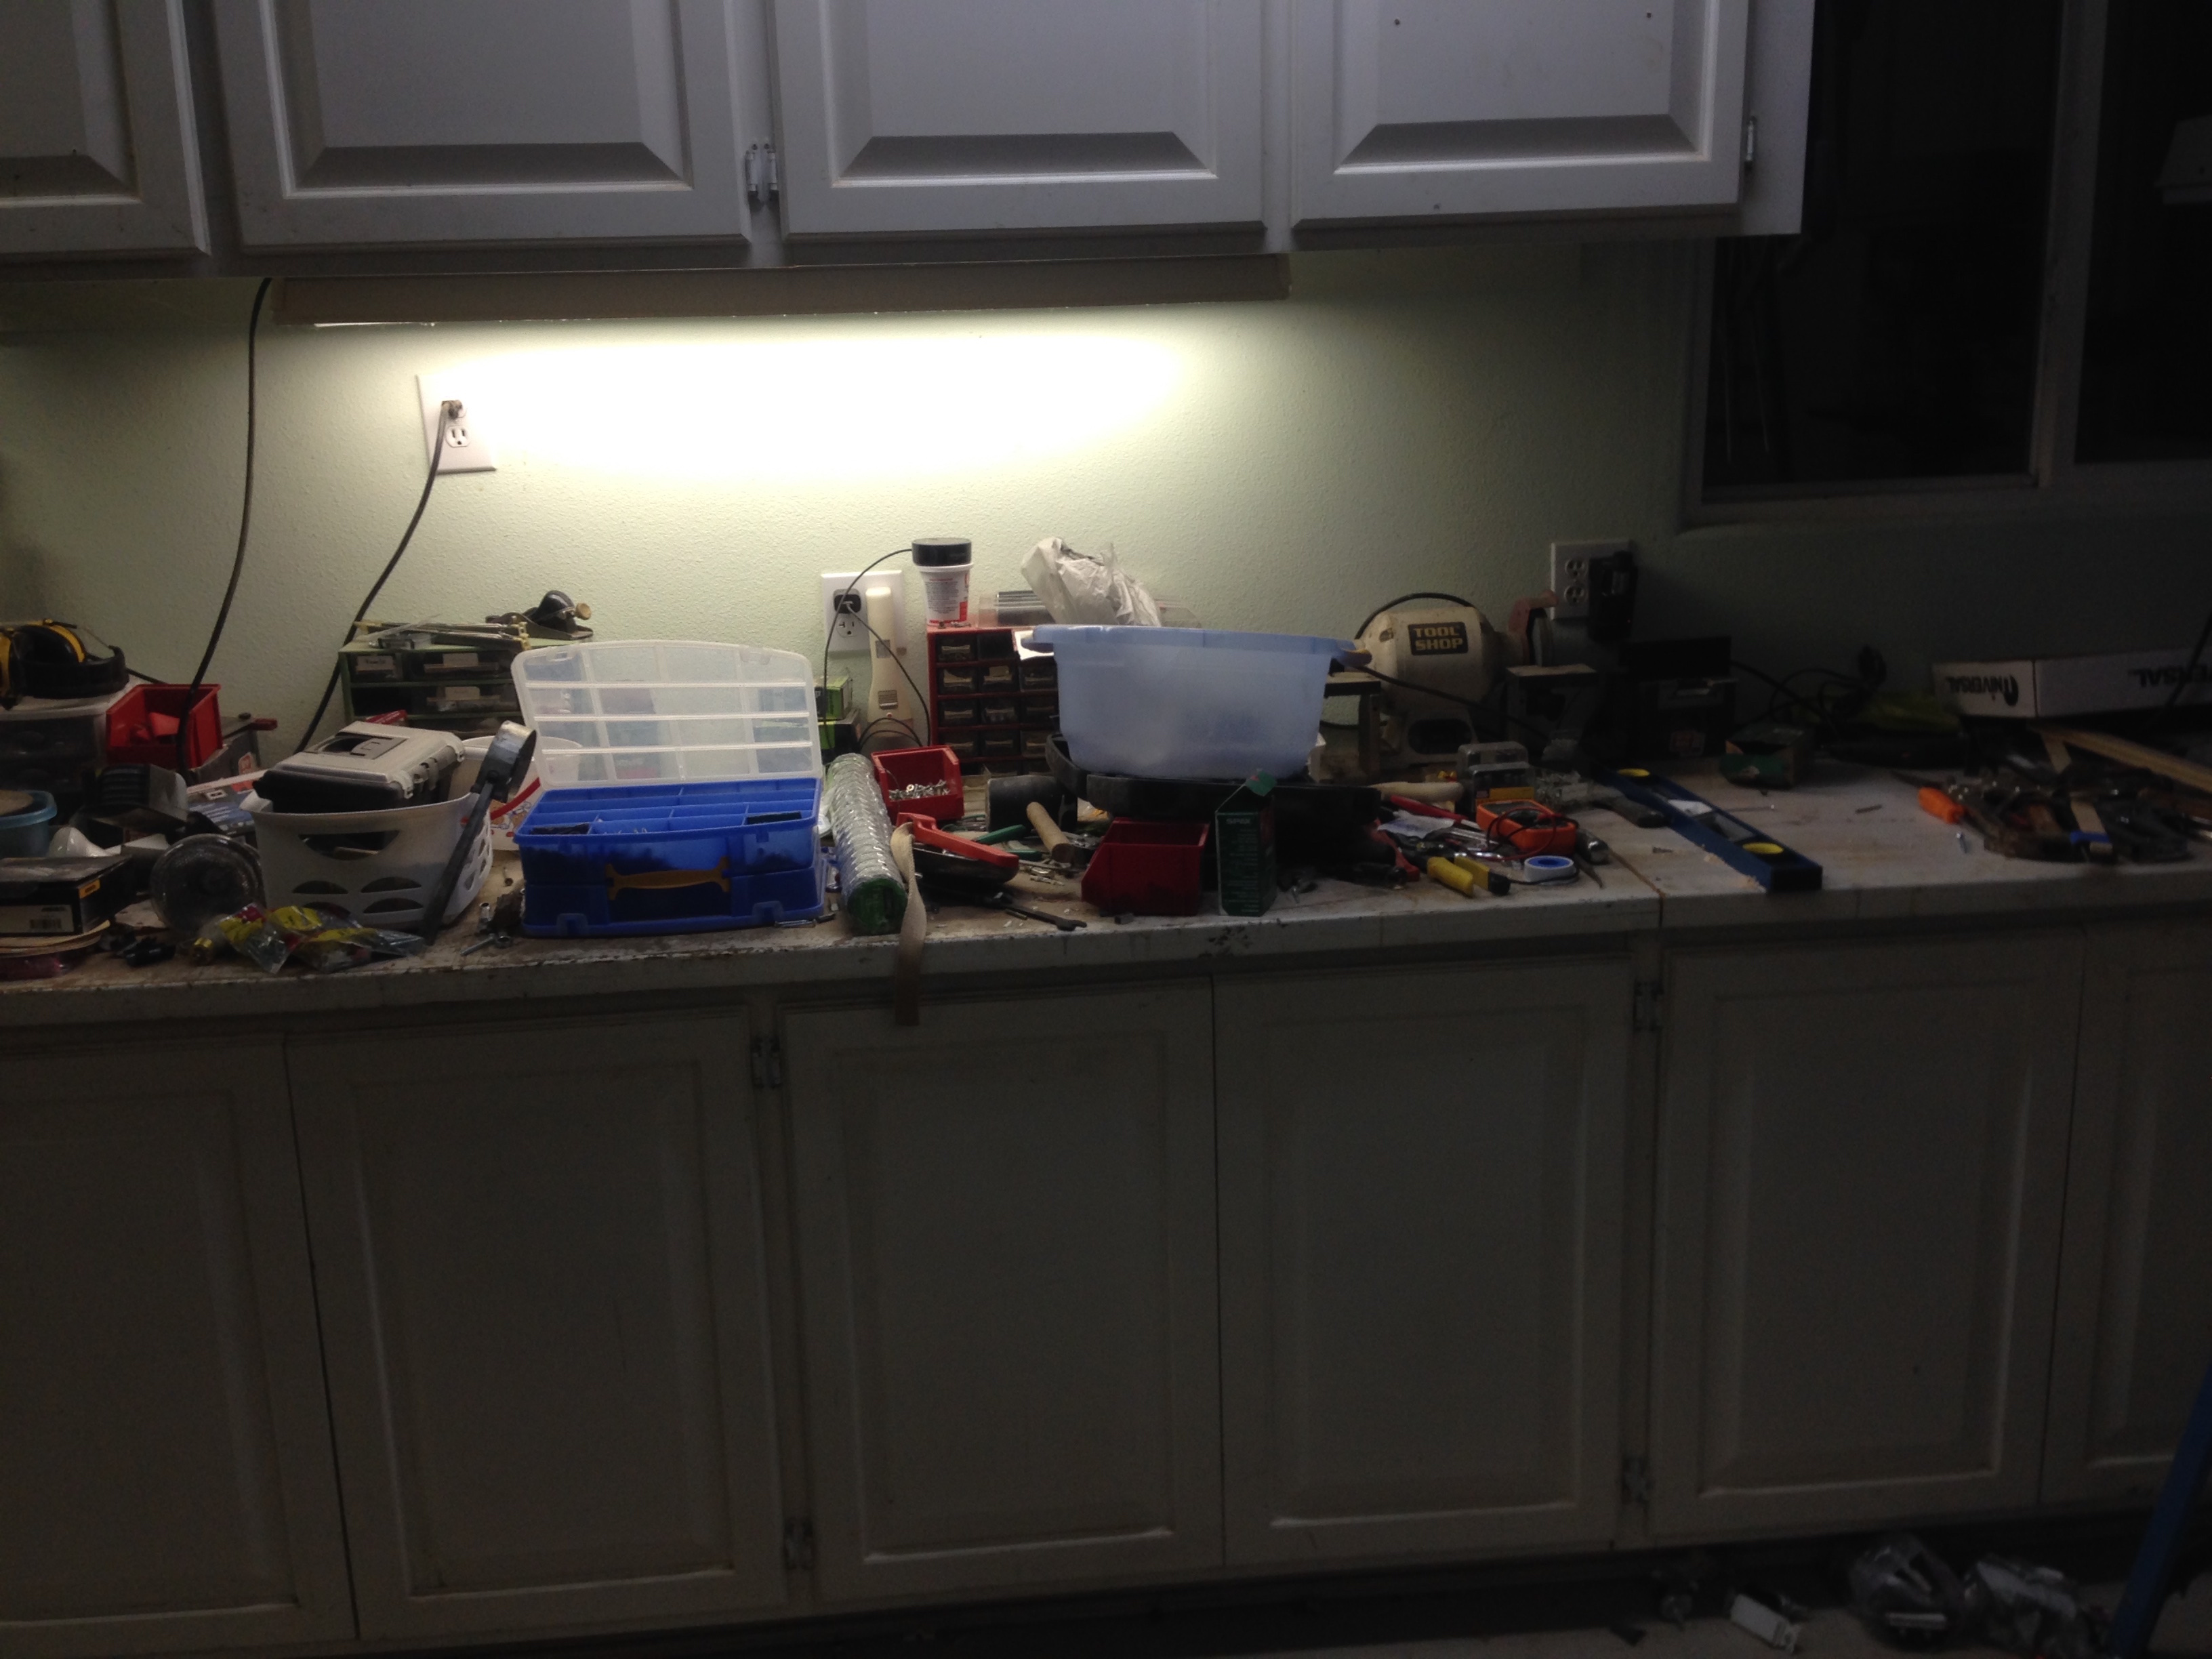
We moved into a new house this summer, and it has a separate workshop with a built-in workbench. As I unpacked my tools, they ended up on the workbench in no particular order:
If I ever wanted to be able to find any of my tools or have space to use them, I needed to get organized. I started by removing two cabinets from this wall. (The first step in getting organized is not usually removing cabinets, and it took some time to convince my wife that this would work out.) You’ll have to take my word that the cabinets were up there, because I forgot to take a before picture.
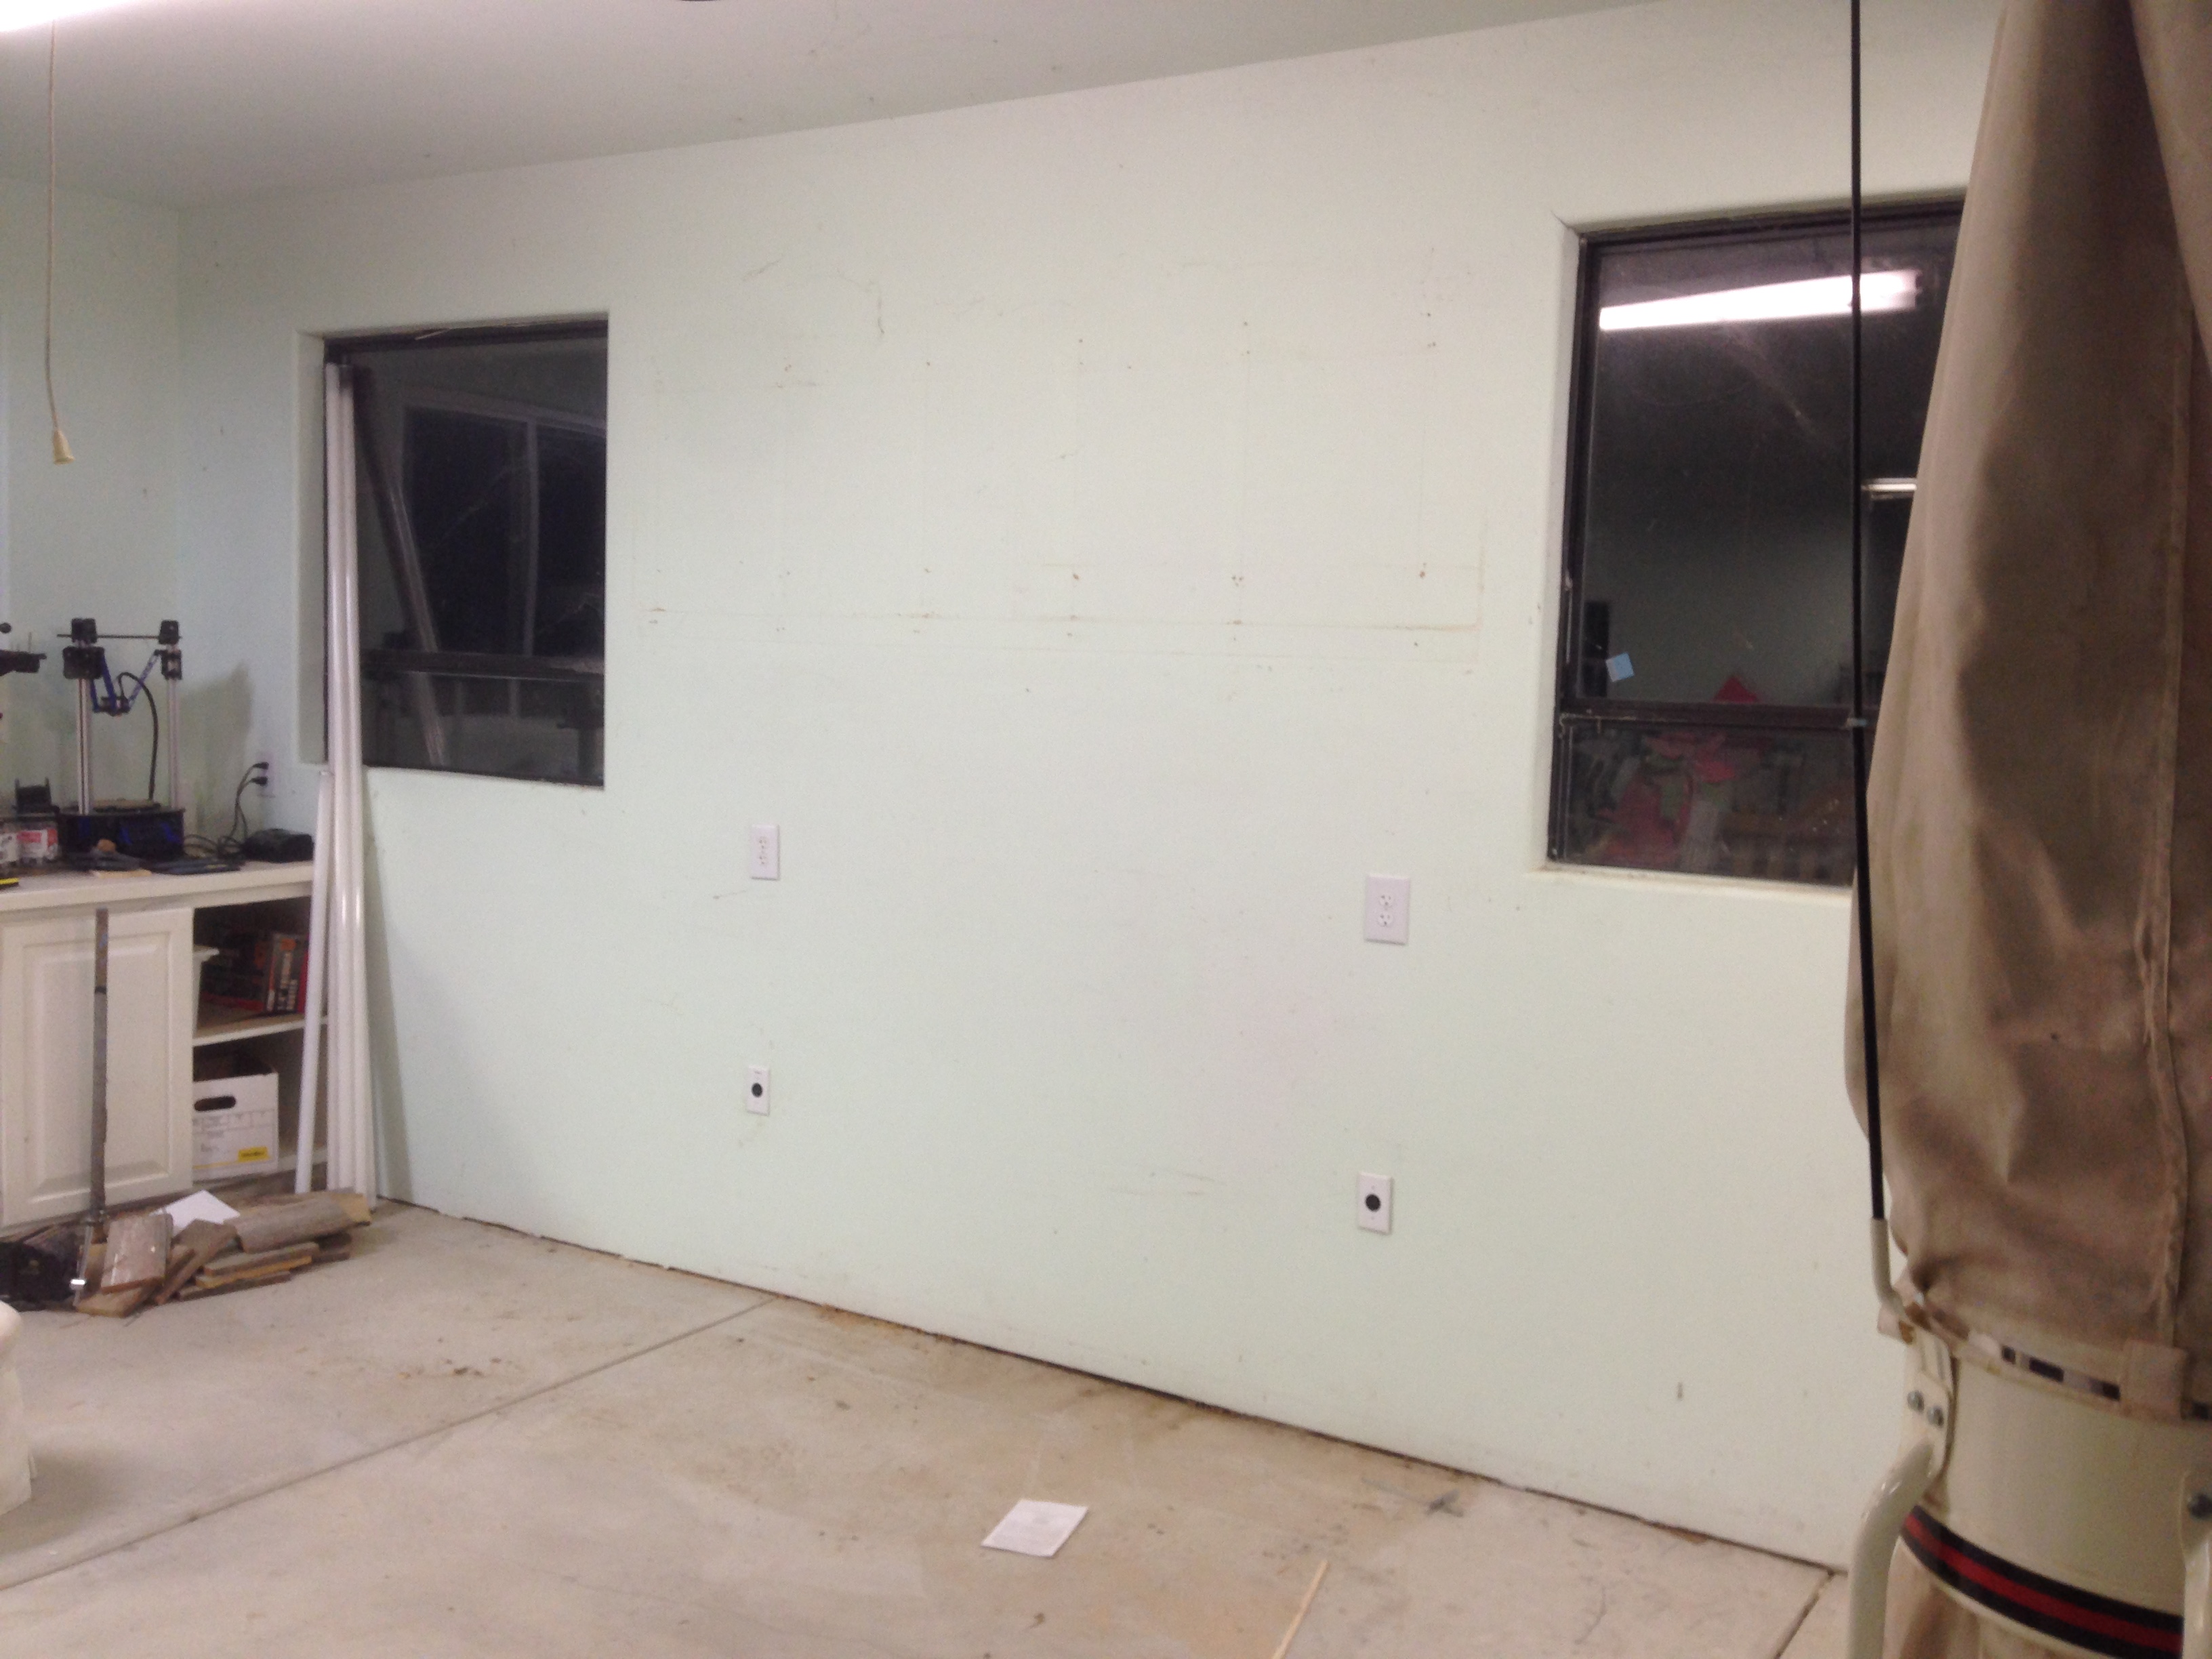
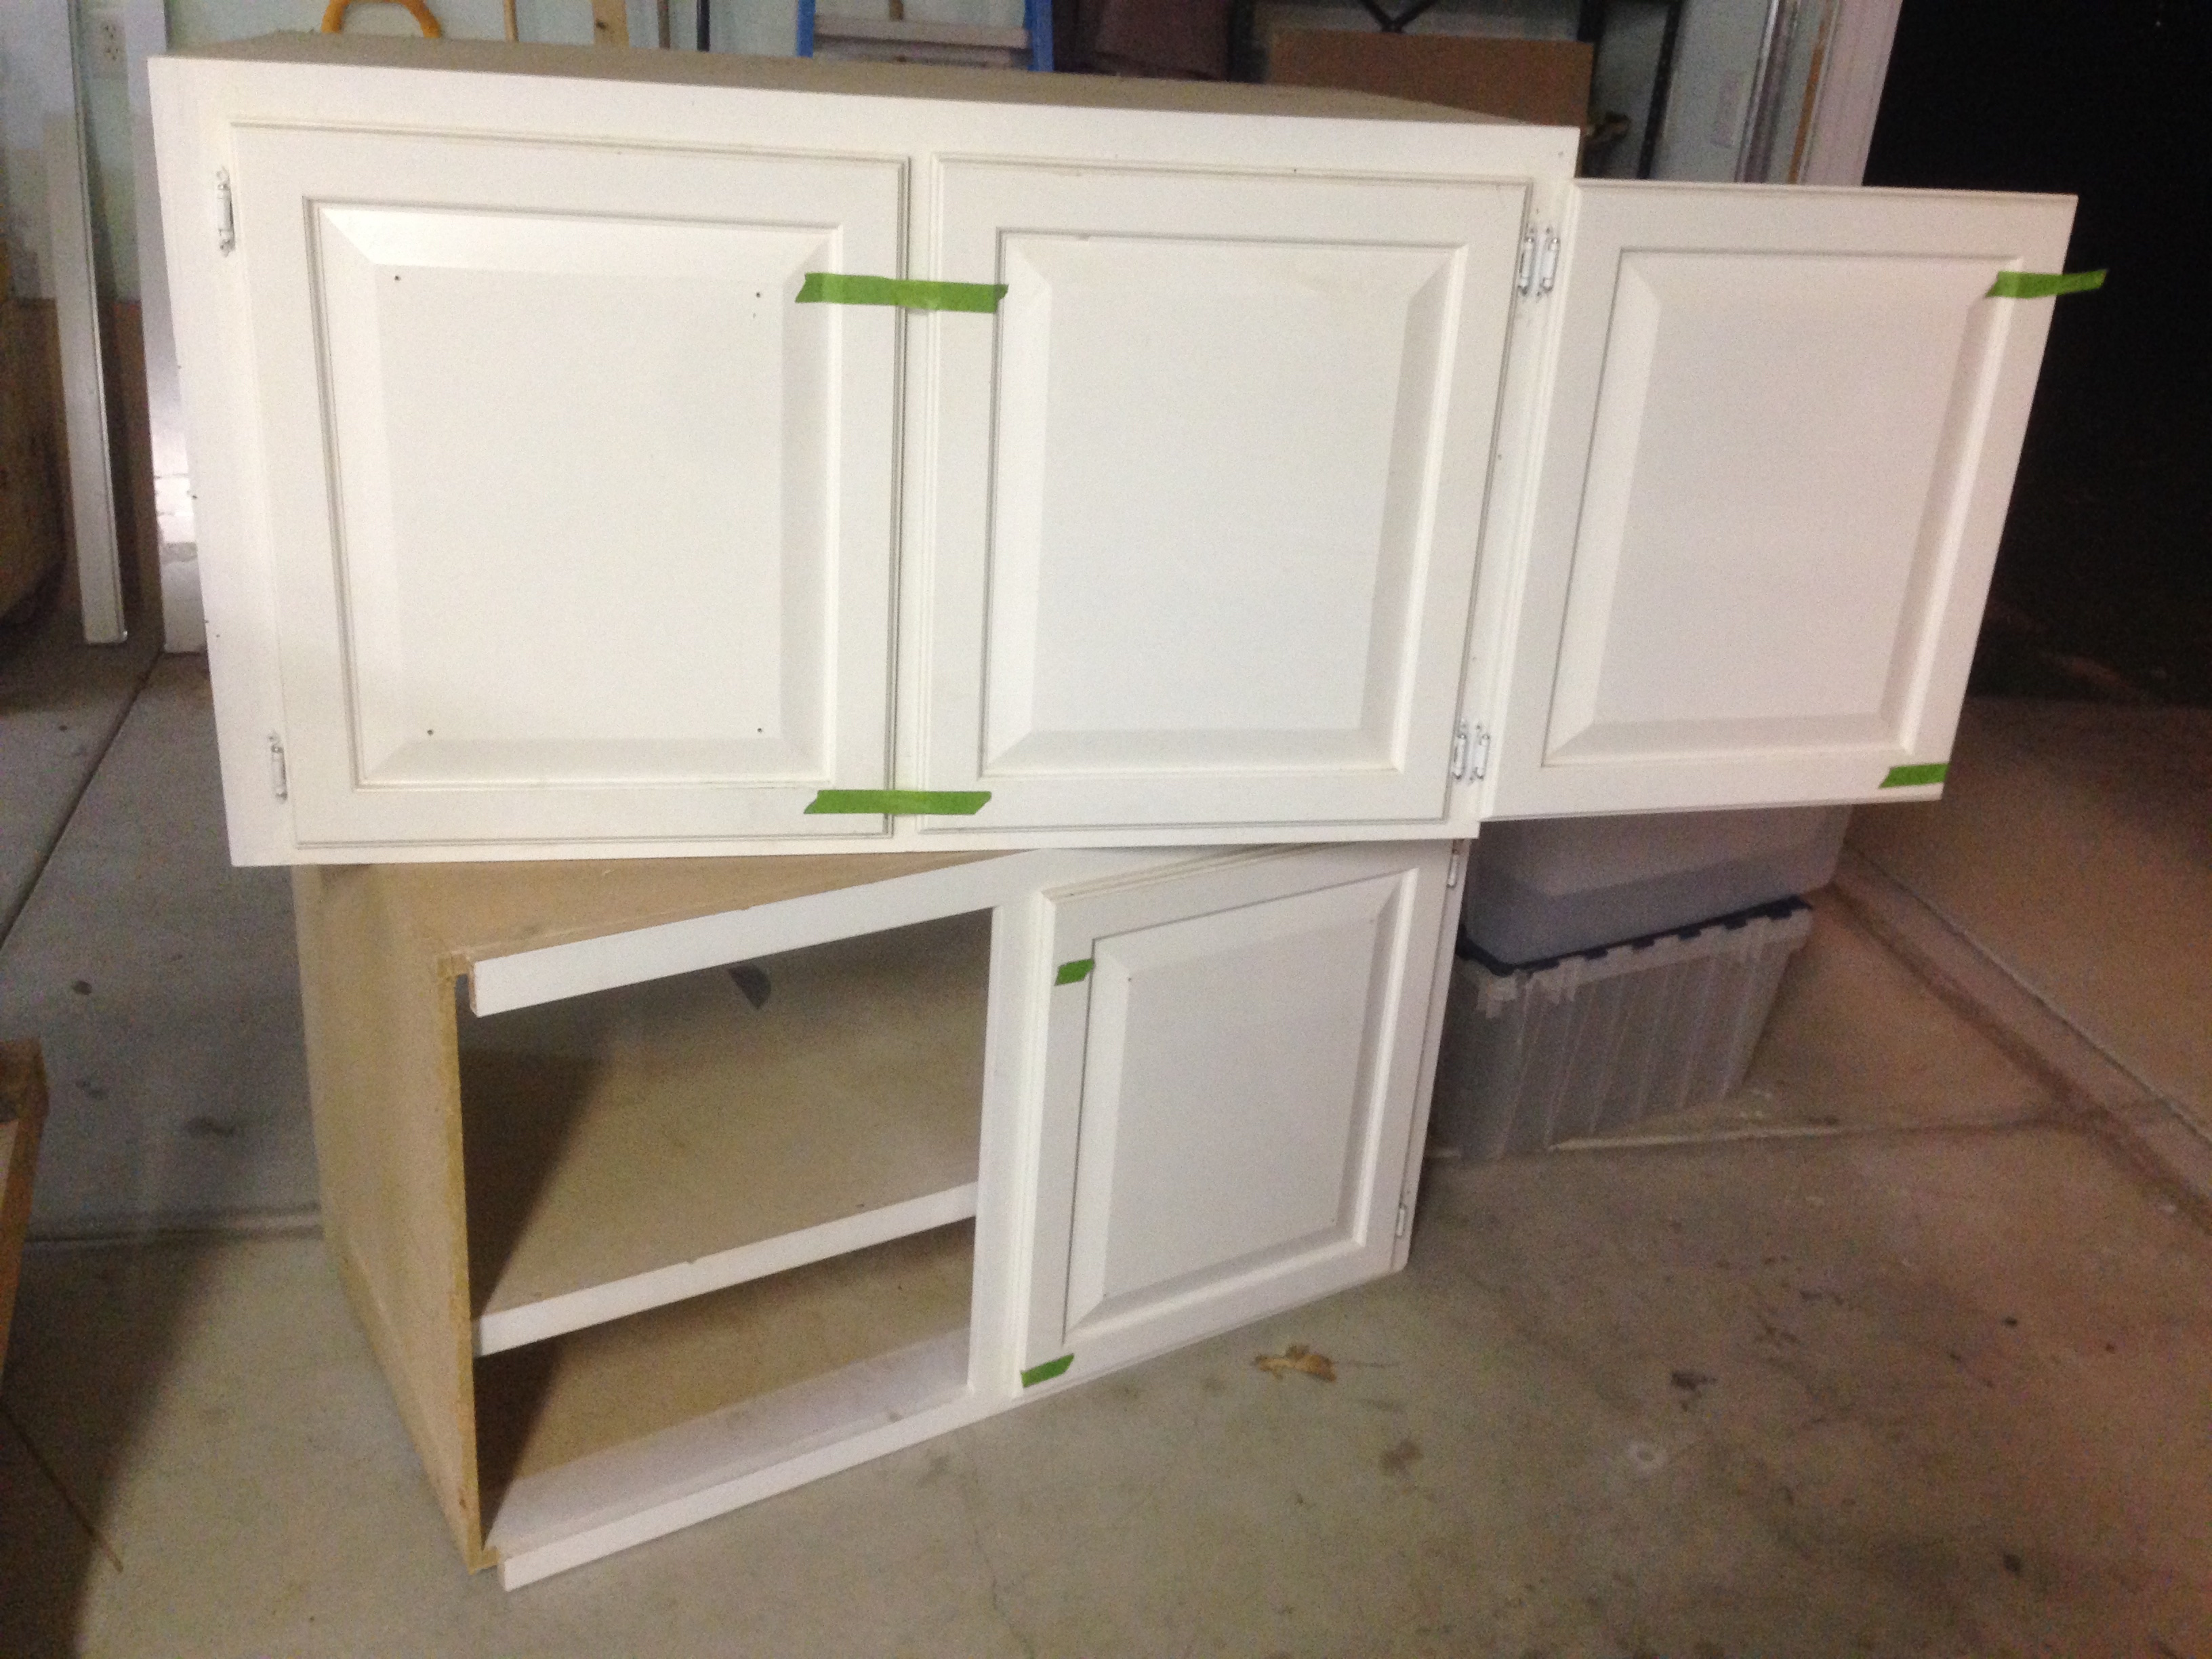
Here’s an after picture of the cabinets. They were on the wall, but now they’re on the floor and will soon be in our laundry room.
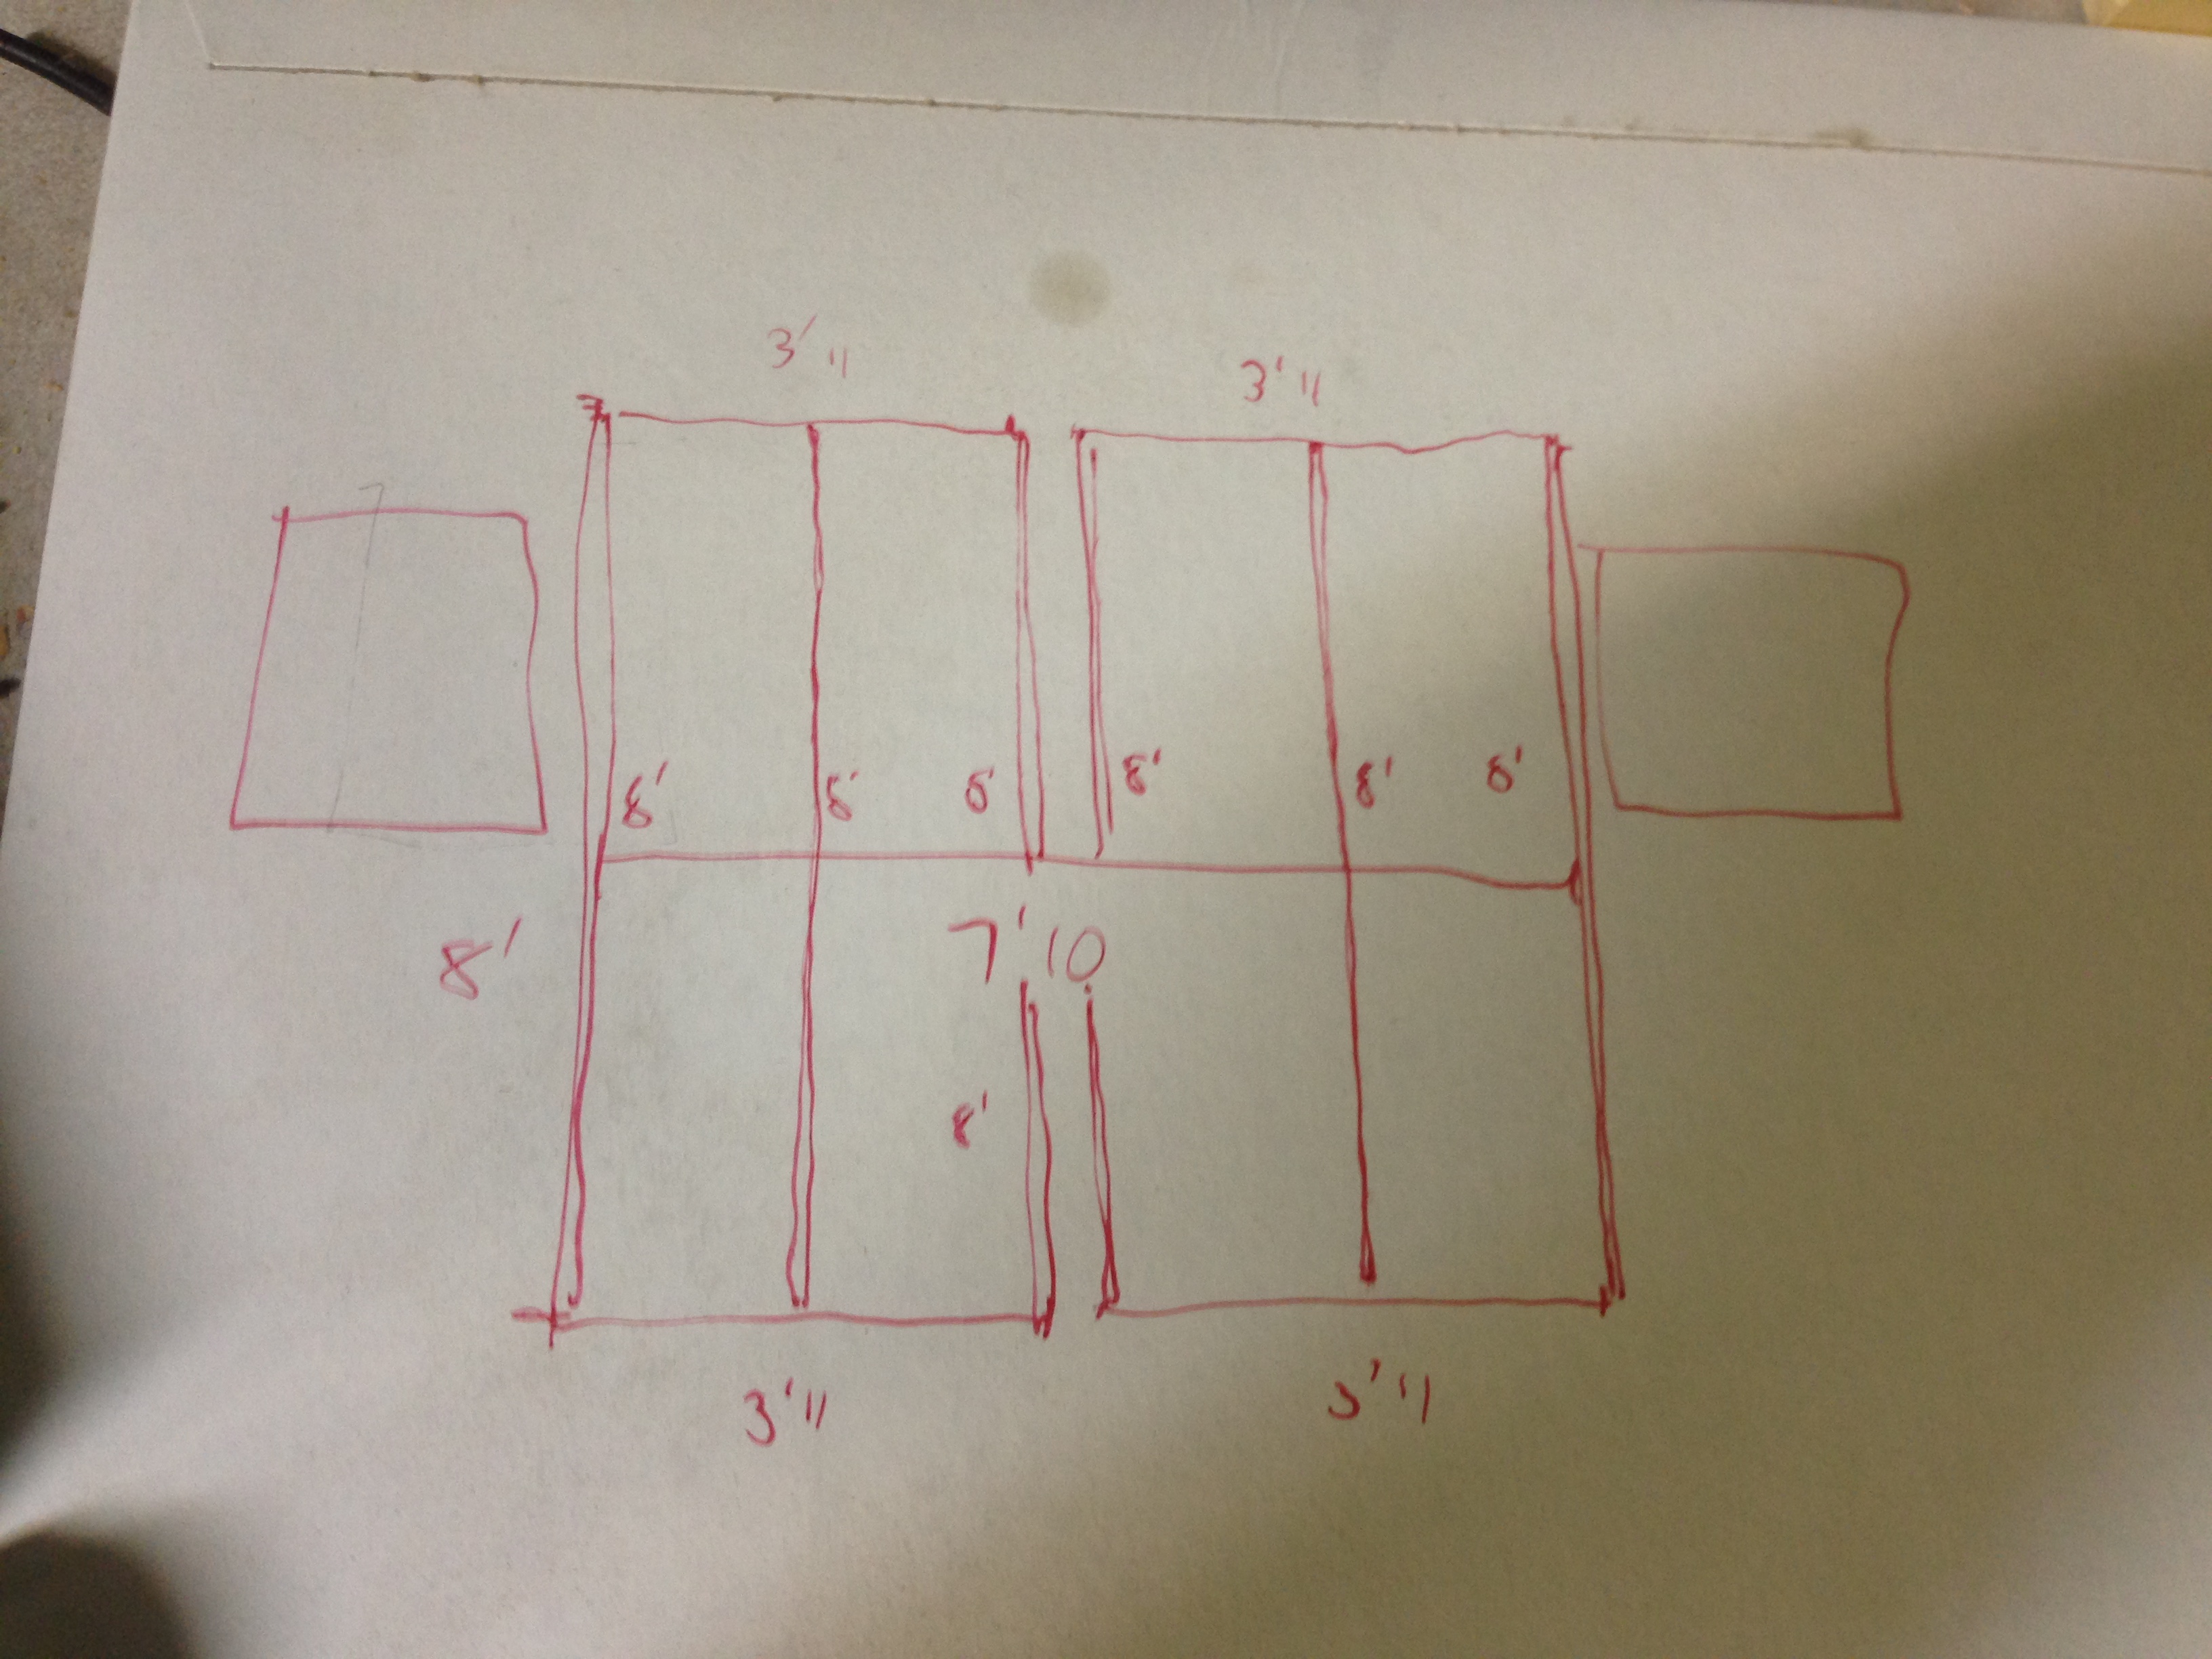
I planned to build an 8’x8′ rack between the windows, comprising horizontal slats across a vertical frame. Here’s the architectural plan for the rack very professionally done on the back of a circular saw blade sleeve.
I built a simple rectangular frame out of 1×2 pine and then ripped 27 2 1/2″ slats out of half-inch plywood. The frame is screwed into the studs along the top and bottom; unfortunately, the middle vertical 1×2 wasn’t lined up with a stud, so I had to screw through a couple of the slats into the stud about an inch off of center.
Here’s the frame after attaching the first few slats around the outlet.
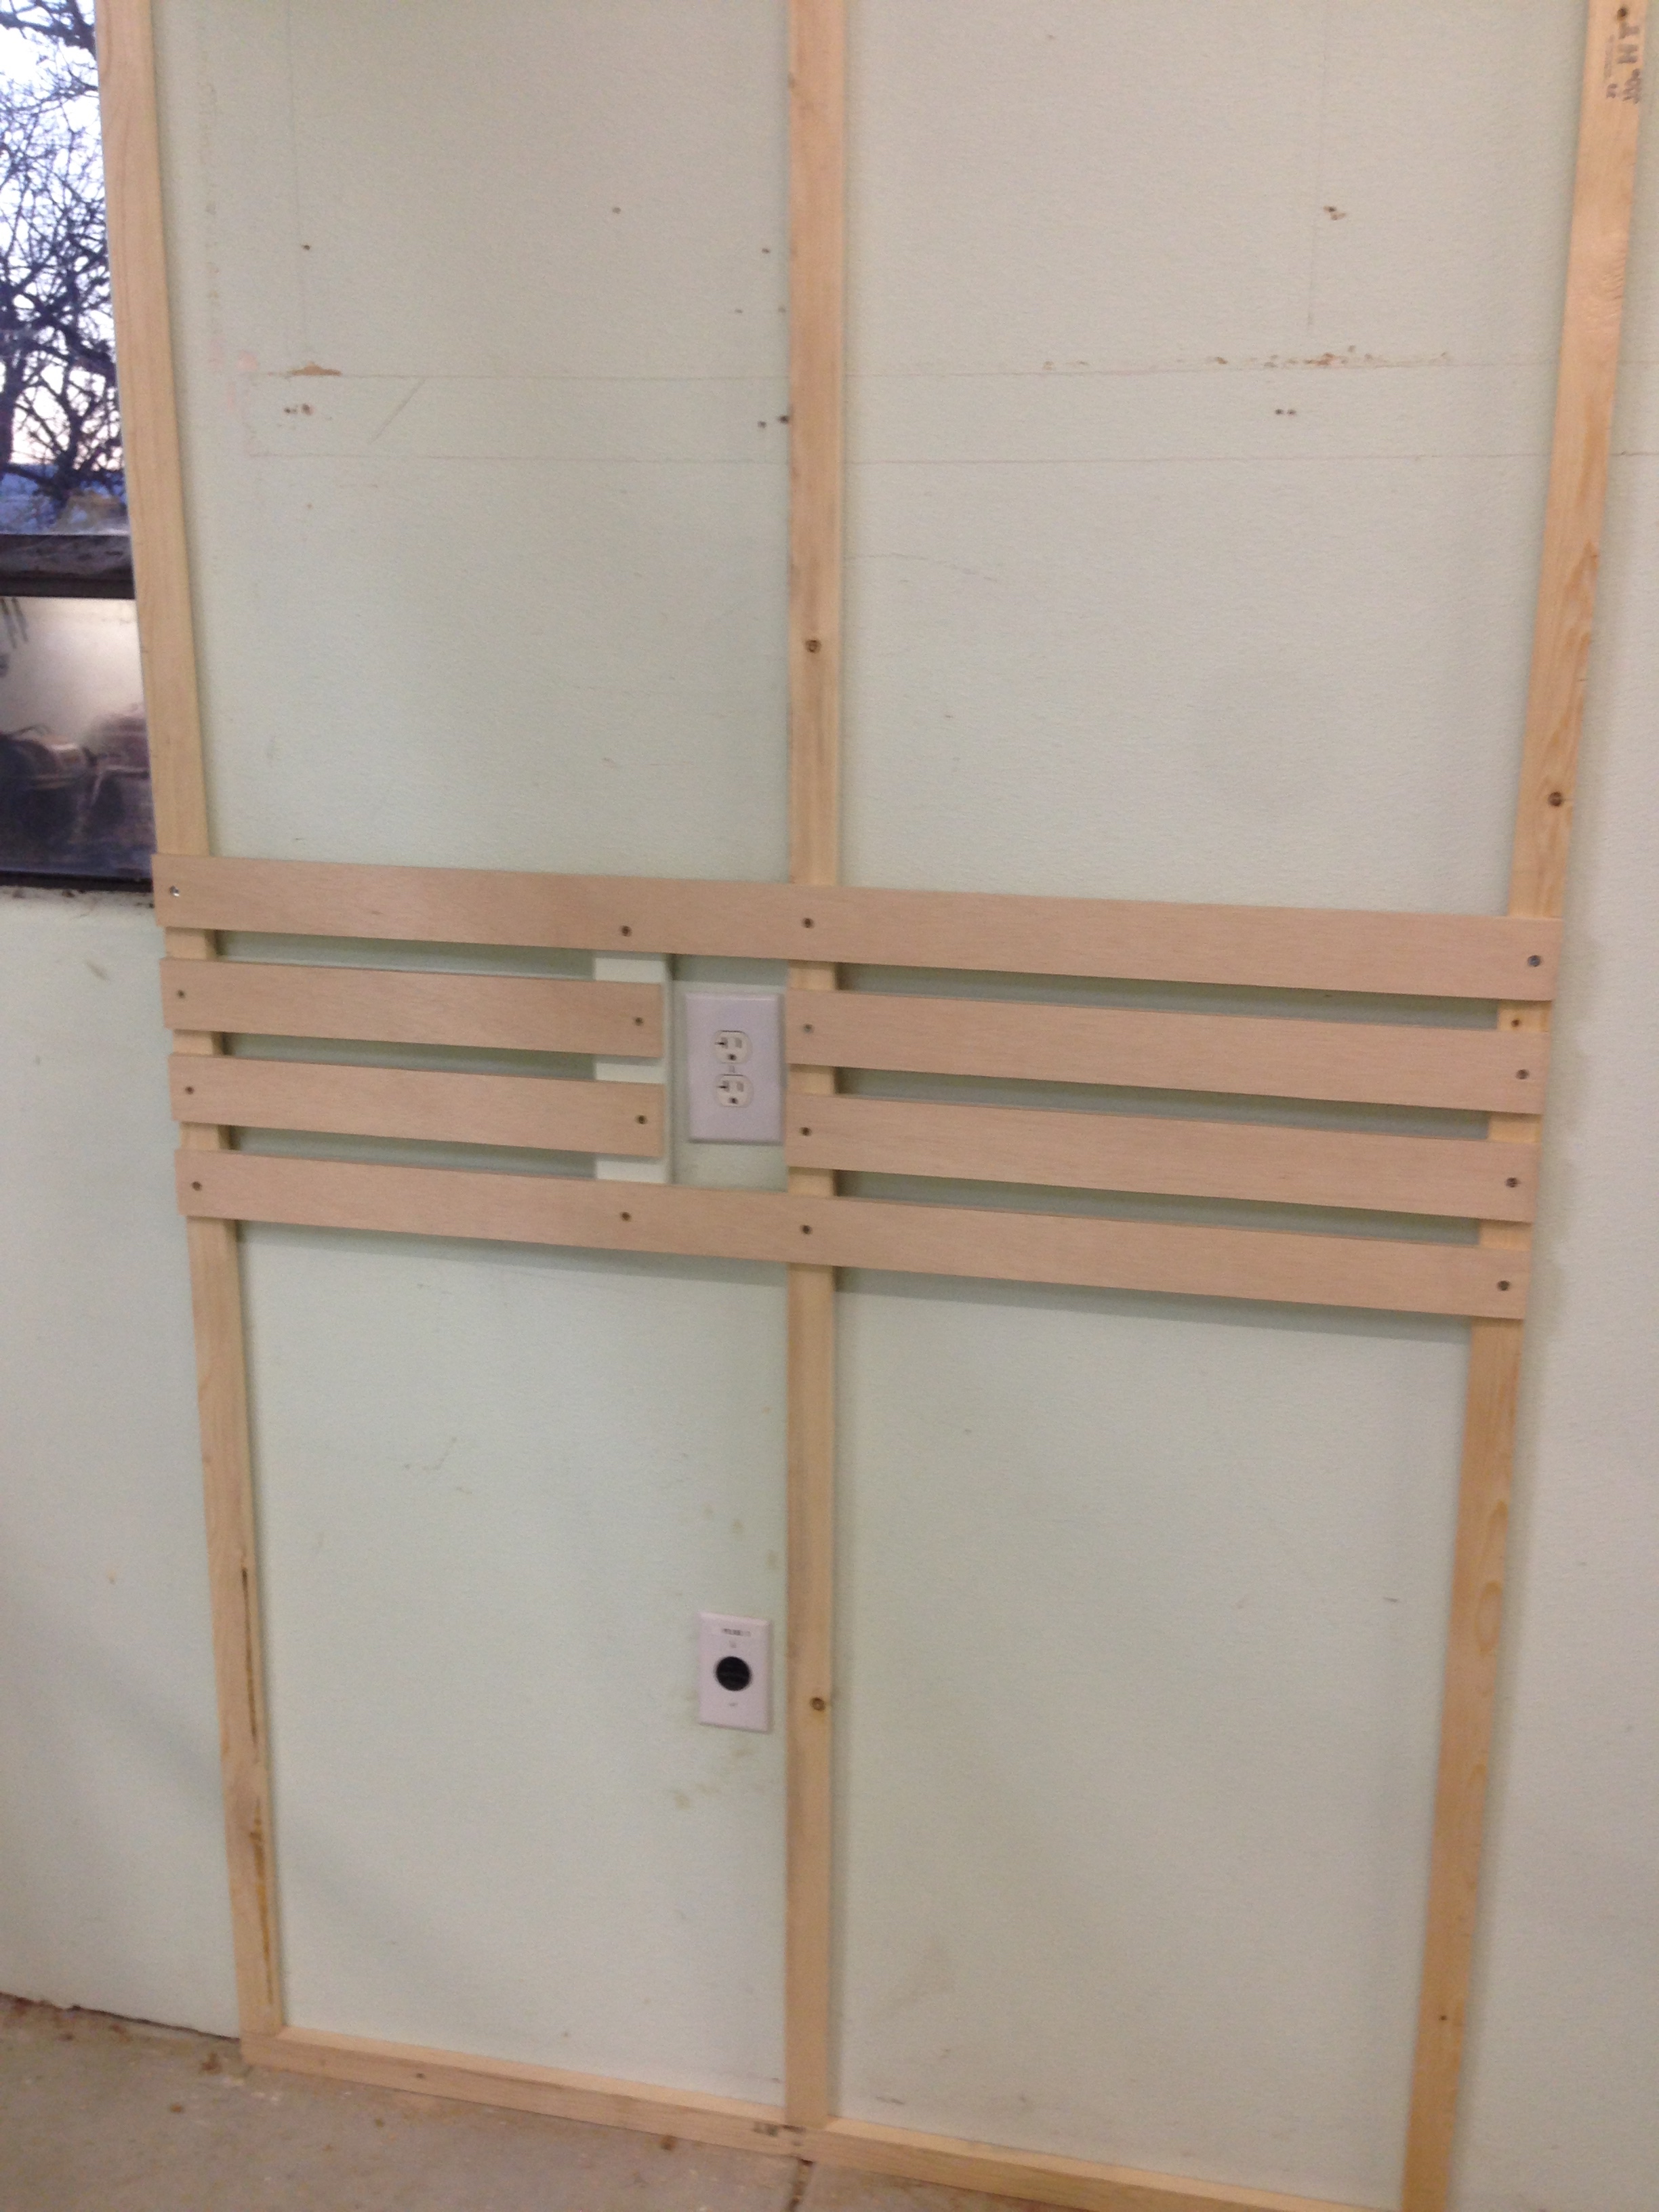
I re-used the 1×4 ledger board that was supporting the bottom of the cabinets to frame around the outlets. It’s already painted the same color as the wall, which is good, I guess.
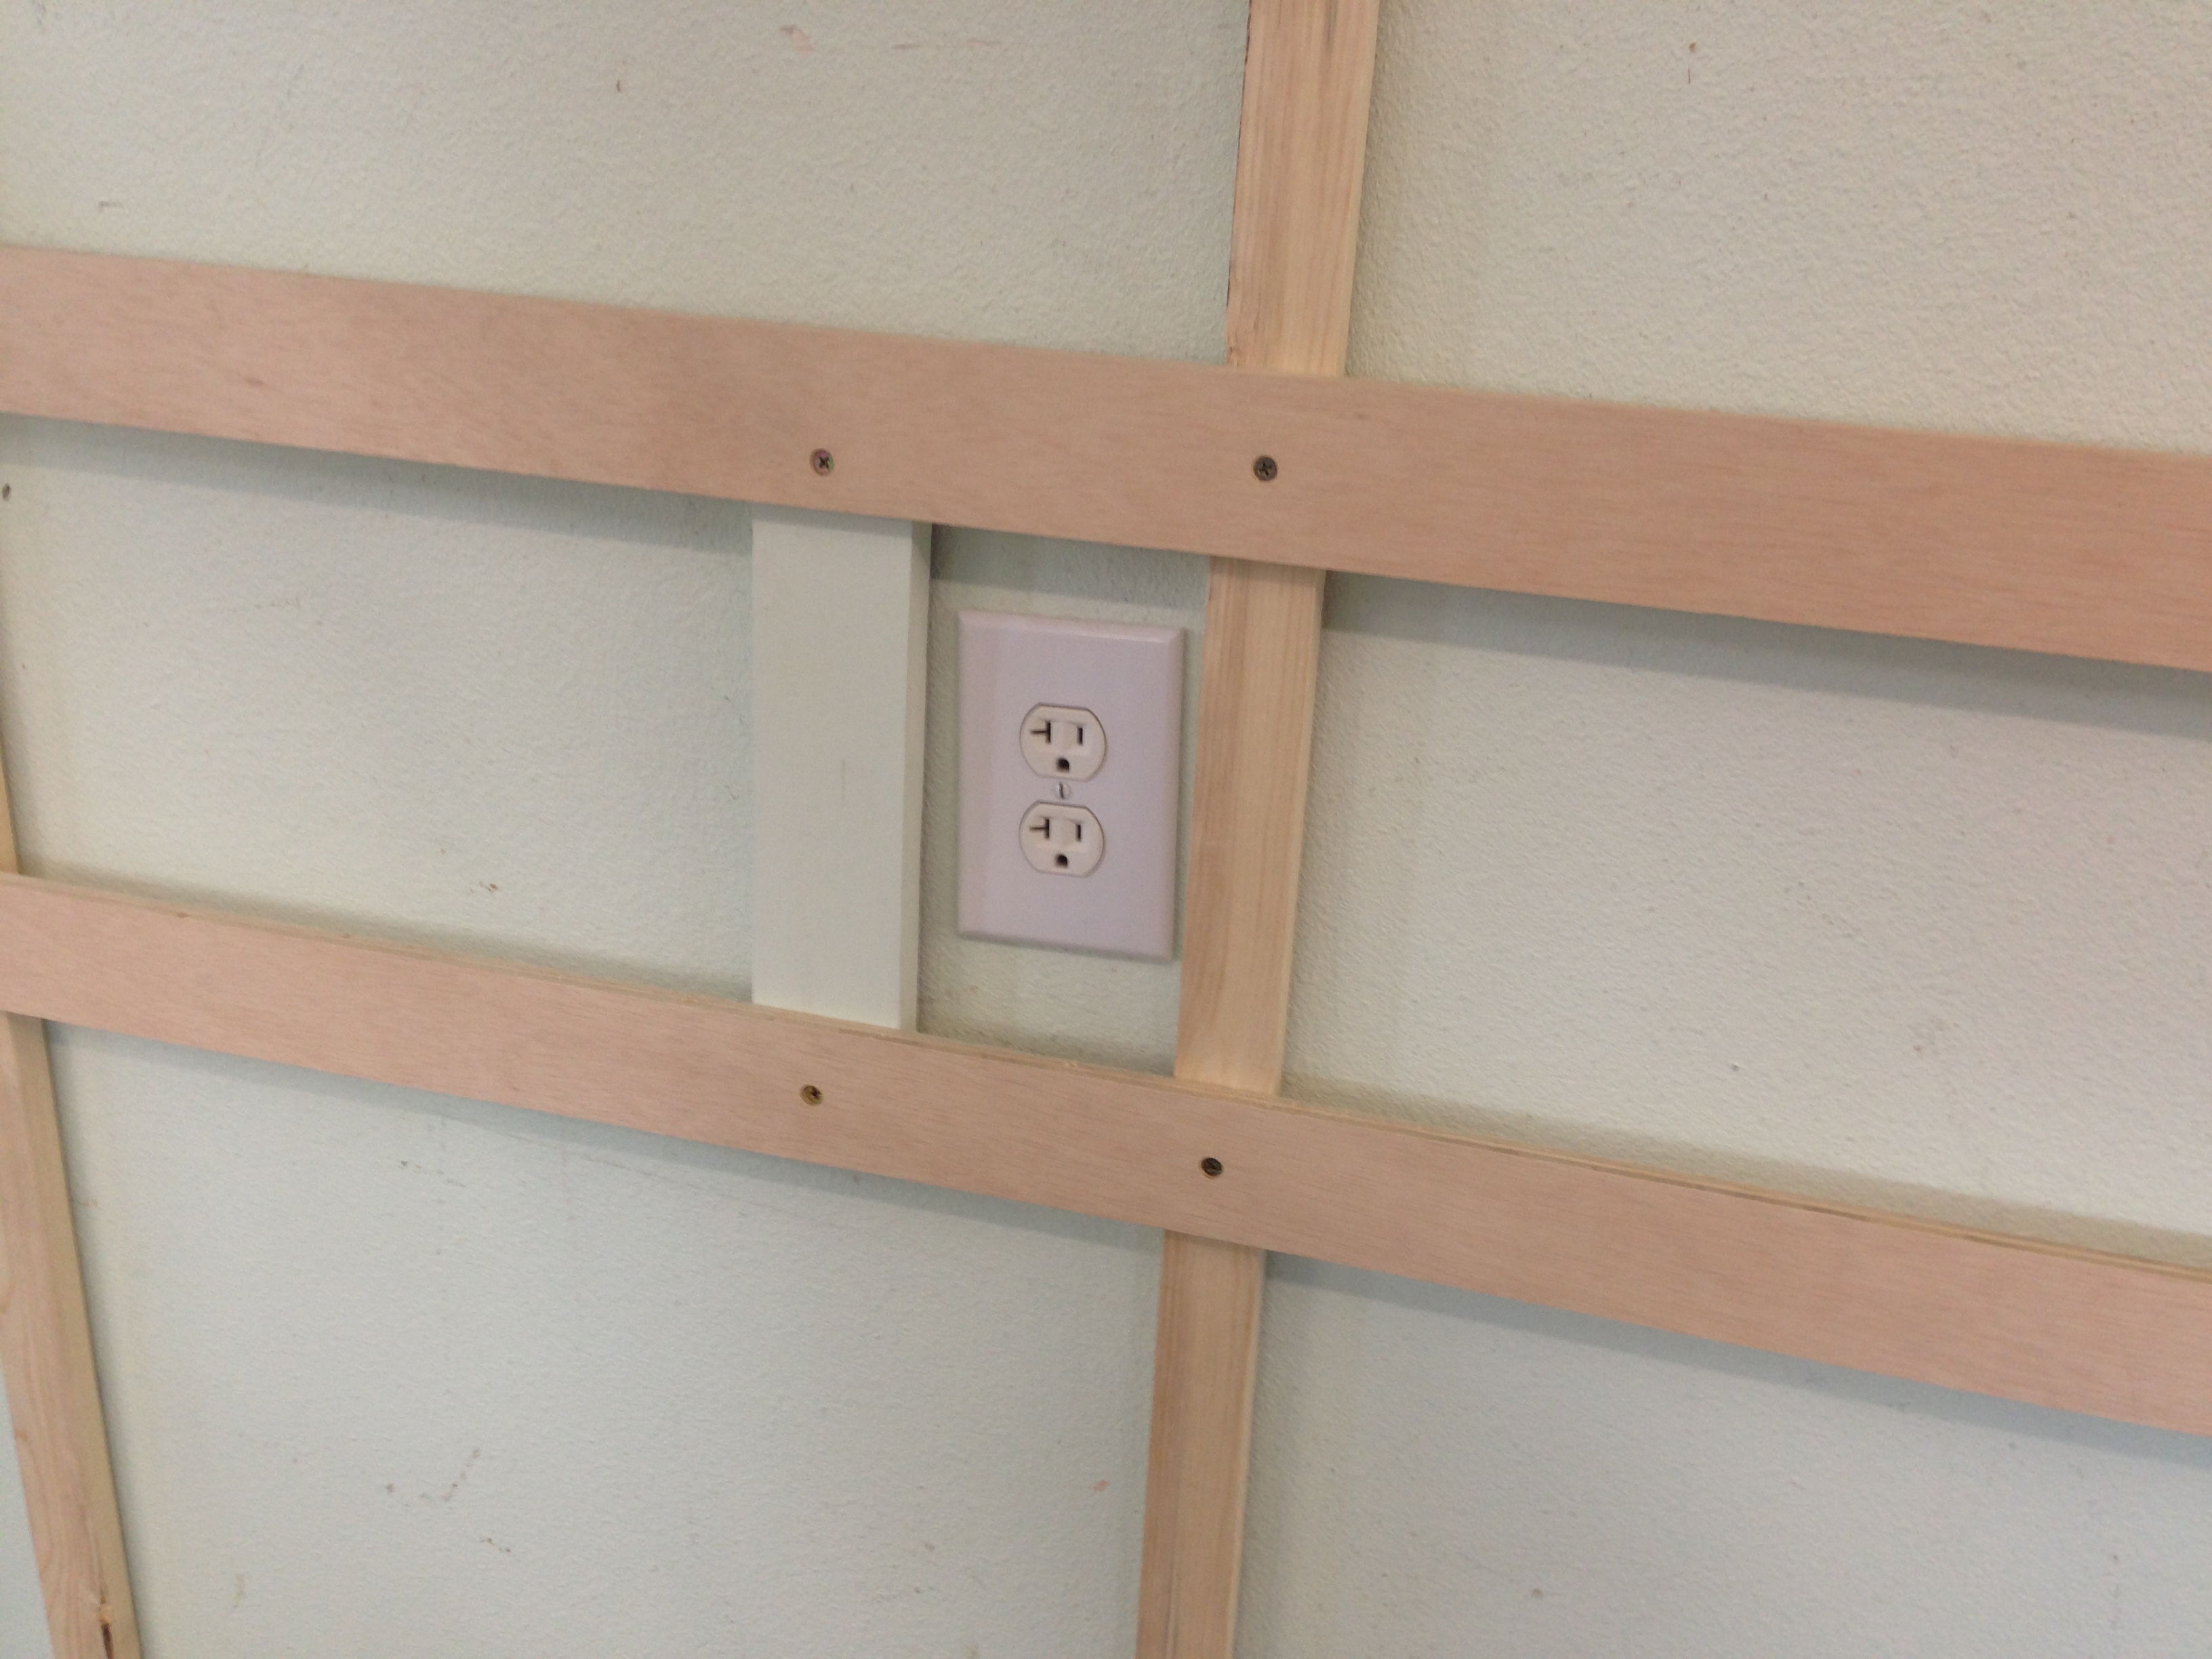
(The outlet is crooked, not the frame.)
At this point, all slats are attached, and both outlets are still accessible. I left an inch between each slat, but if I were smart, I would have done the math necessary to adjust the spacing so as not to have extra space at the top of the frame. No one will ever look up there though.

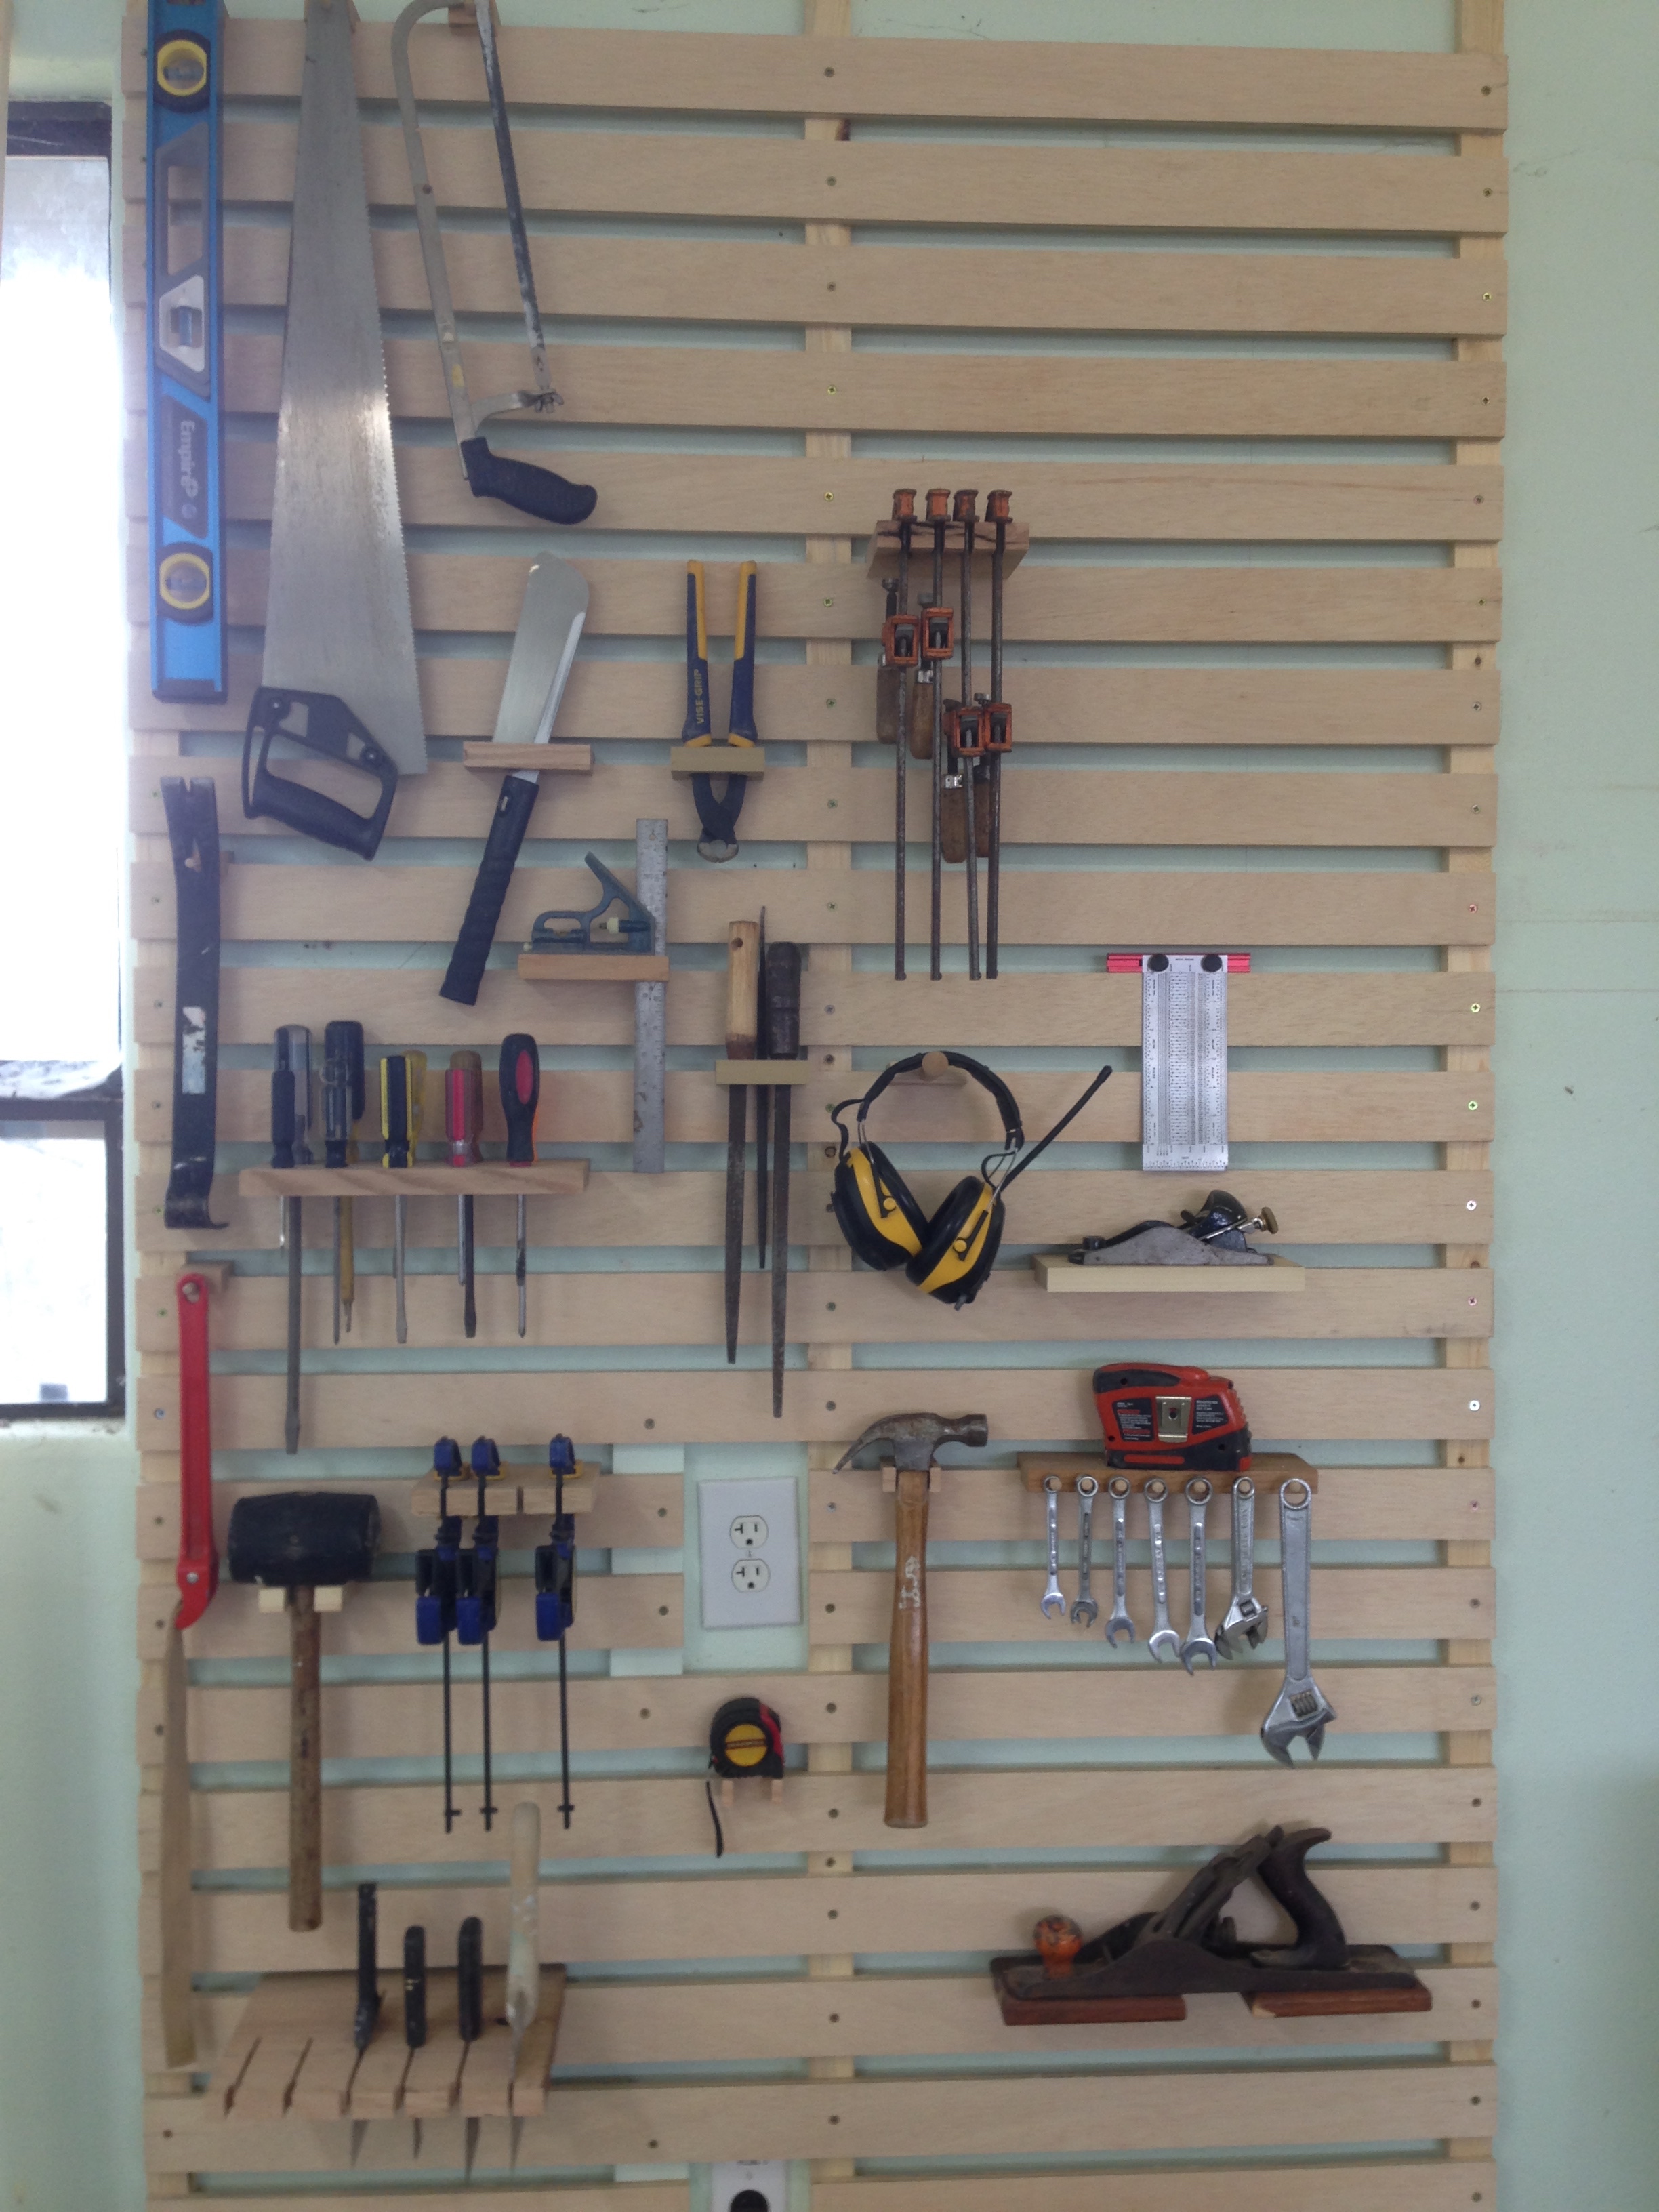
Where this style of rack really shines is in the types of tool holders you can make, and the fact that they’re all essentially free. Try saying that about Slatwall.
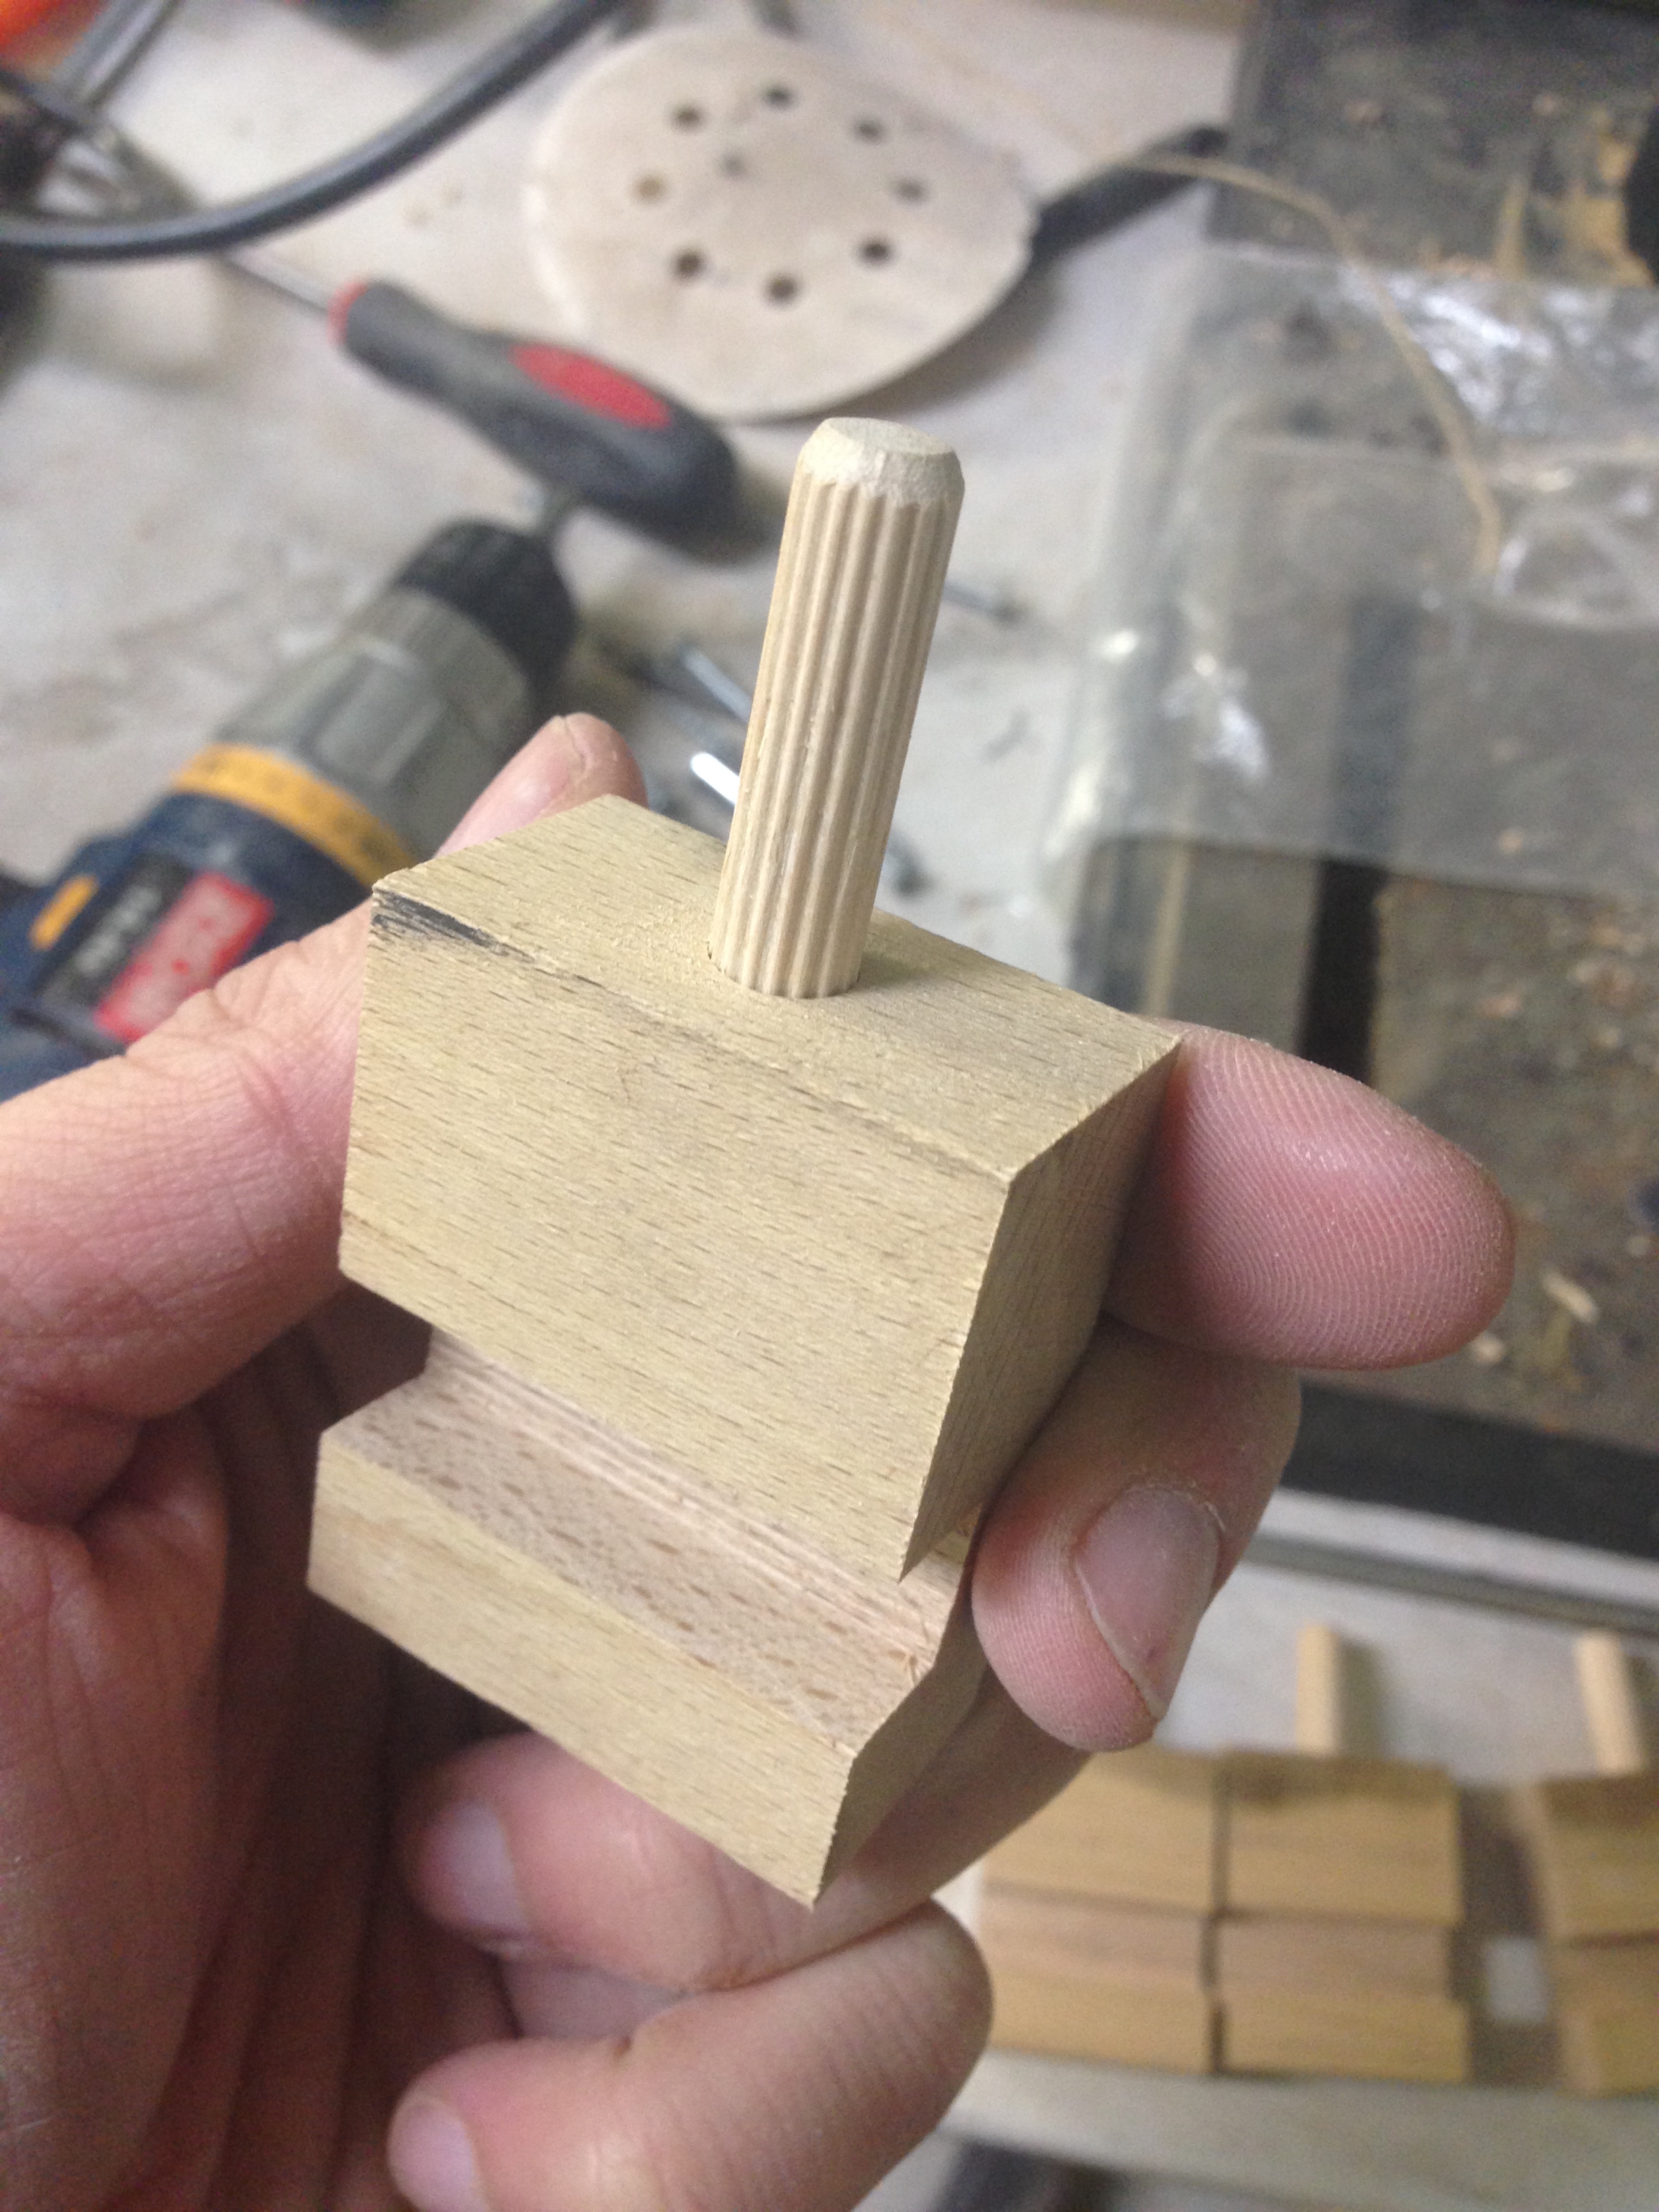
The simplest one is the peg:
It ended up holding my level:
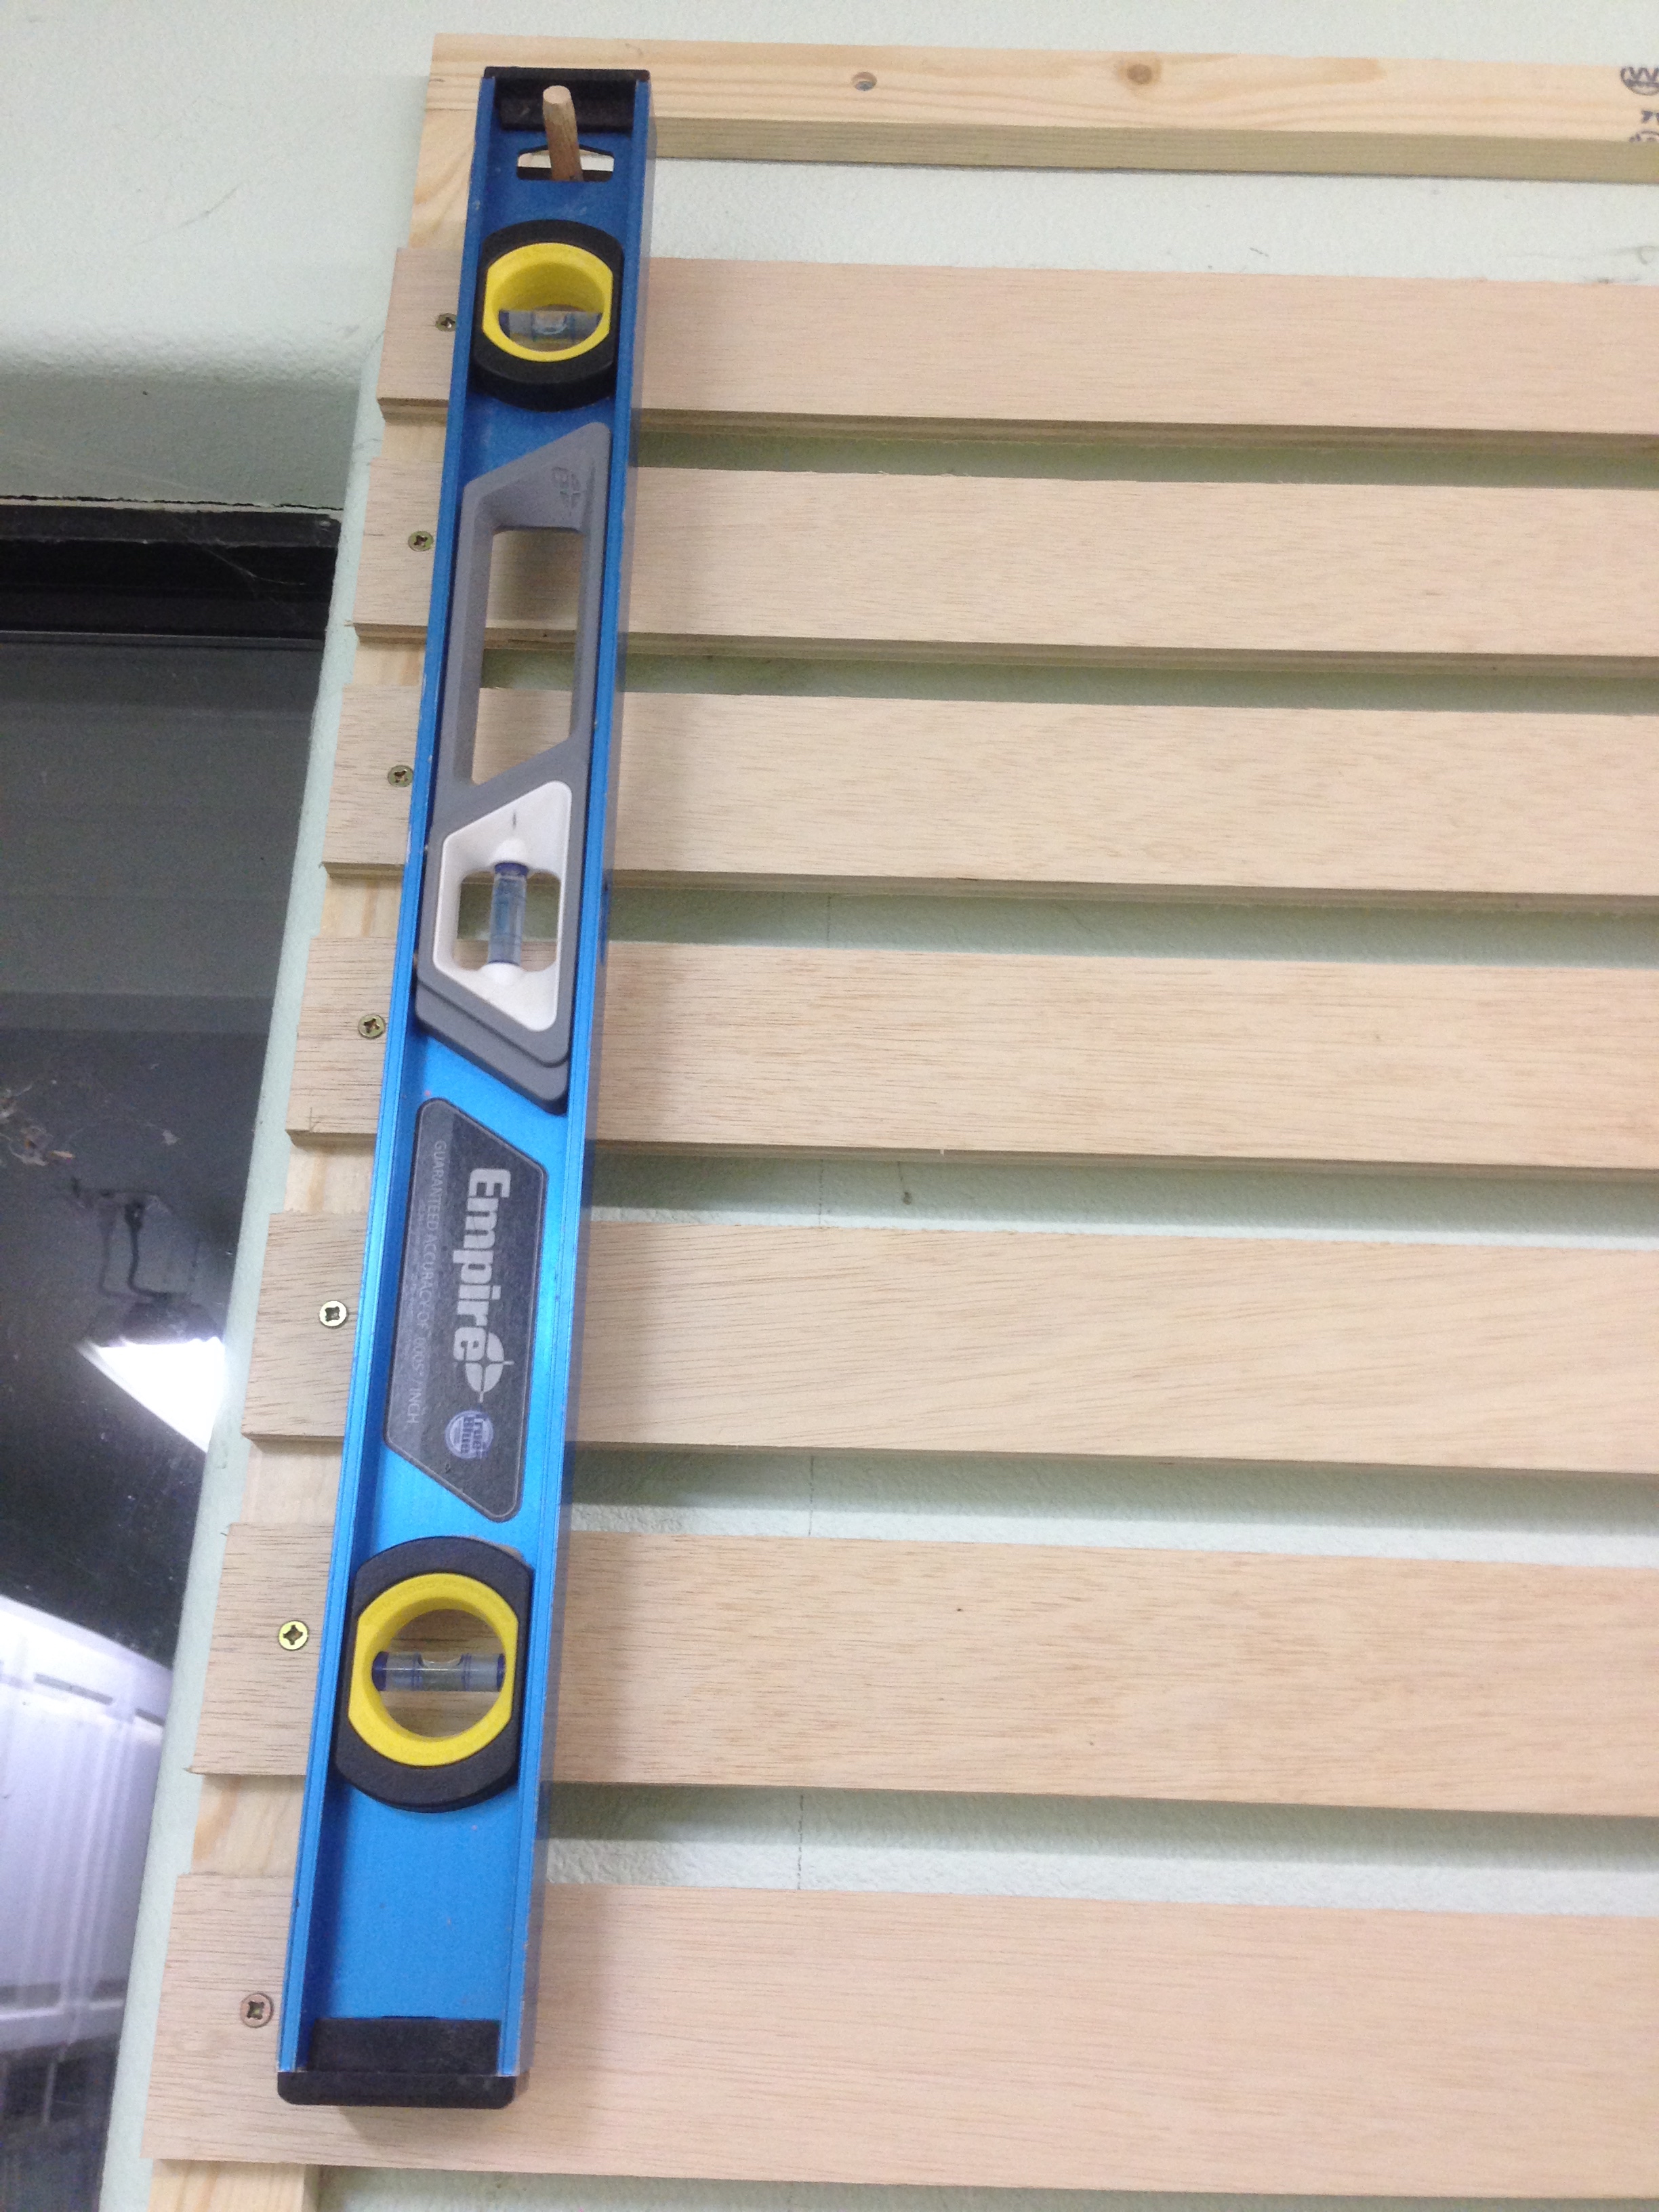
It’s just a dowel in a piece of scrap wood, with a half-inch groove in the back that fits over the slats.
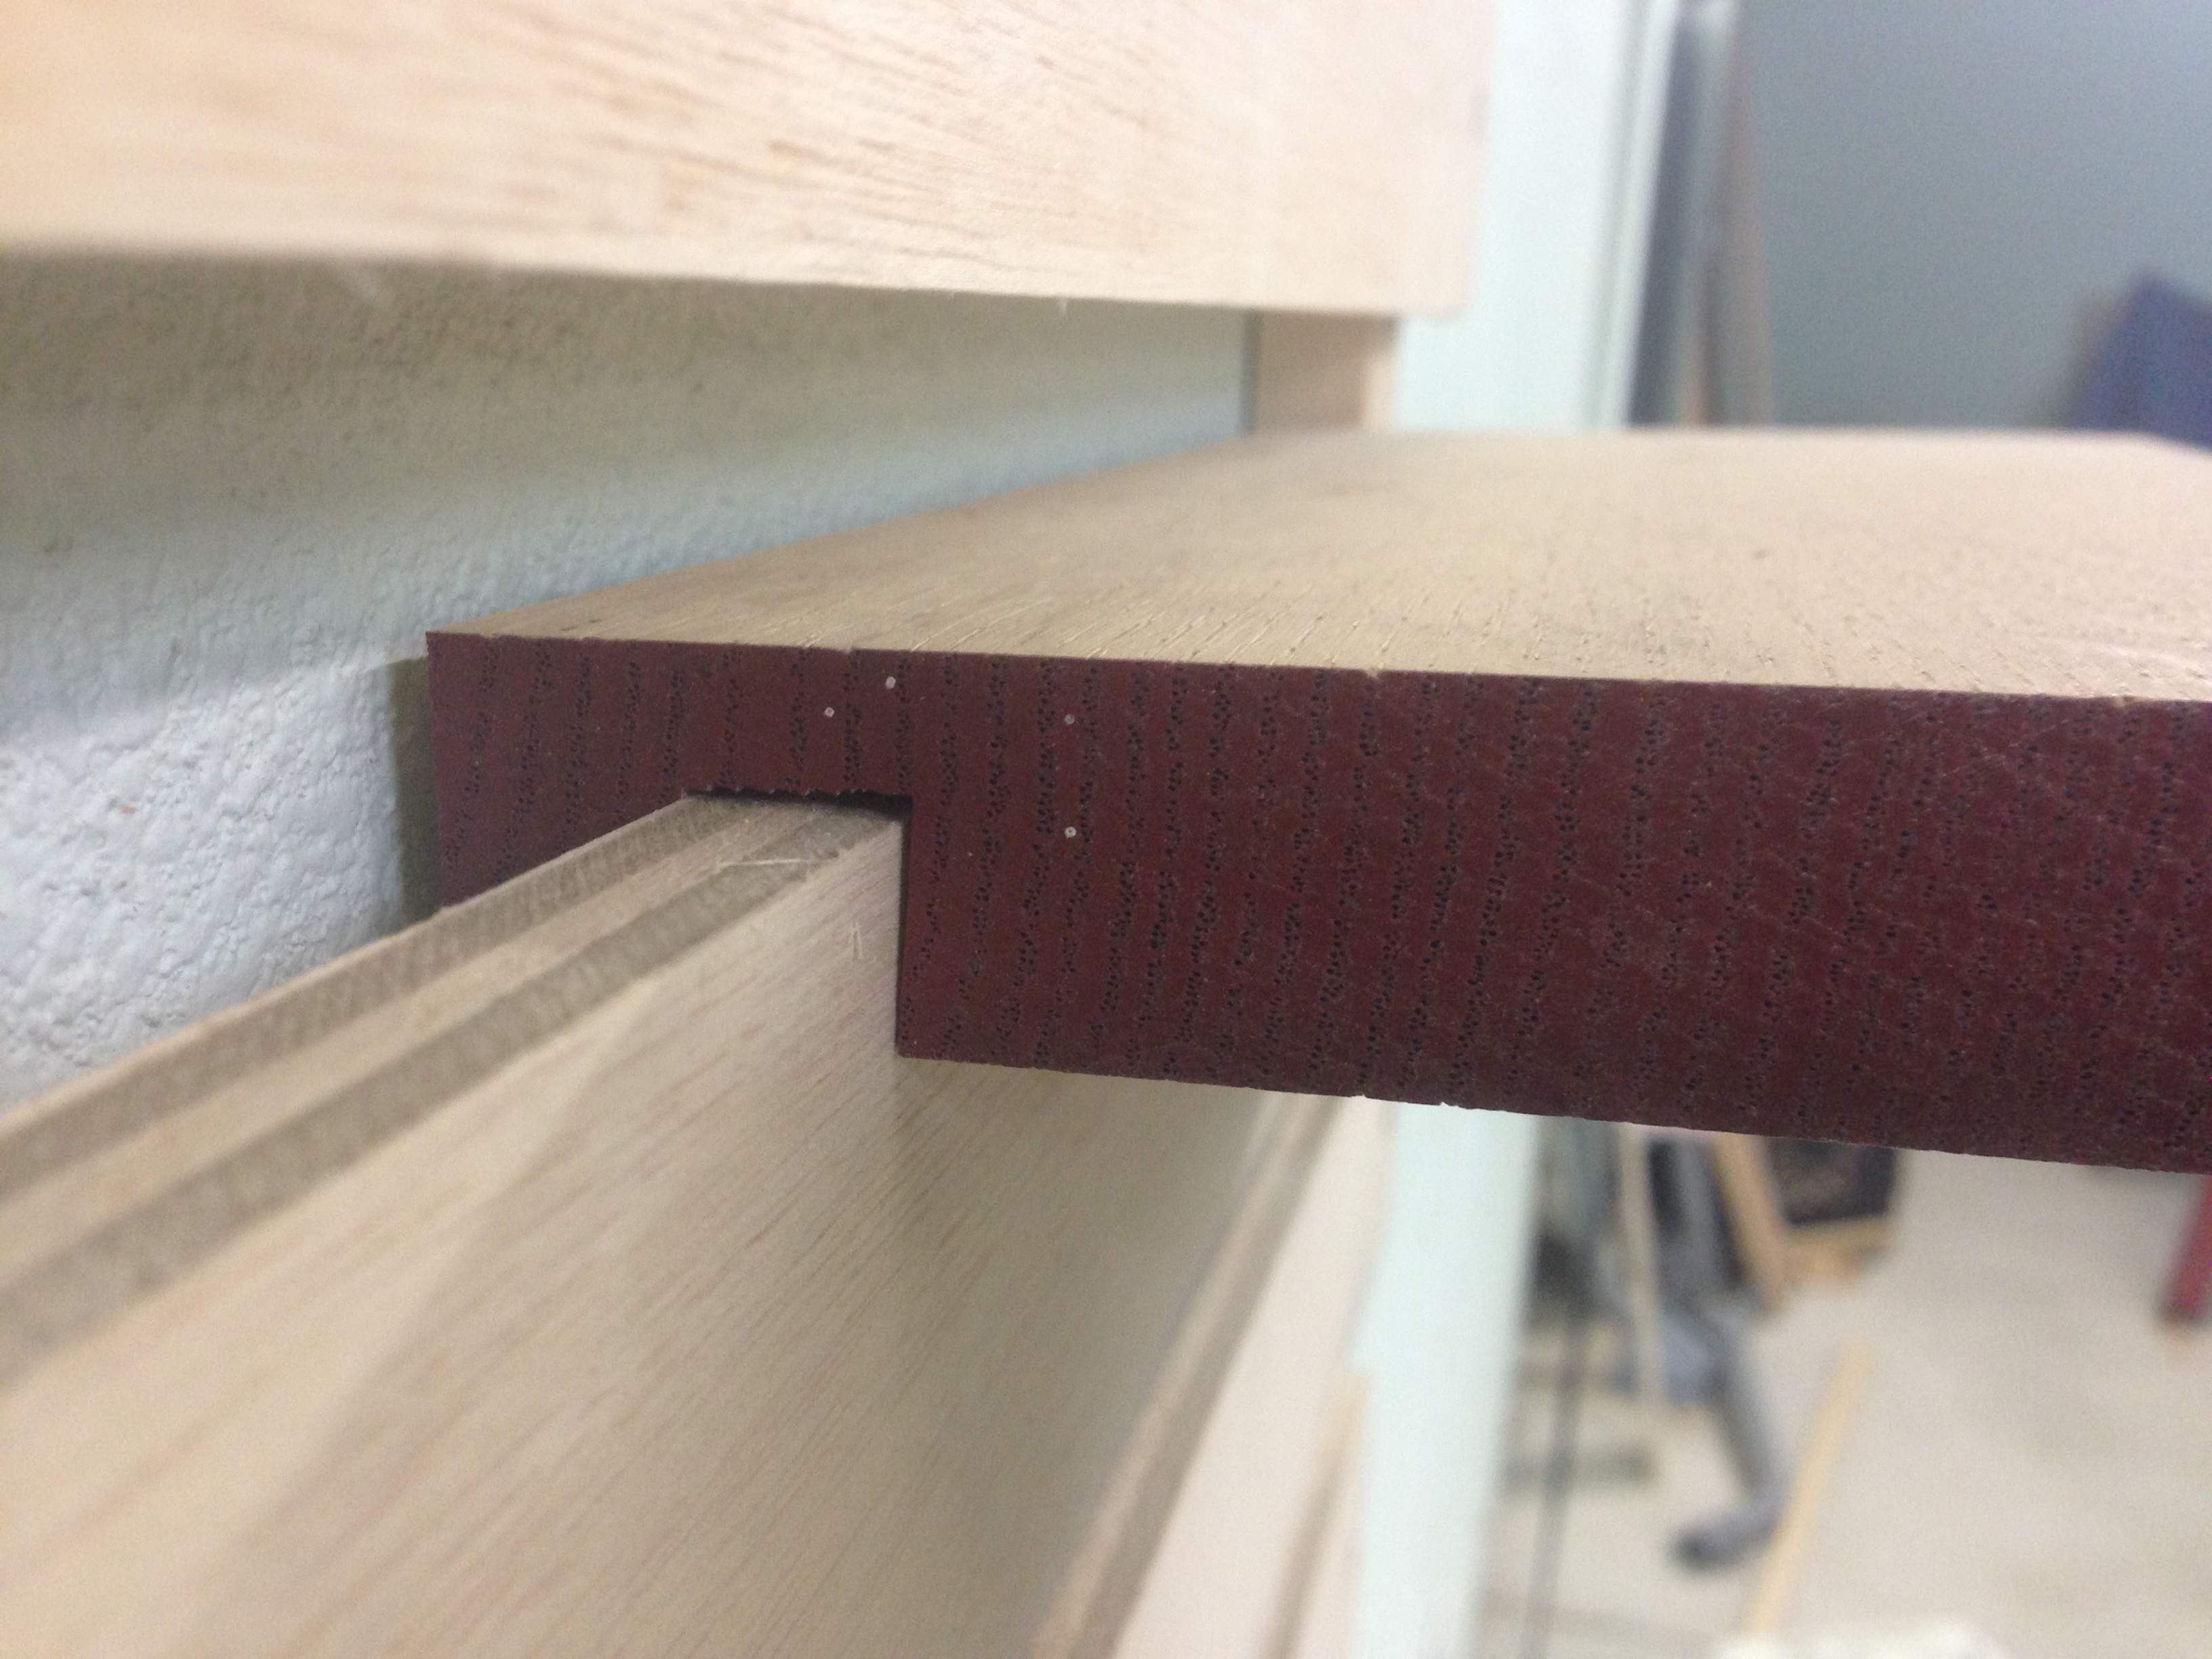
Here’s a pro-tip that you won’t hear anywhere else: cut your grooves at a slight angle, like 3º or 4º, and your tool holders will point up ever so slightly, offsetting any sag from the weight of the tools that will be attached to them.
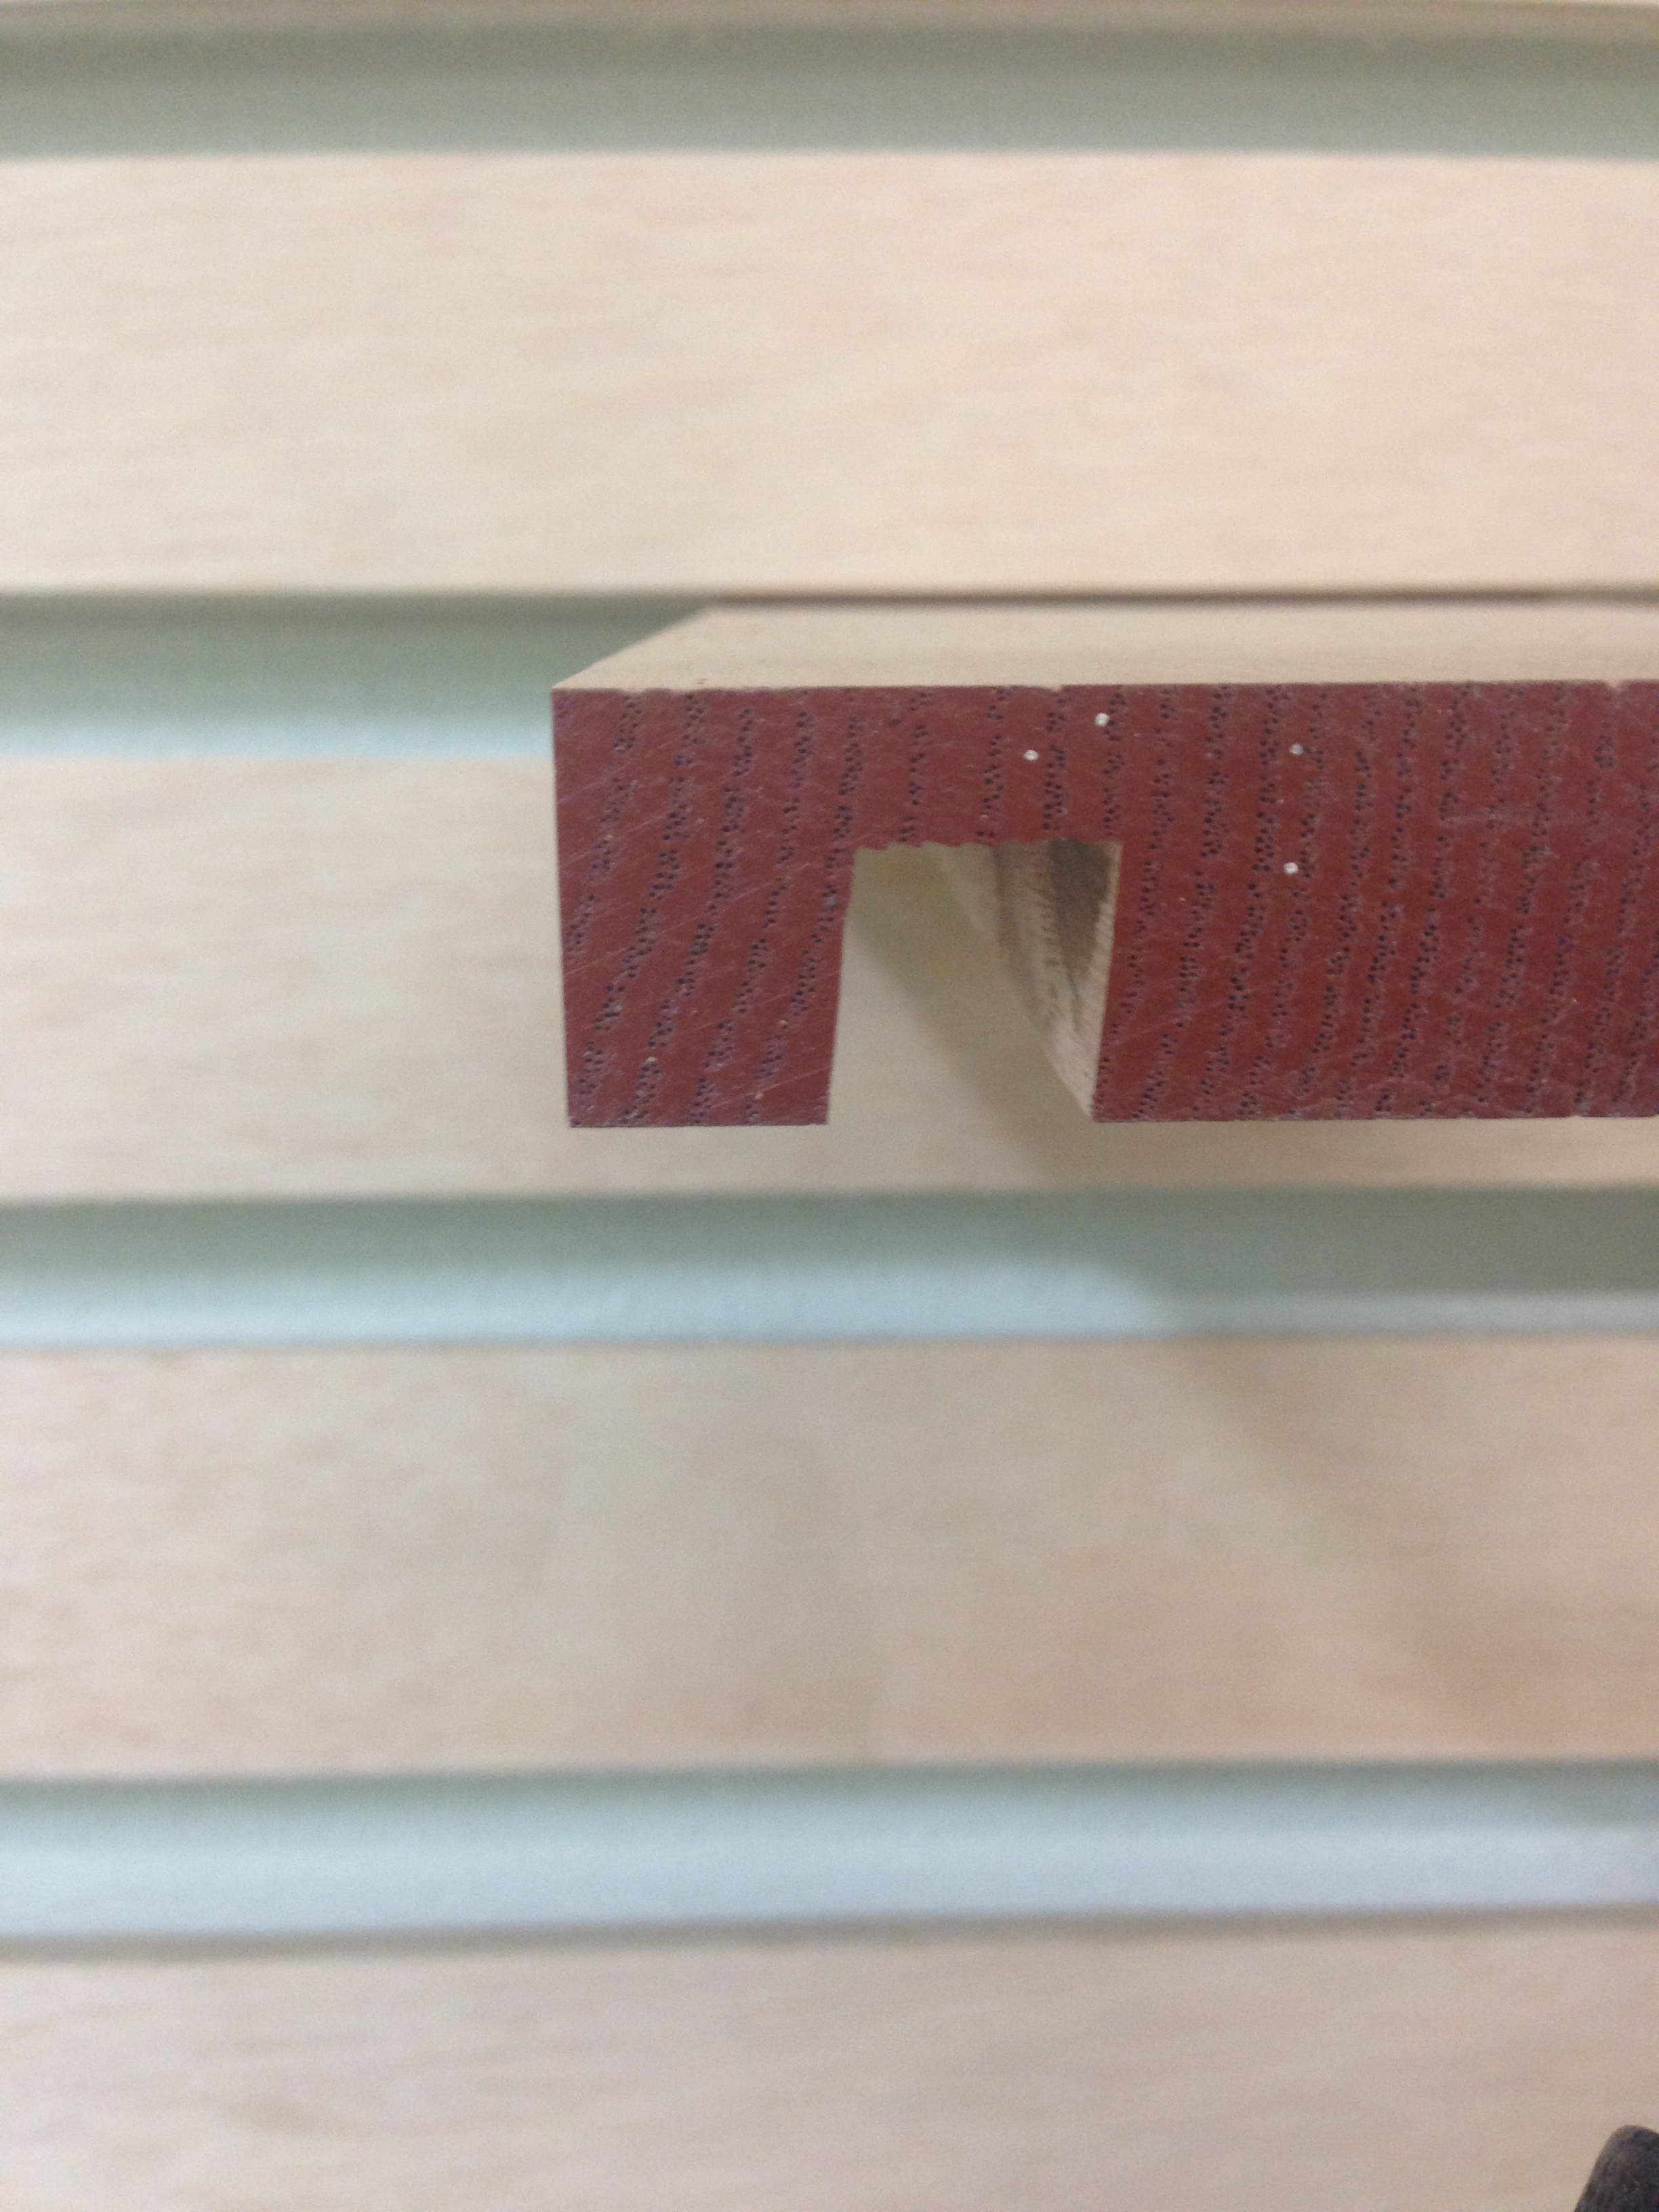
(This groove was cut at 5º, which was probably a little too extreme.)
Now for more example tool holders! All of the ones I’ve built so far were made from wood that’s been floating around in my scrap bin and was probably destined for the campfire.
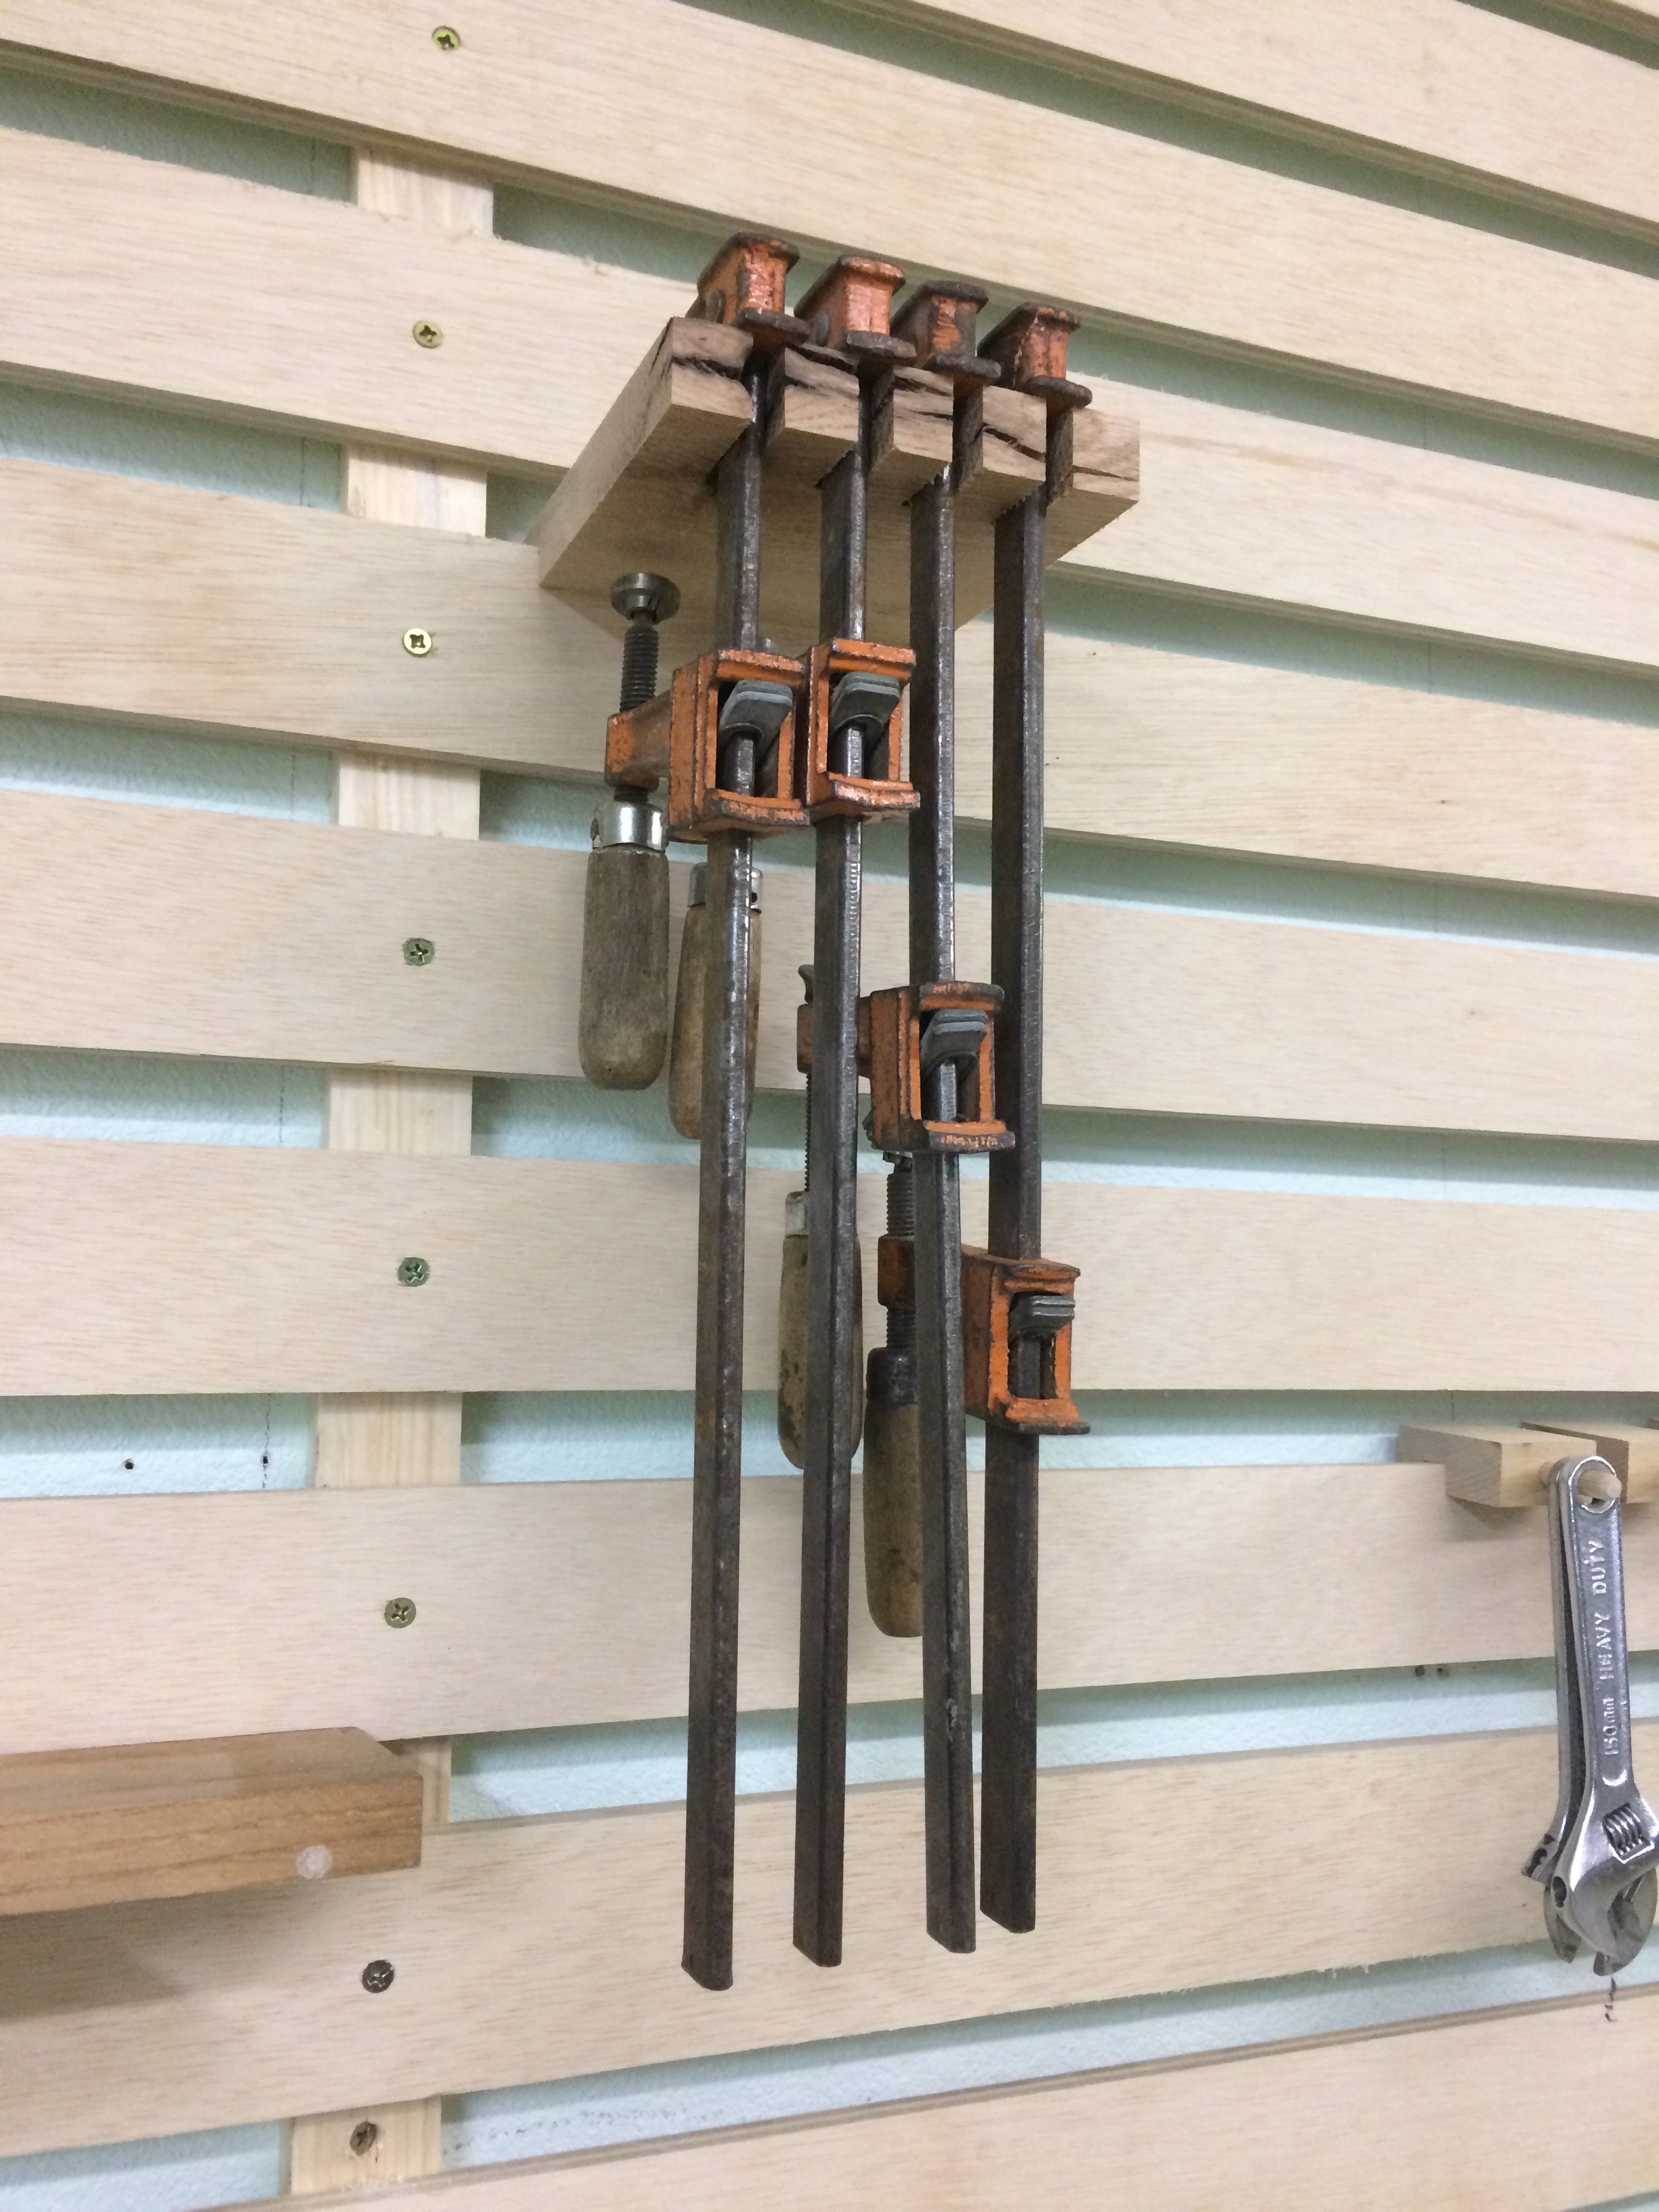
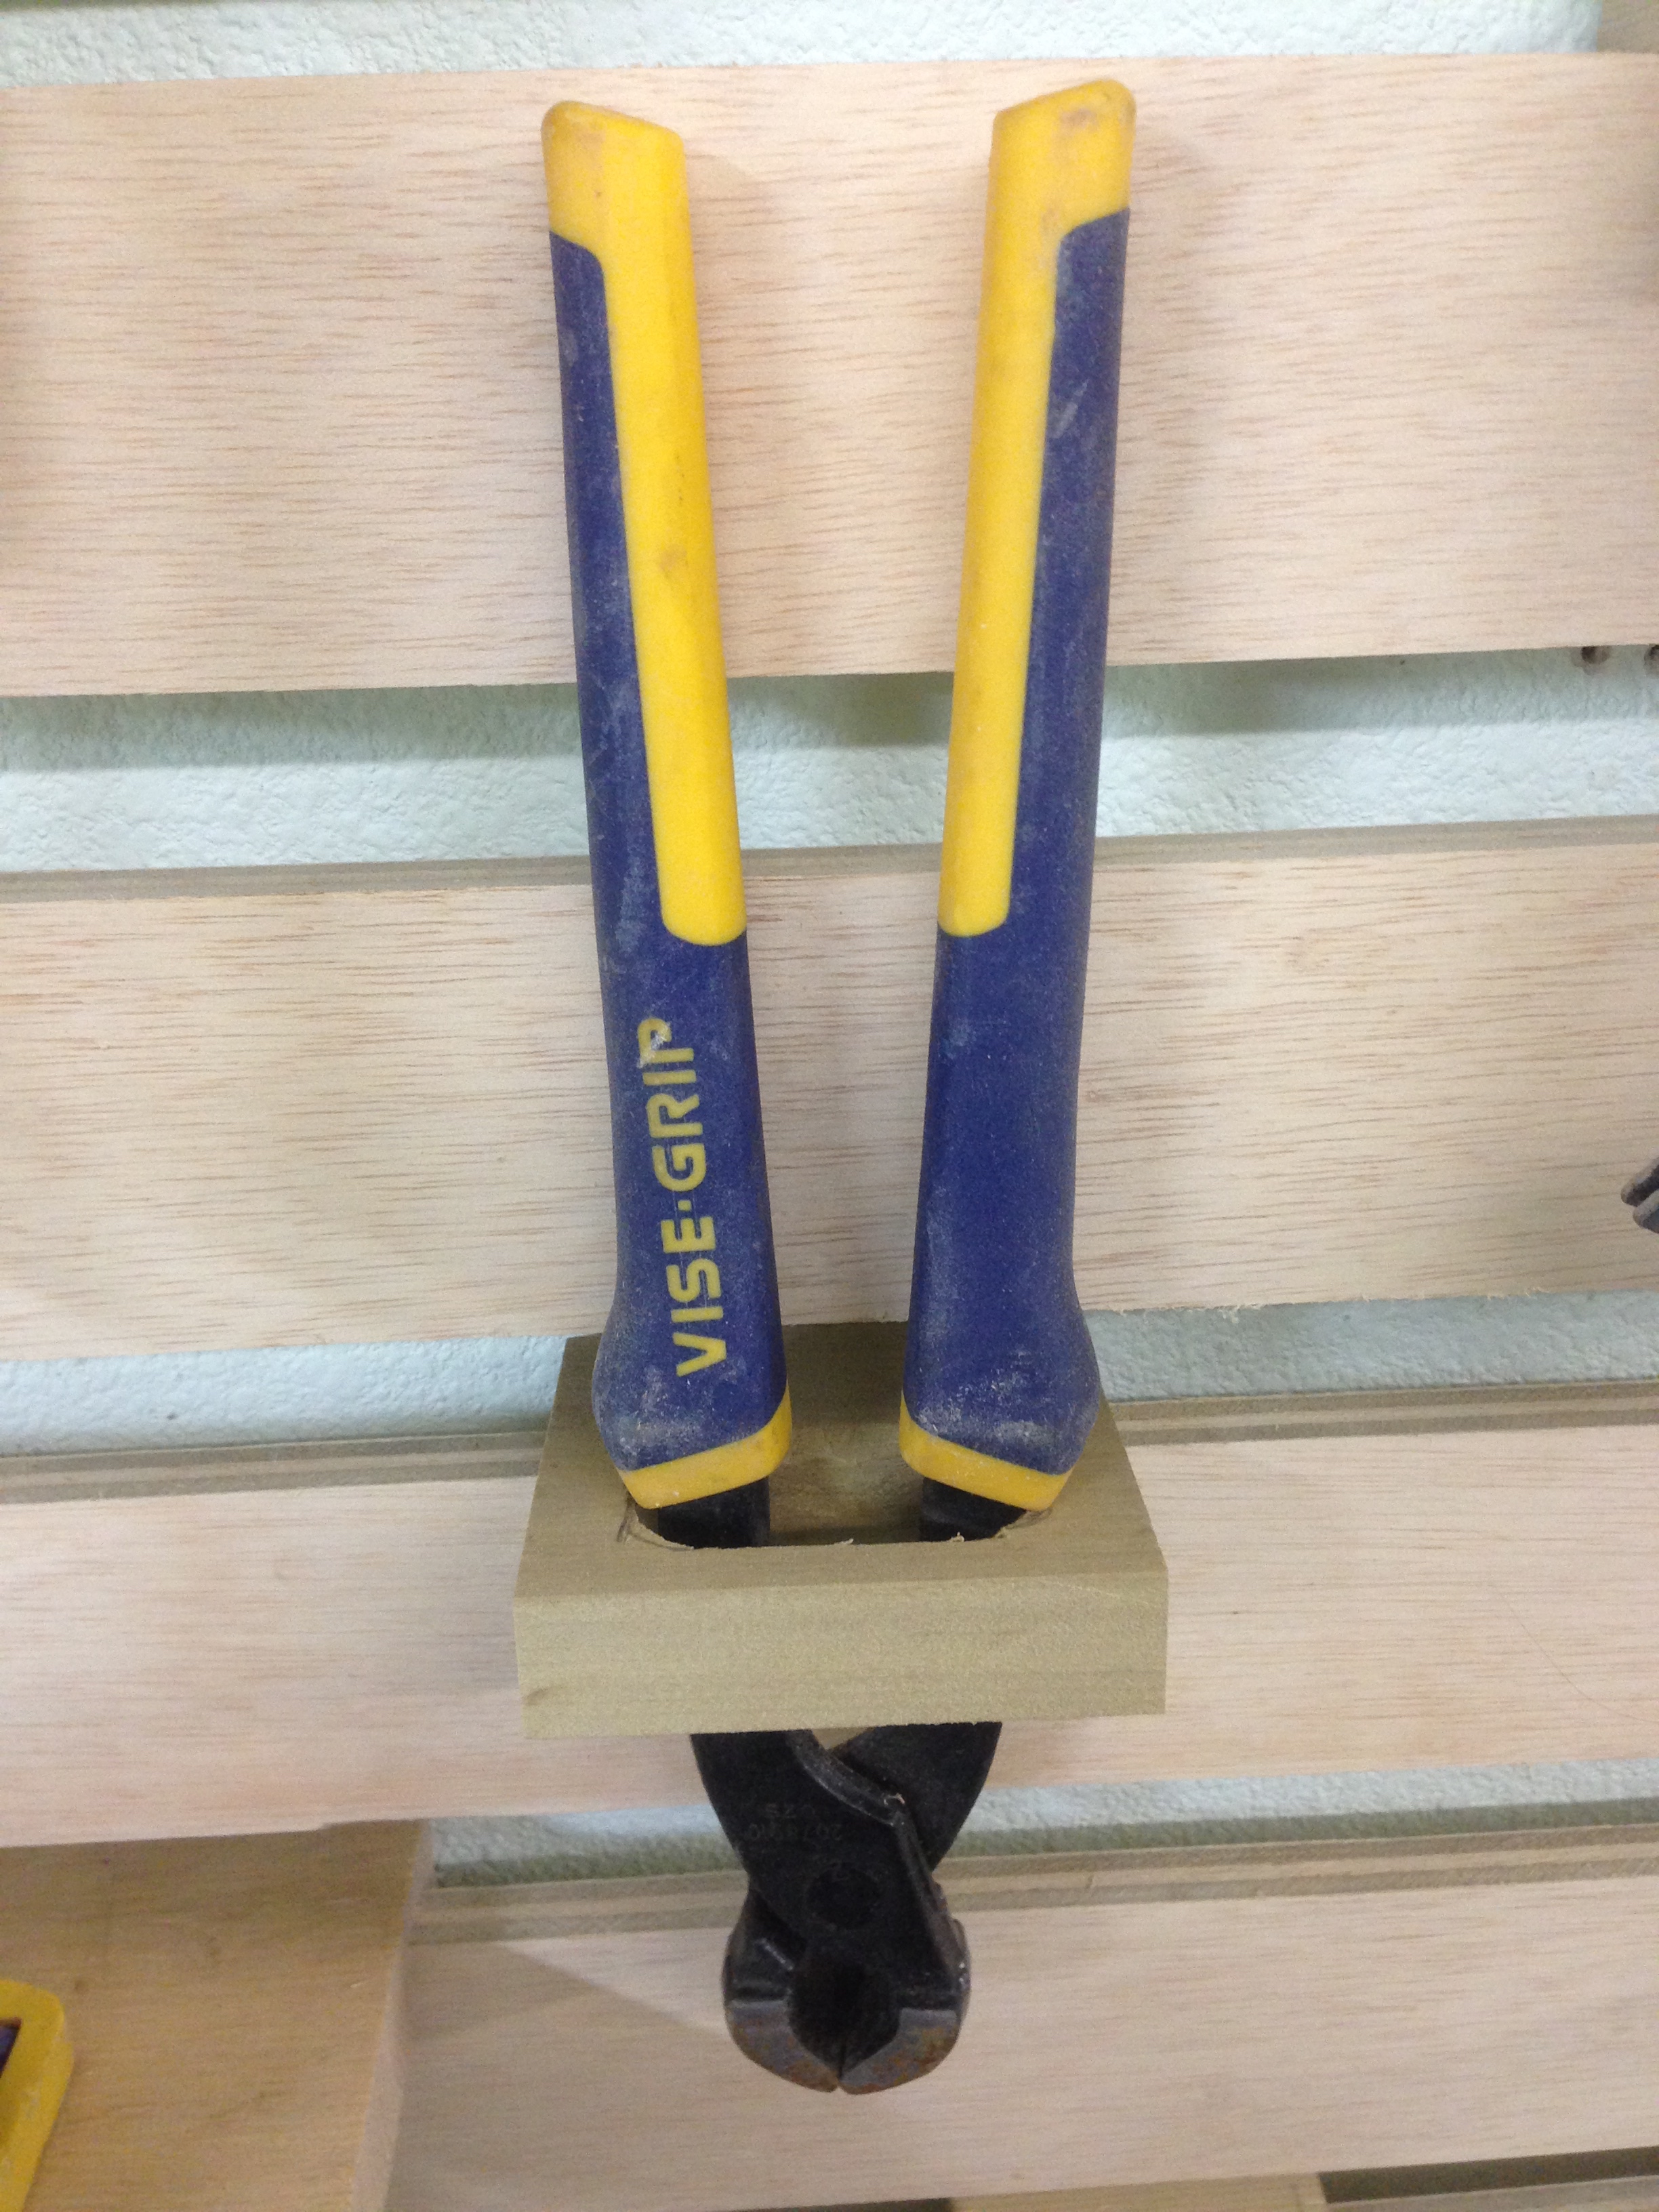
Cut a few slots in wider stock to hang clamps! Ooh, ahh!

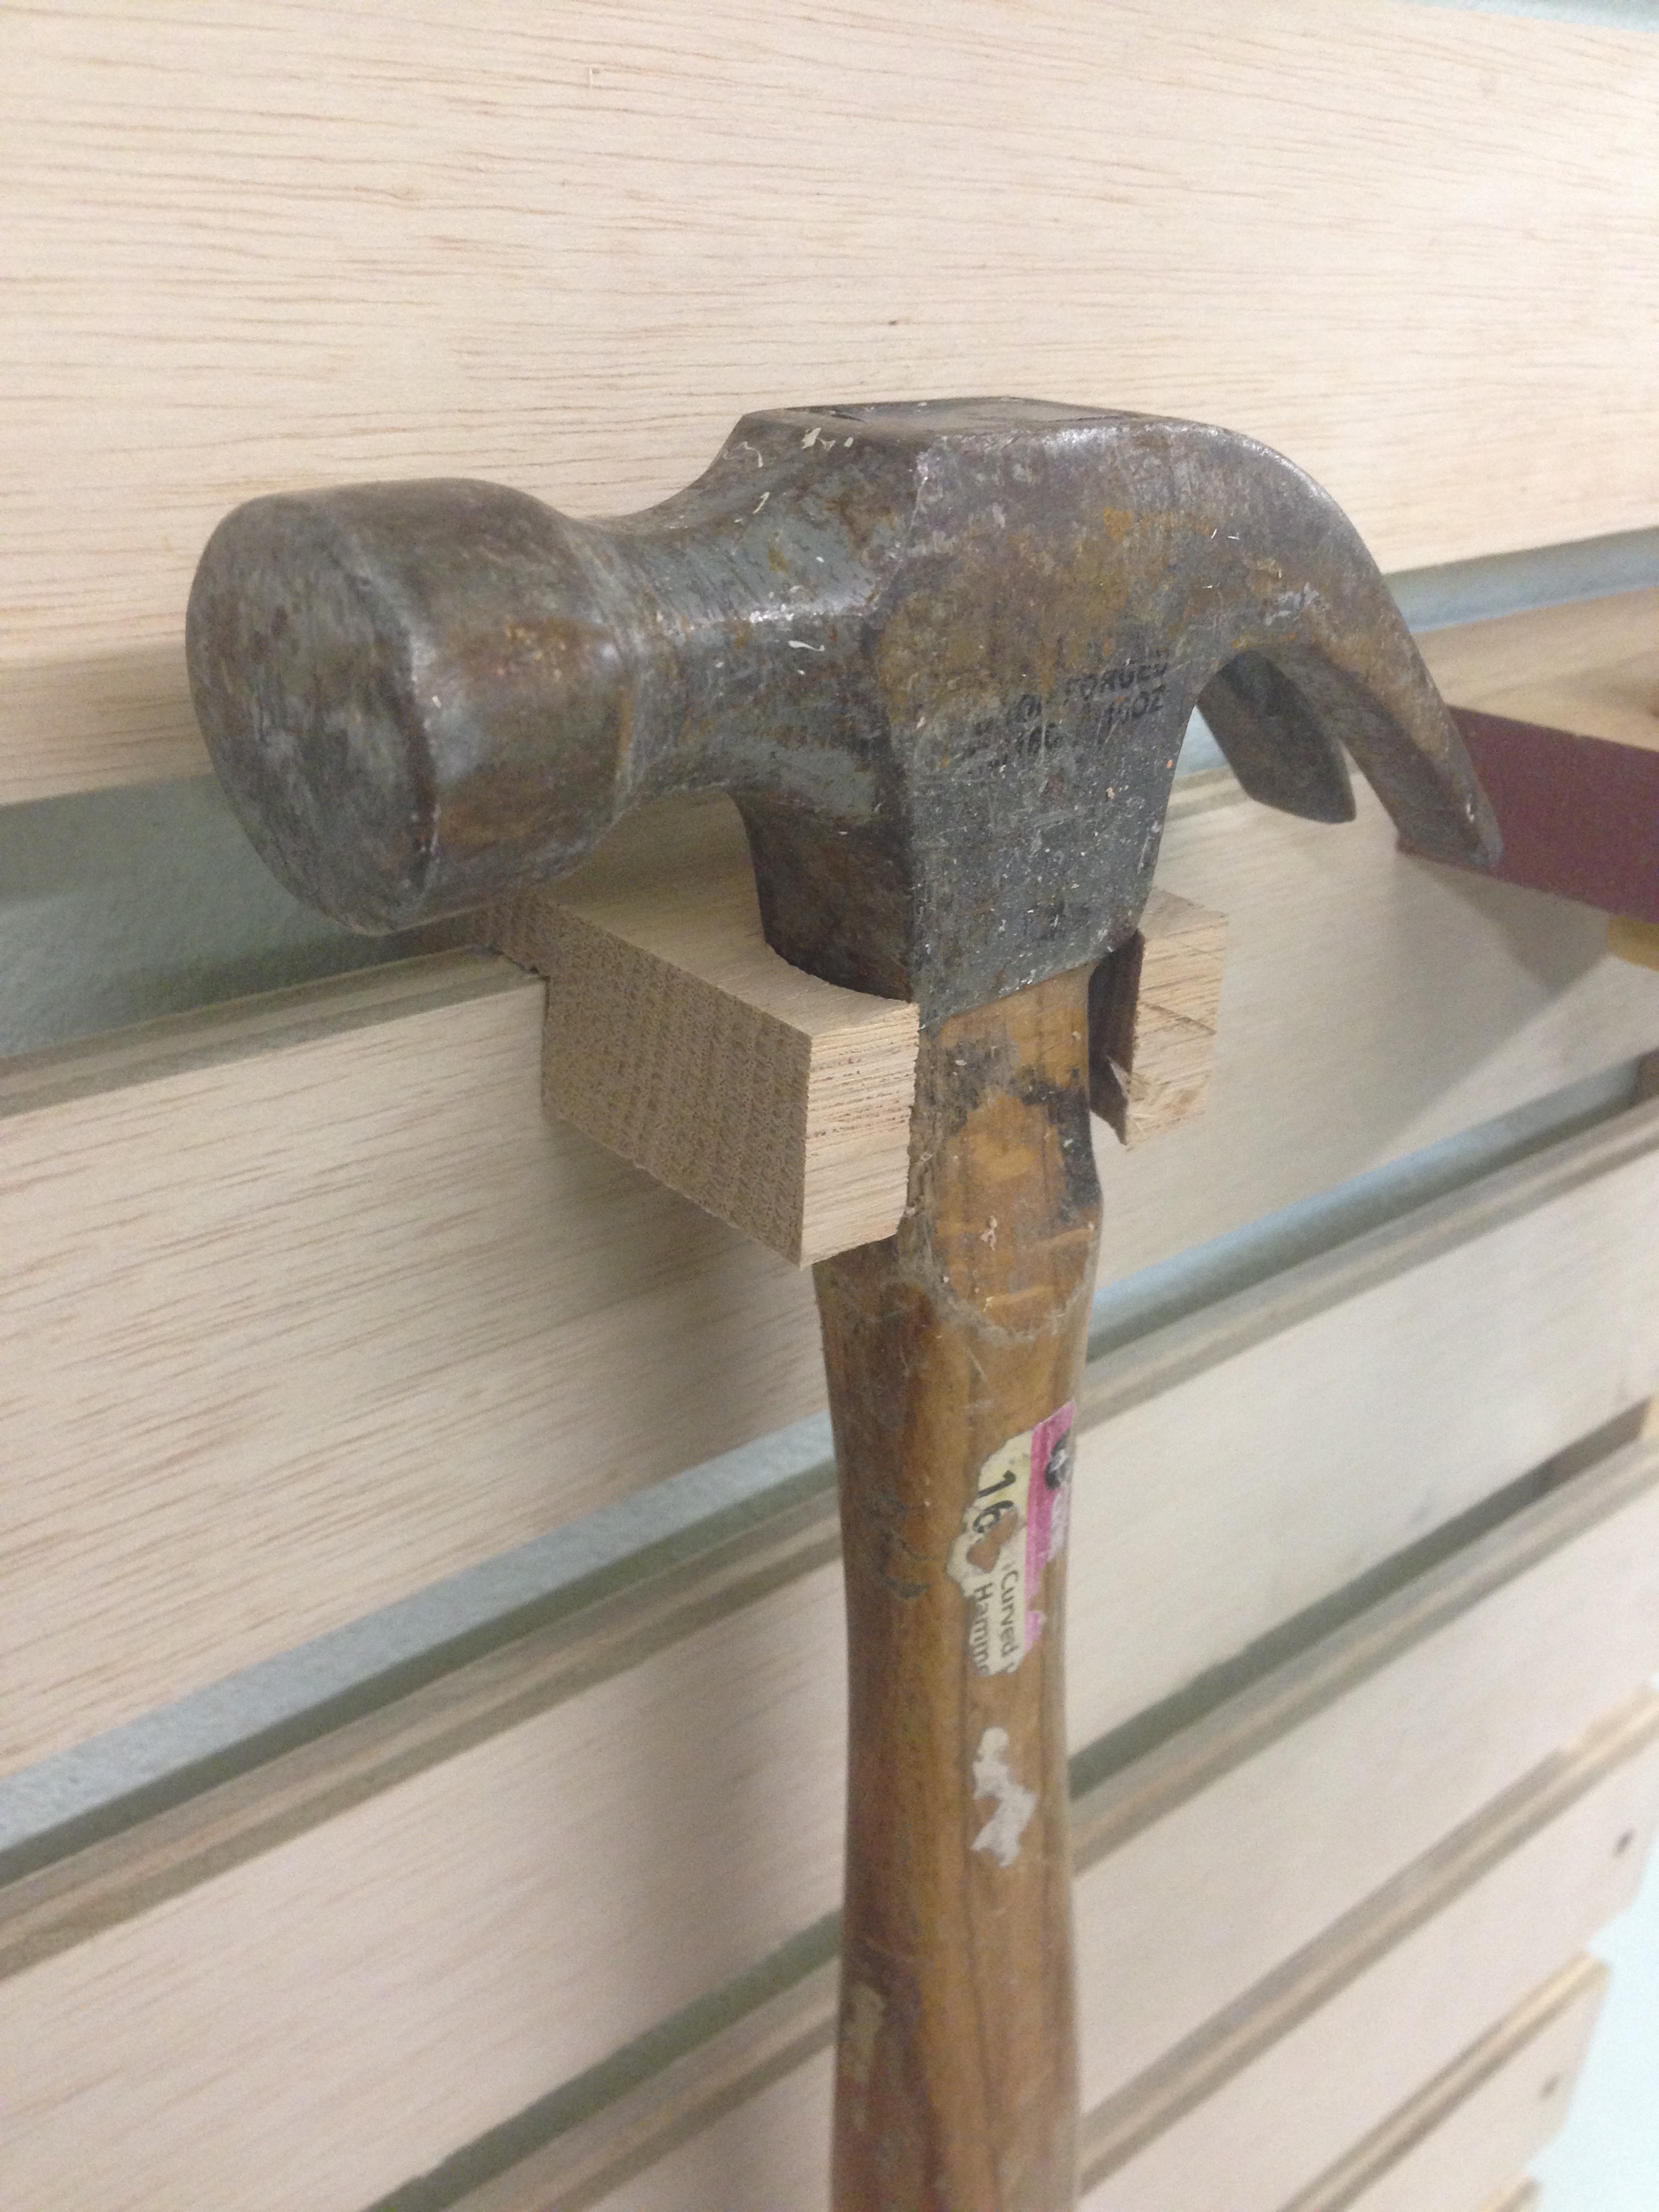
Use a Forstner bit to make a hammer holder! Unbelievable, but true!
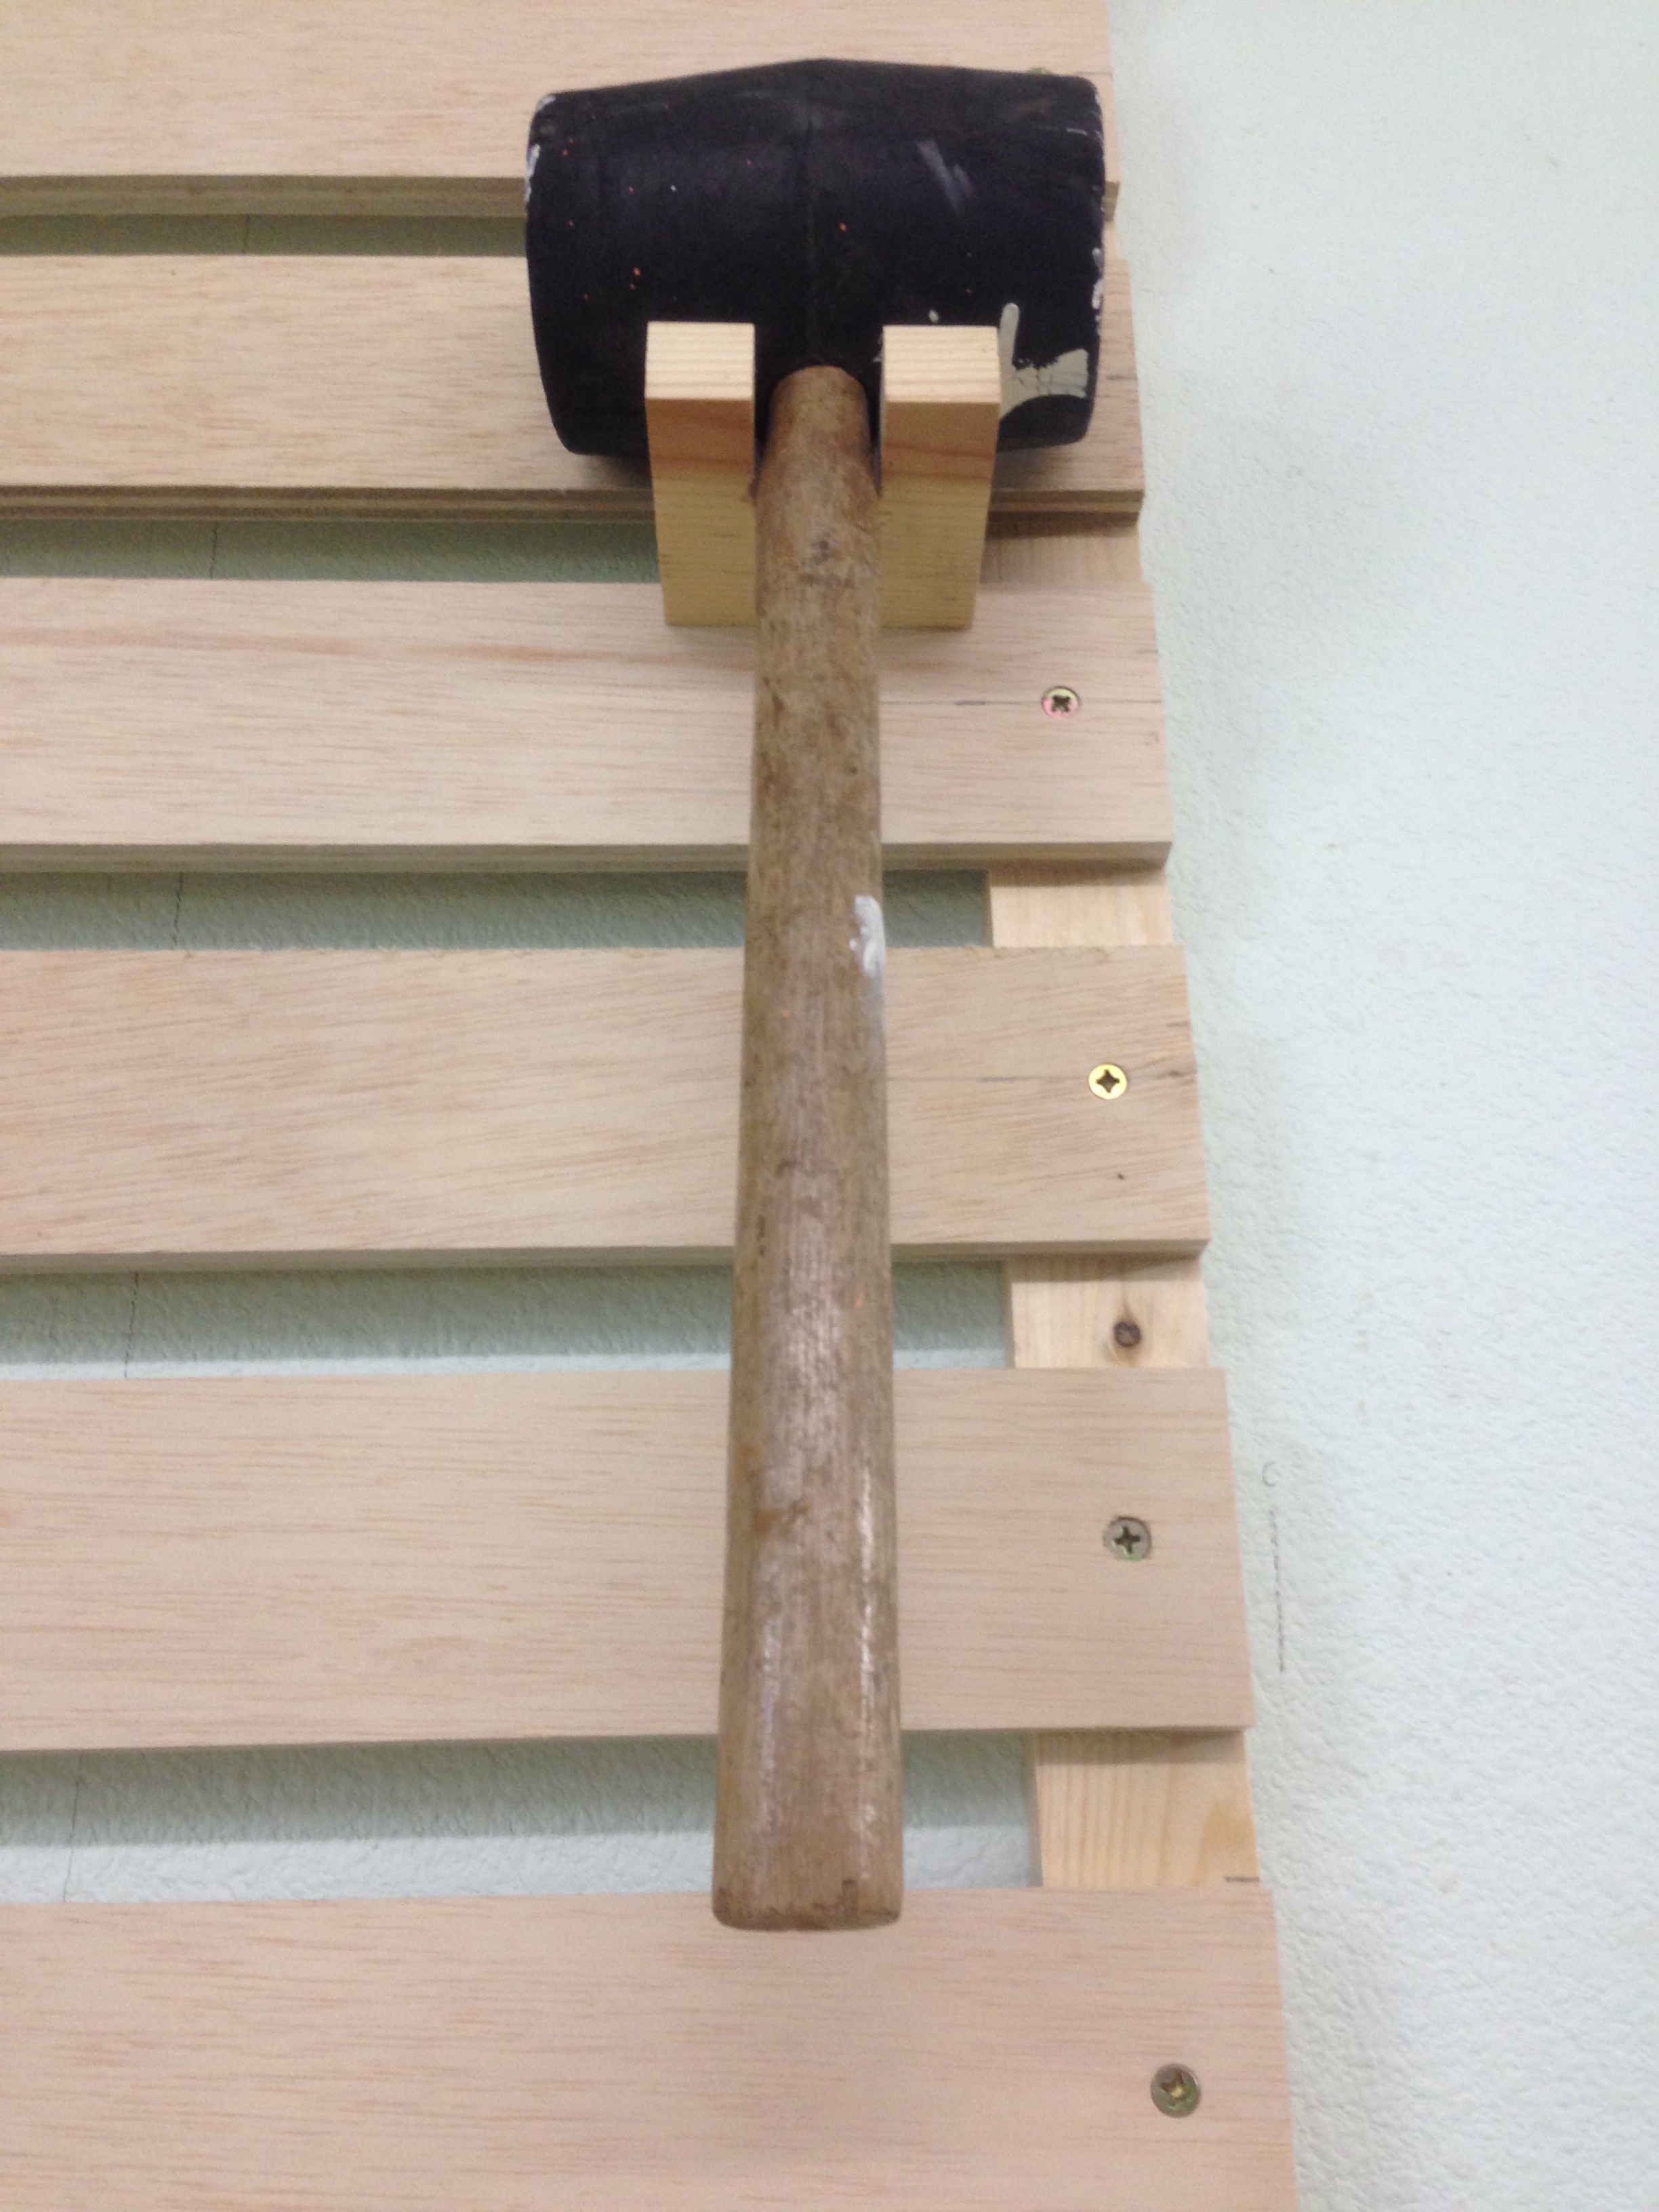
Hang your mallet with the dignity it deserves!
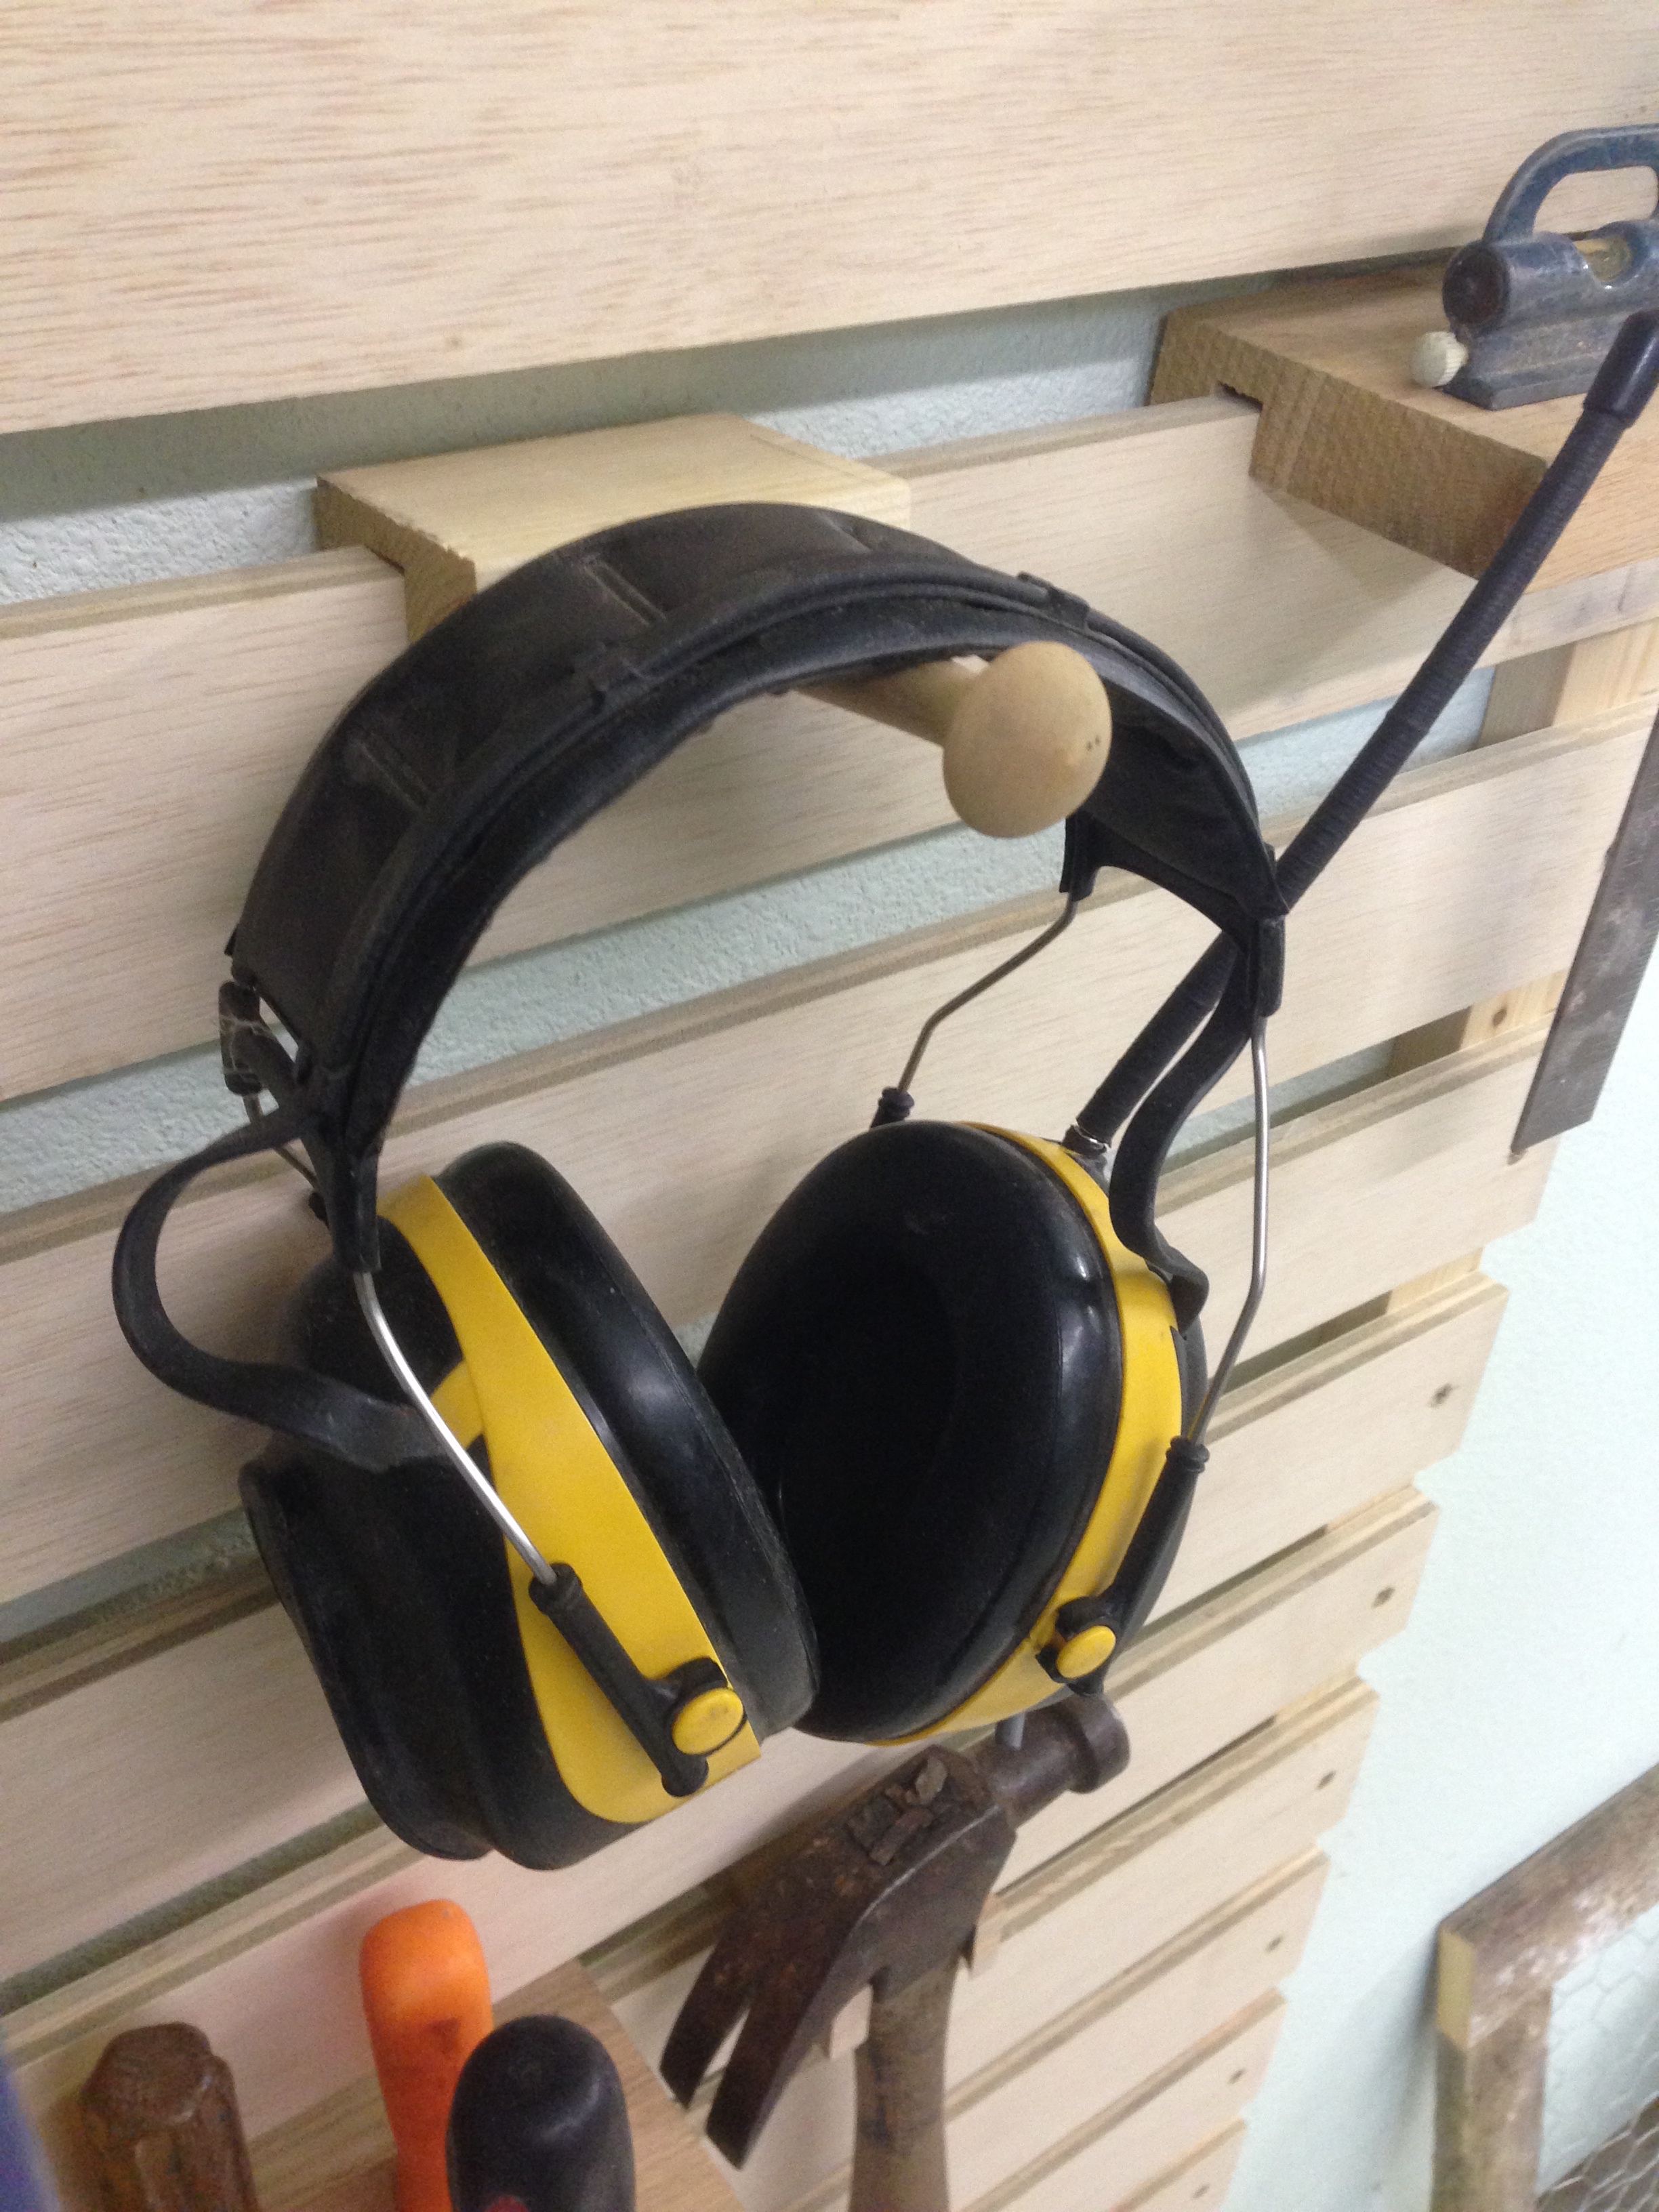
Do you have surplus coat rack dowels? Not anymore — now you have earphone hangers!
Whatever these are called fit right into this oblong hole!
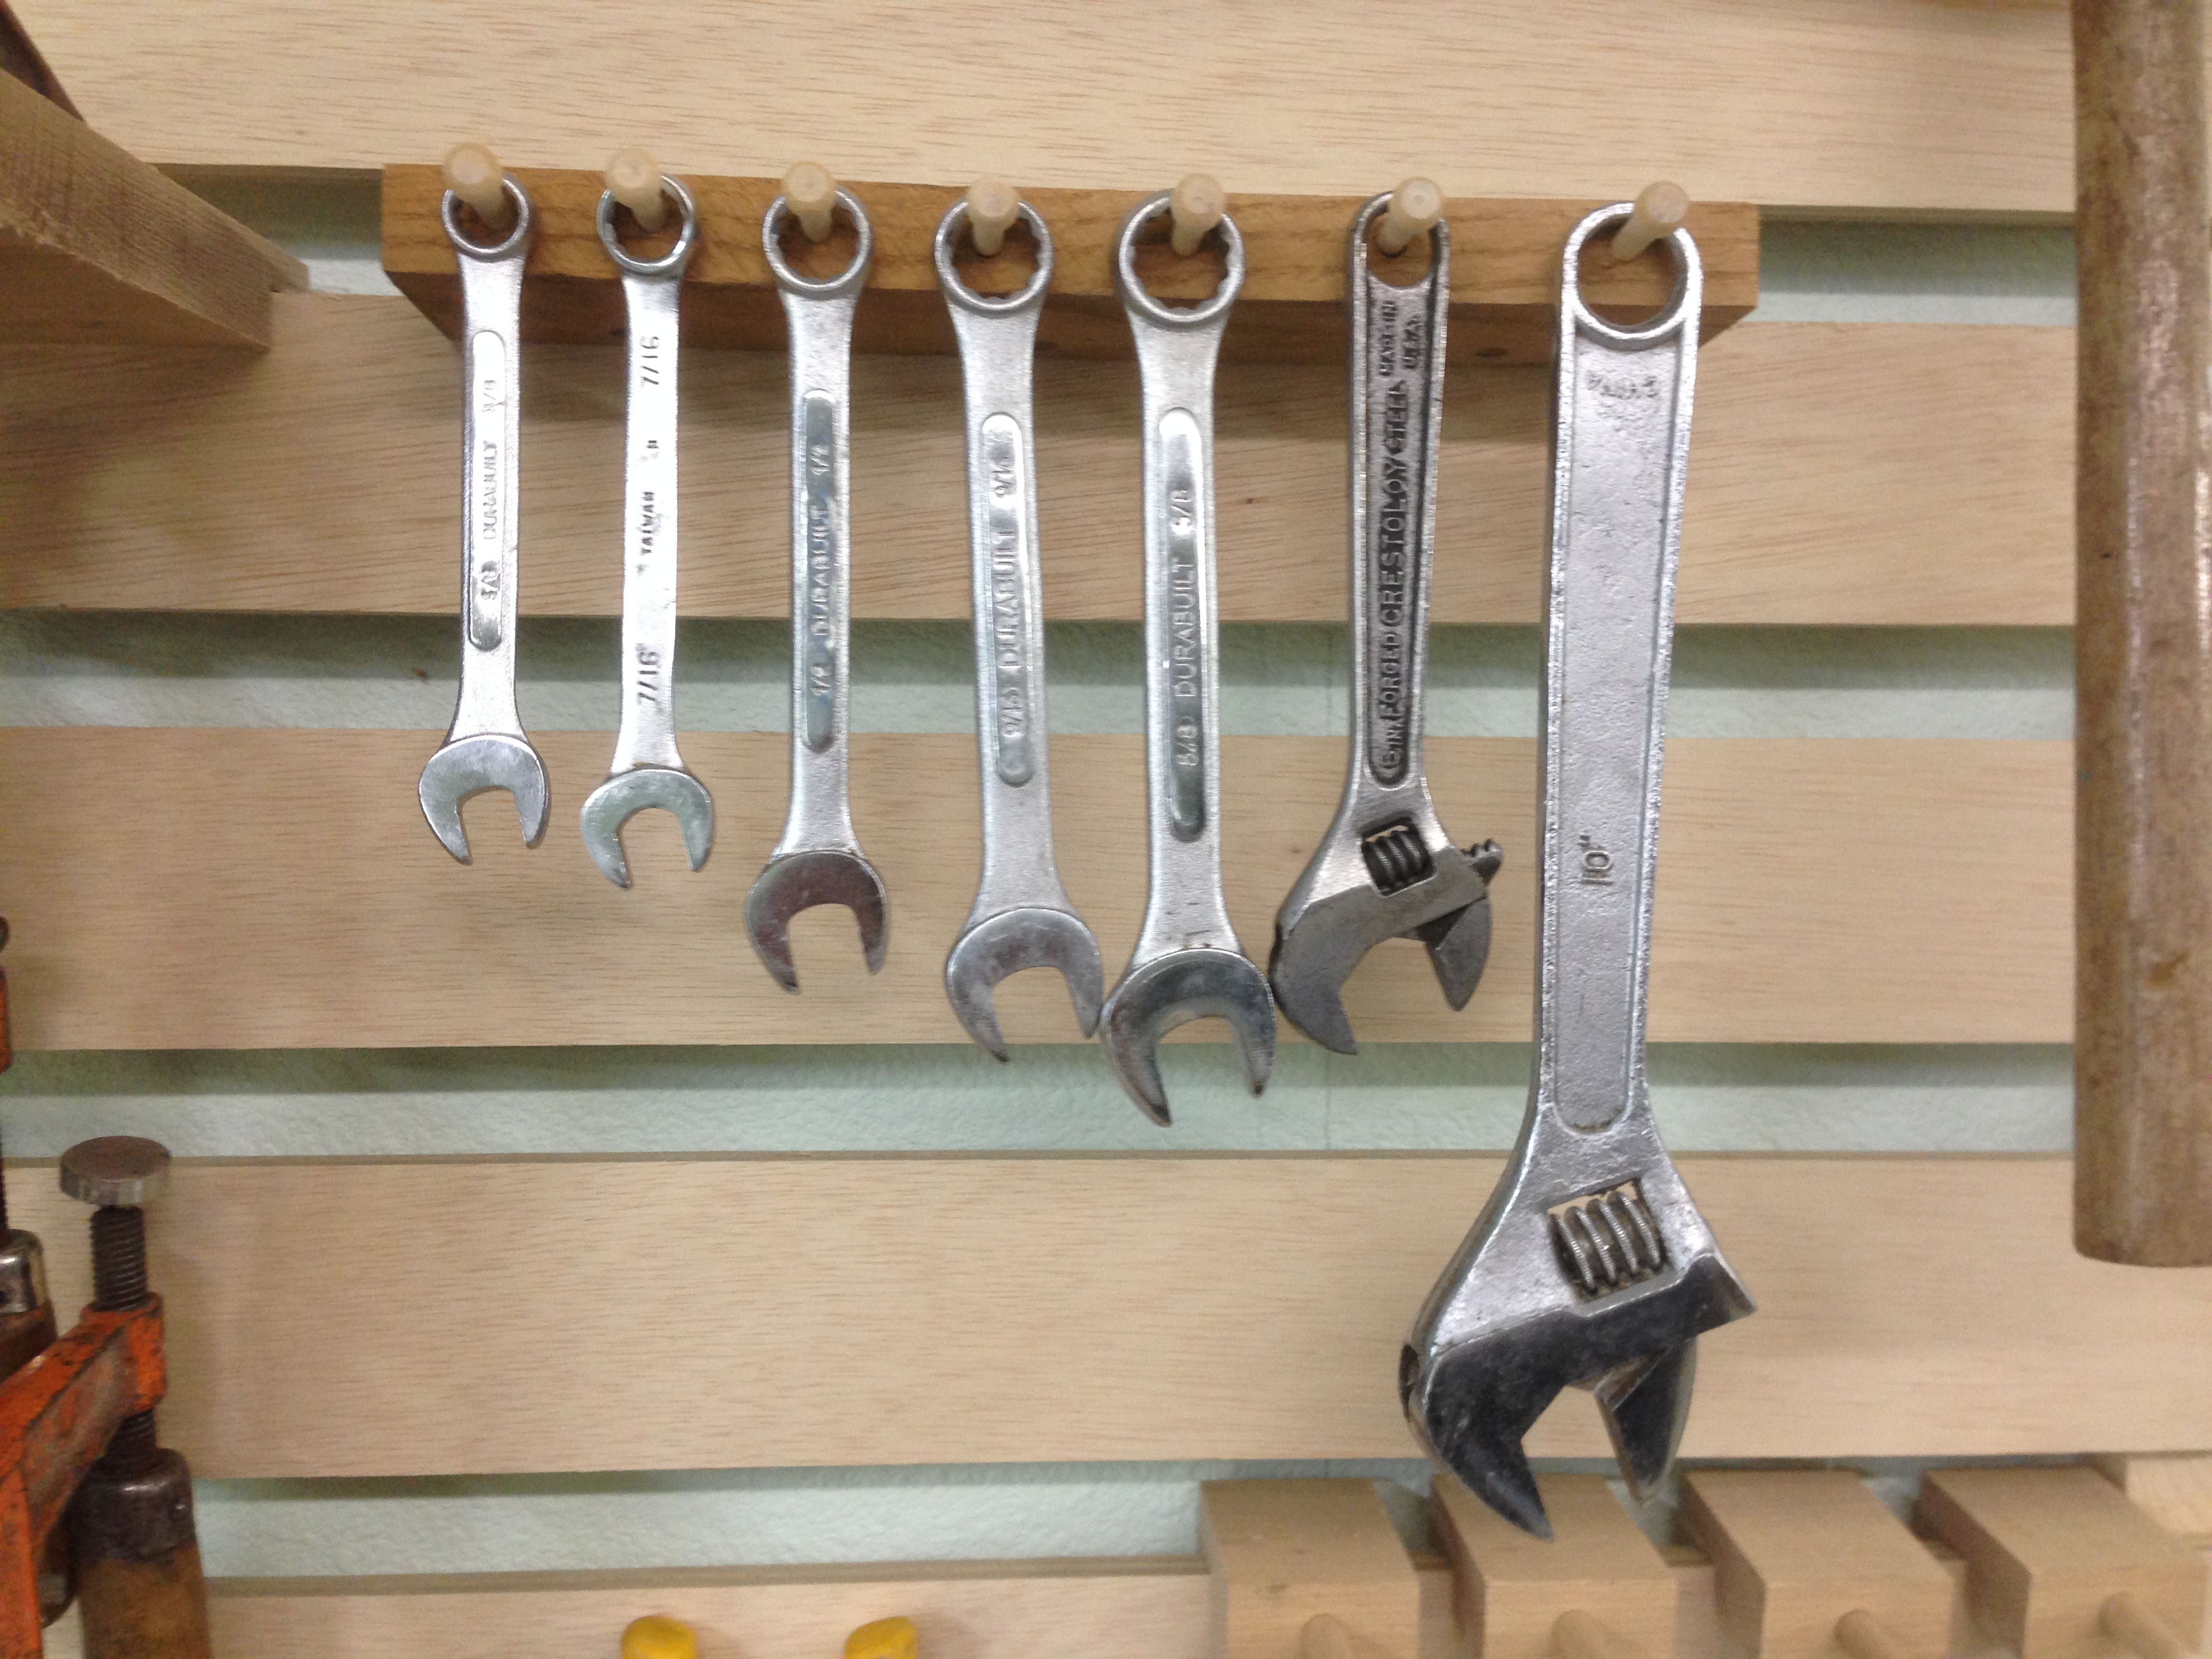
Wrenches! On pegs!
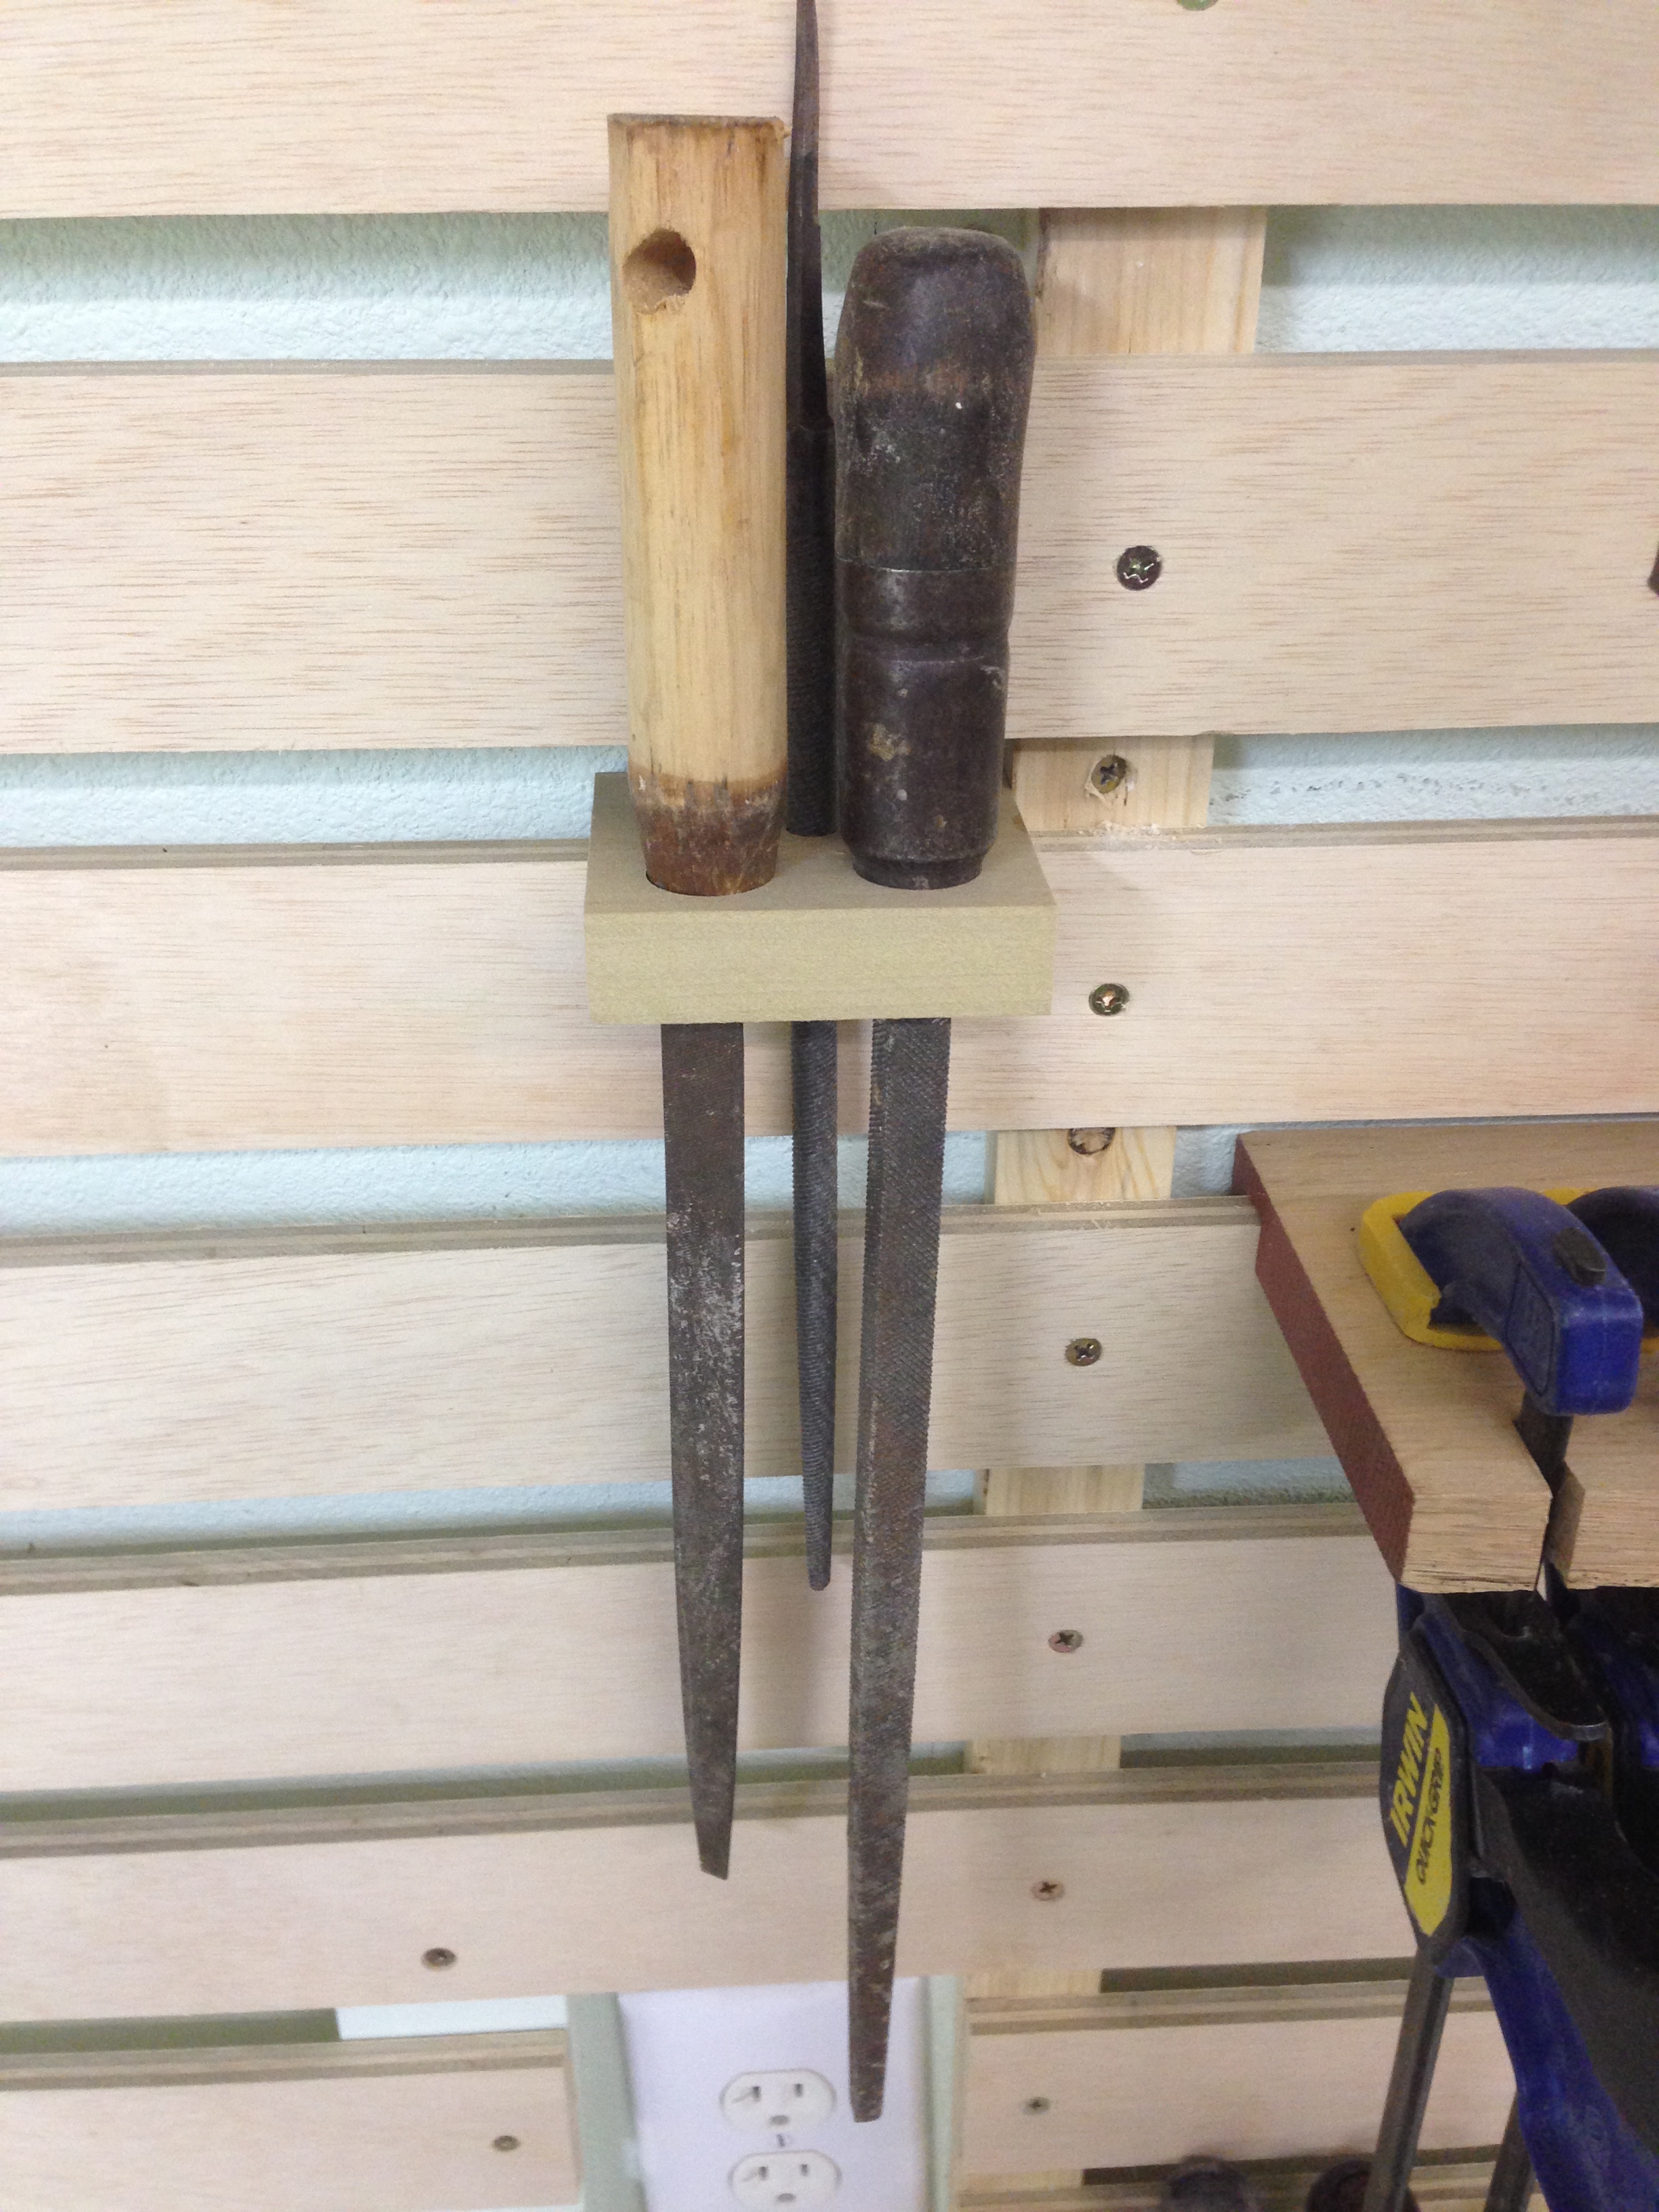
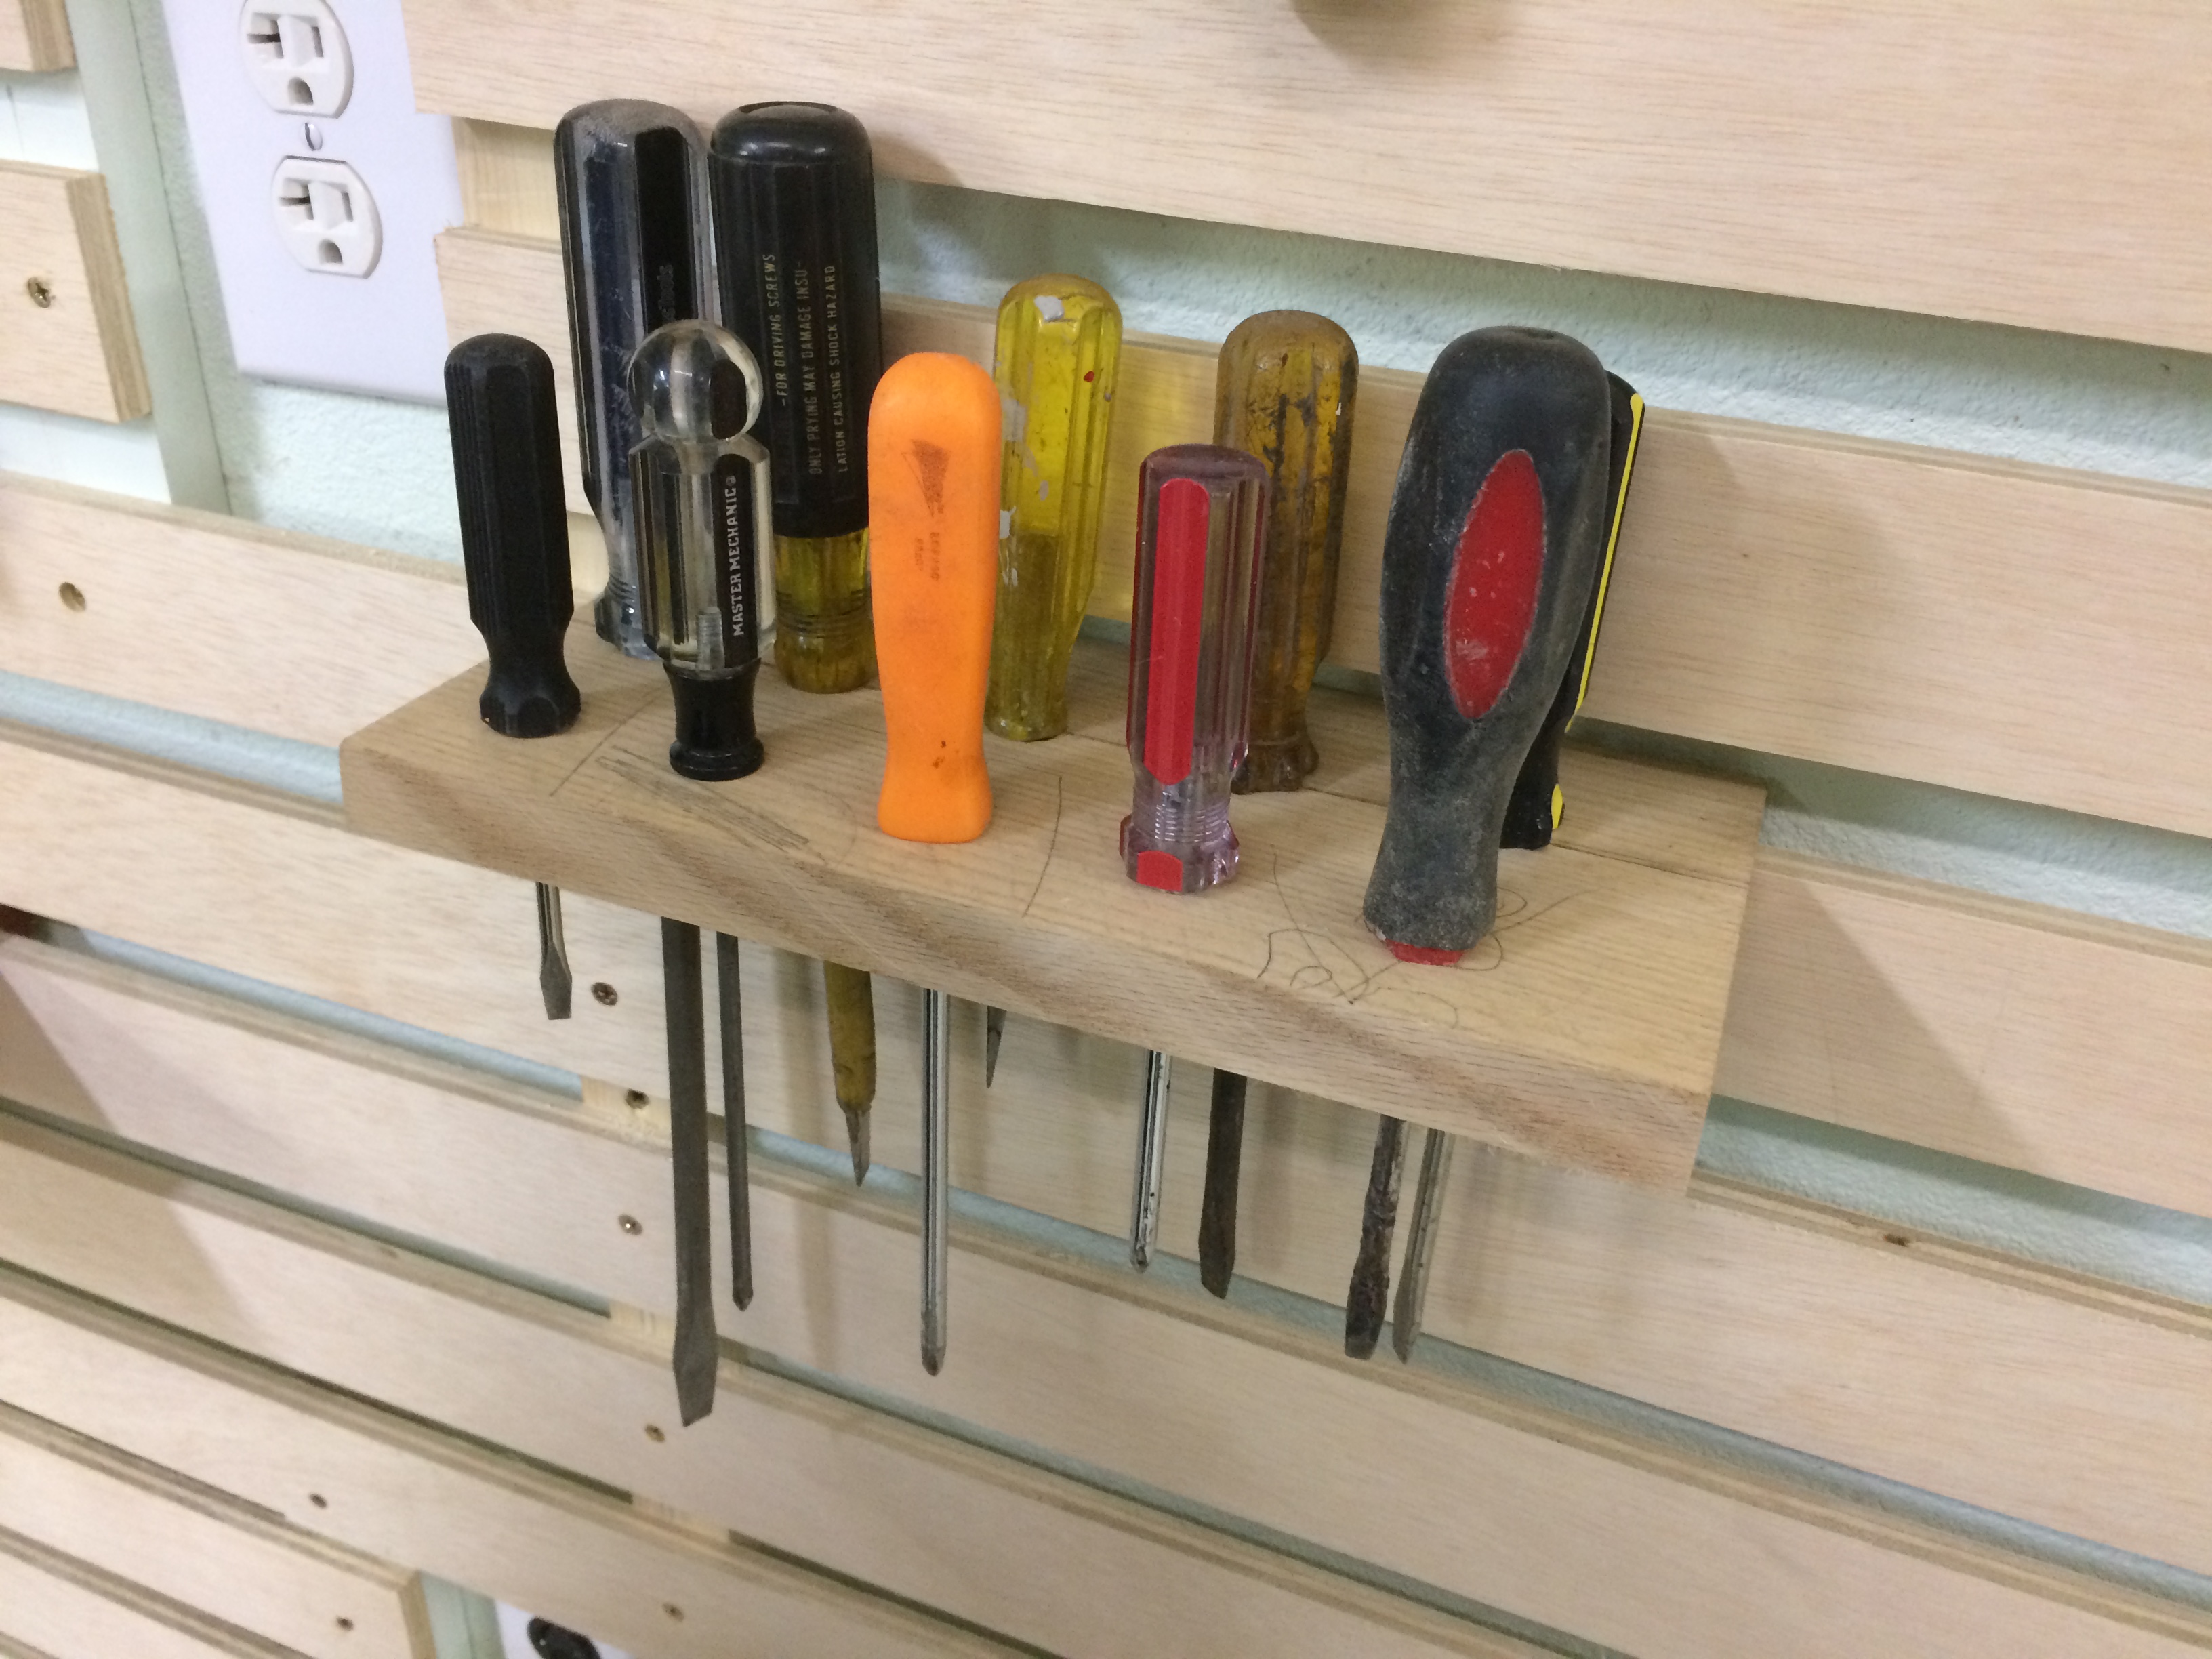
Files and screwdrivers can be dropped into appropriately sized holes!
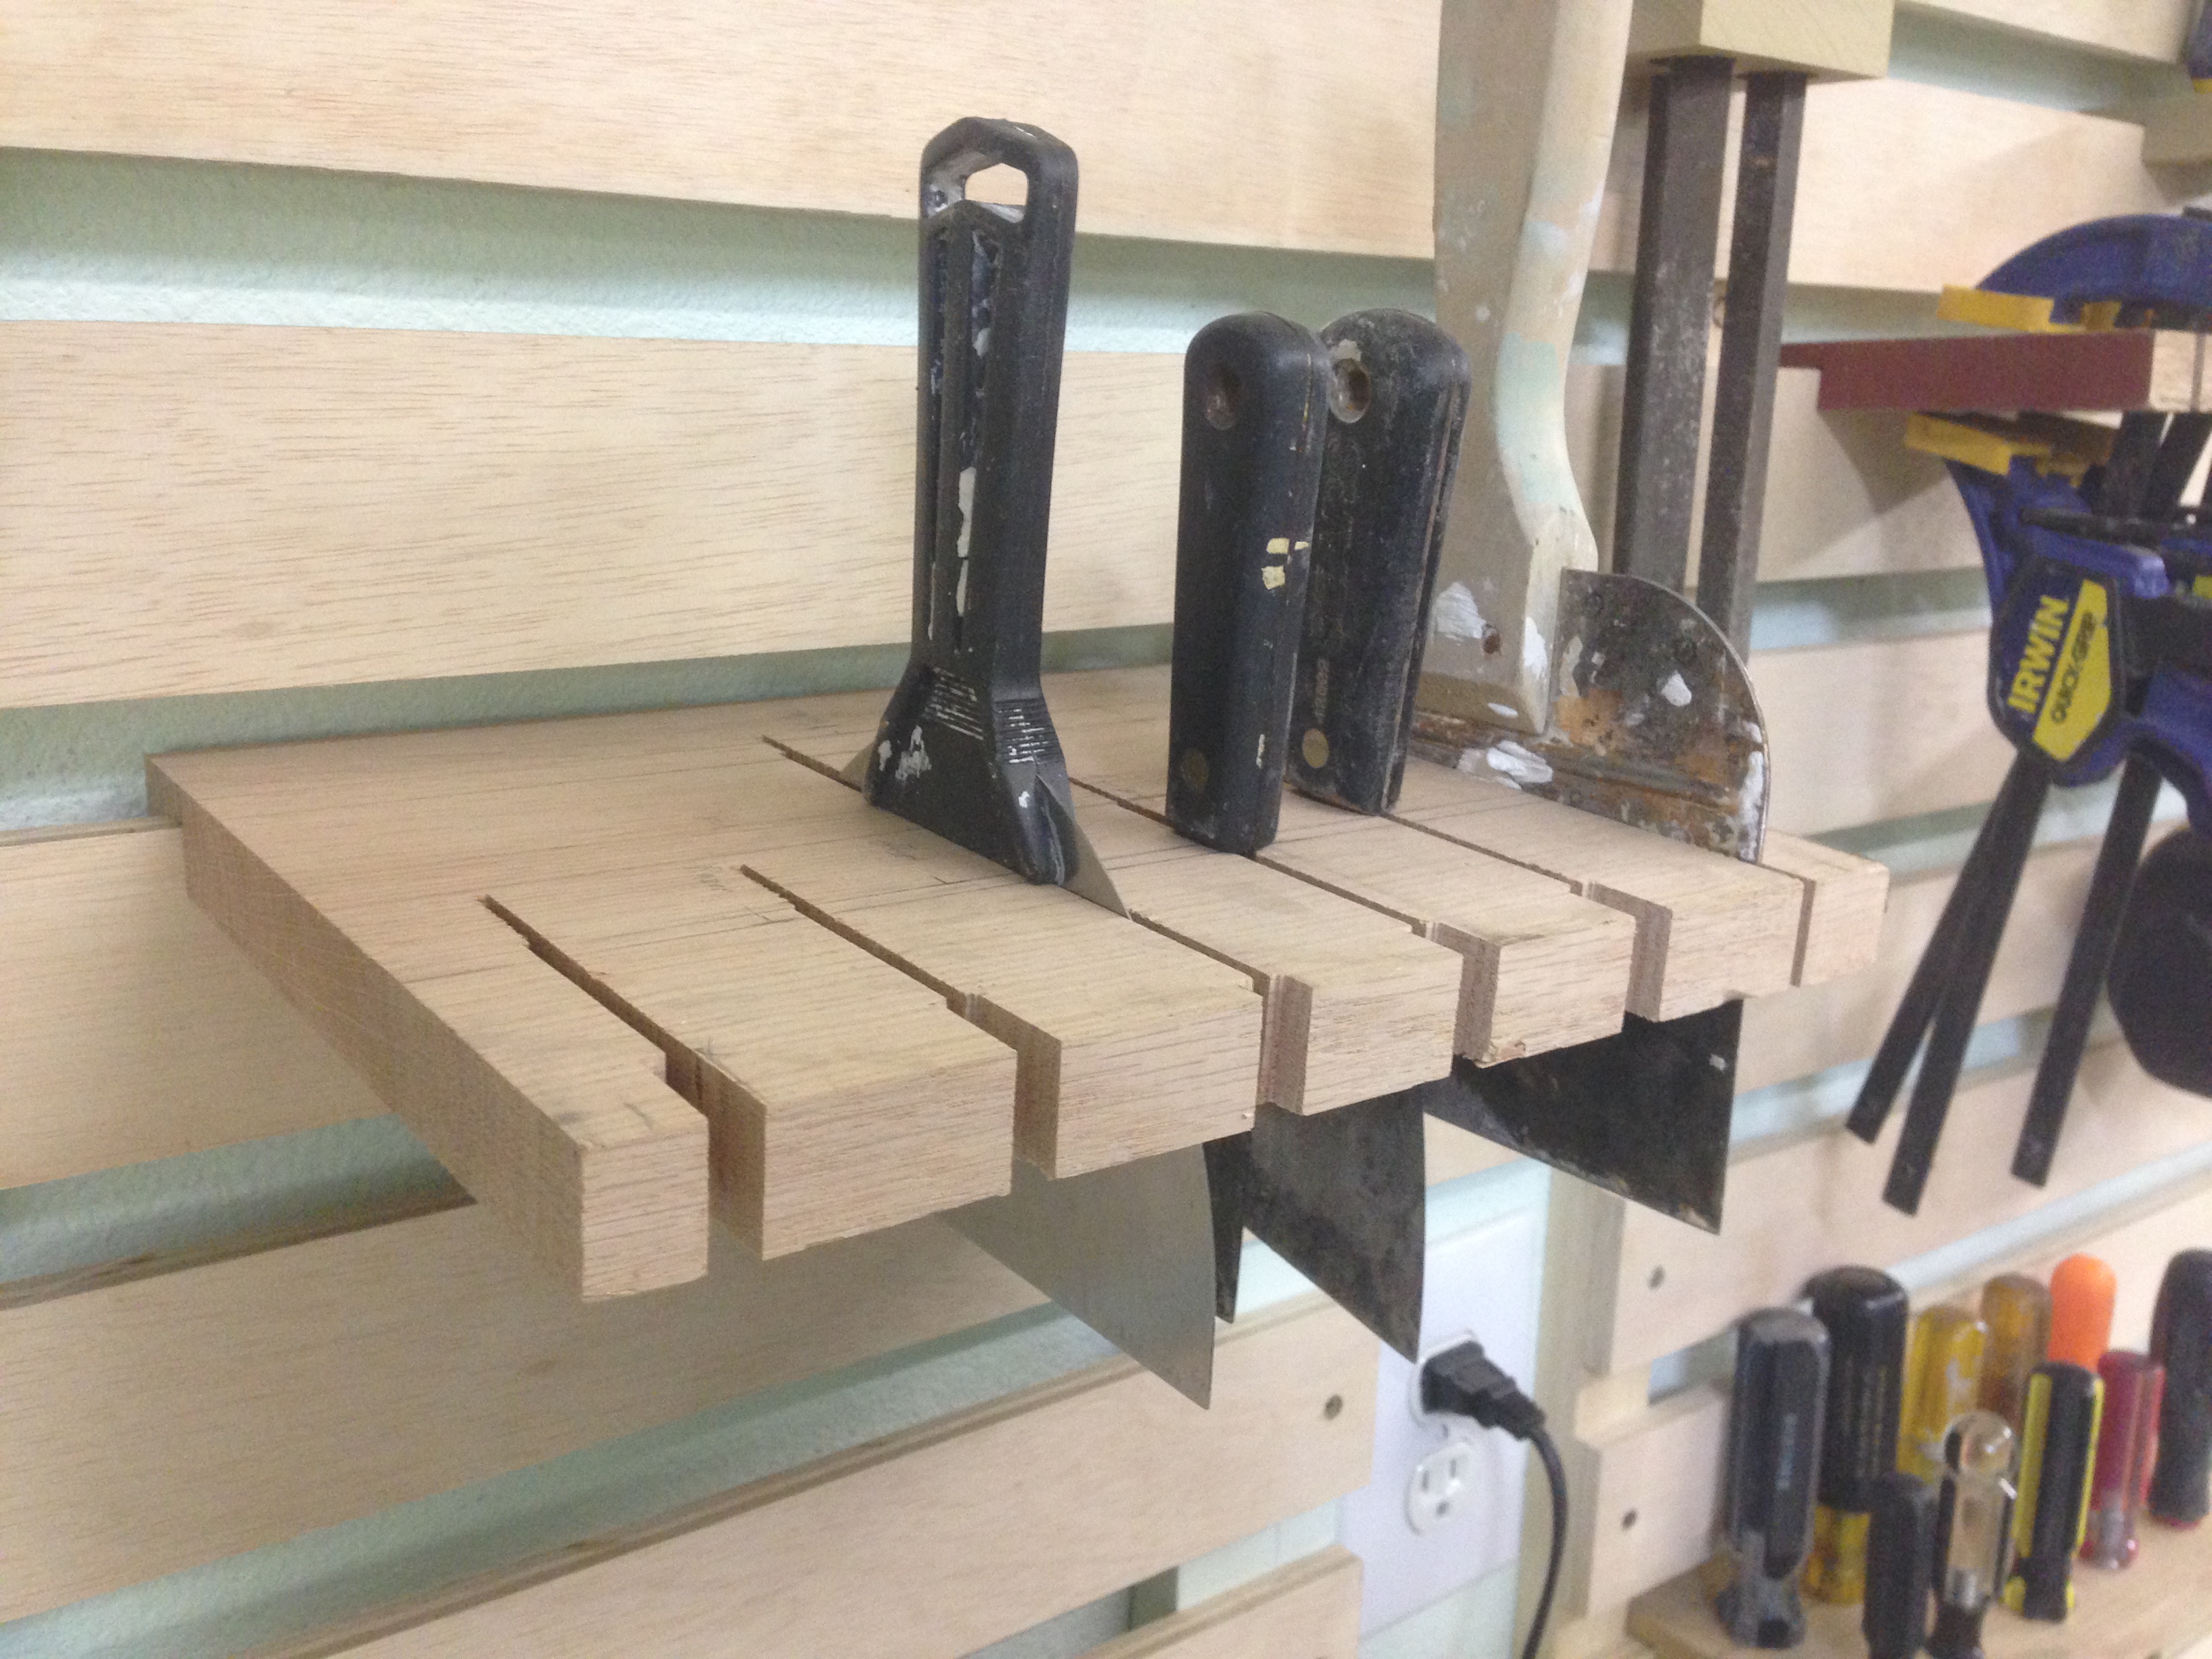
This was going to be a saw holder, but I didn’t like how some of the saws hung, so I repurposed it as a scraper holder! How environmentally-friendly!
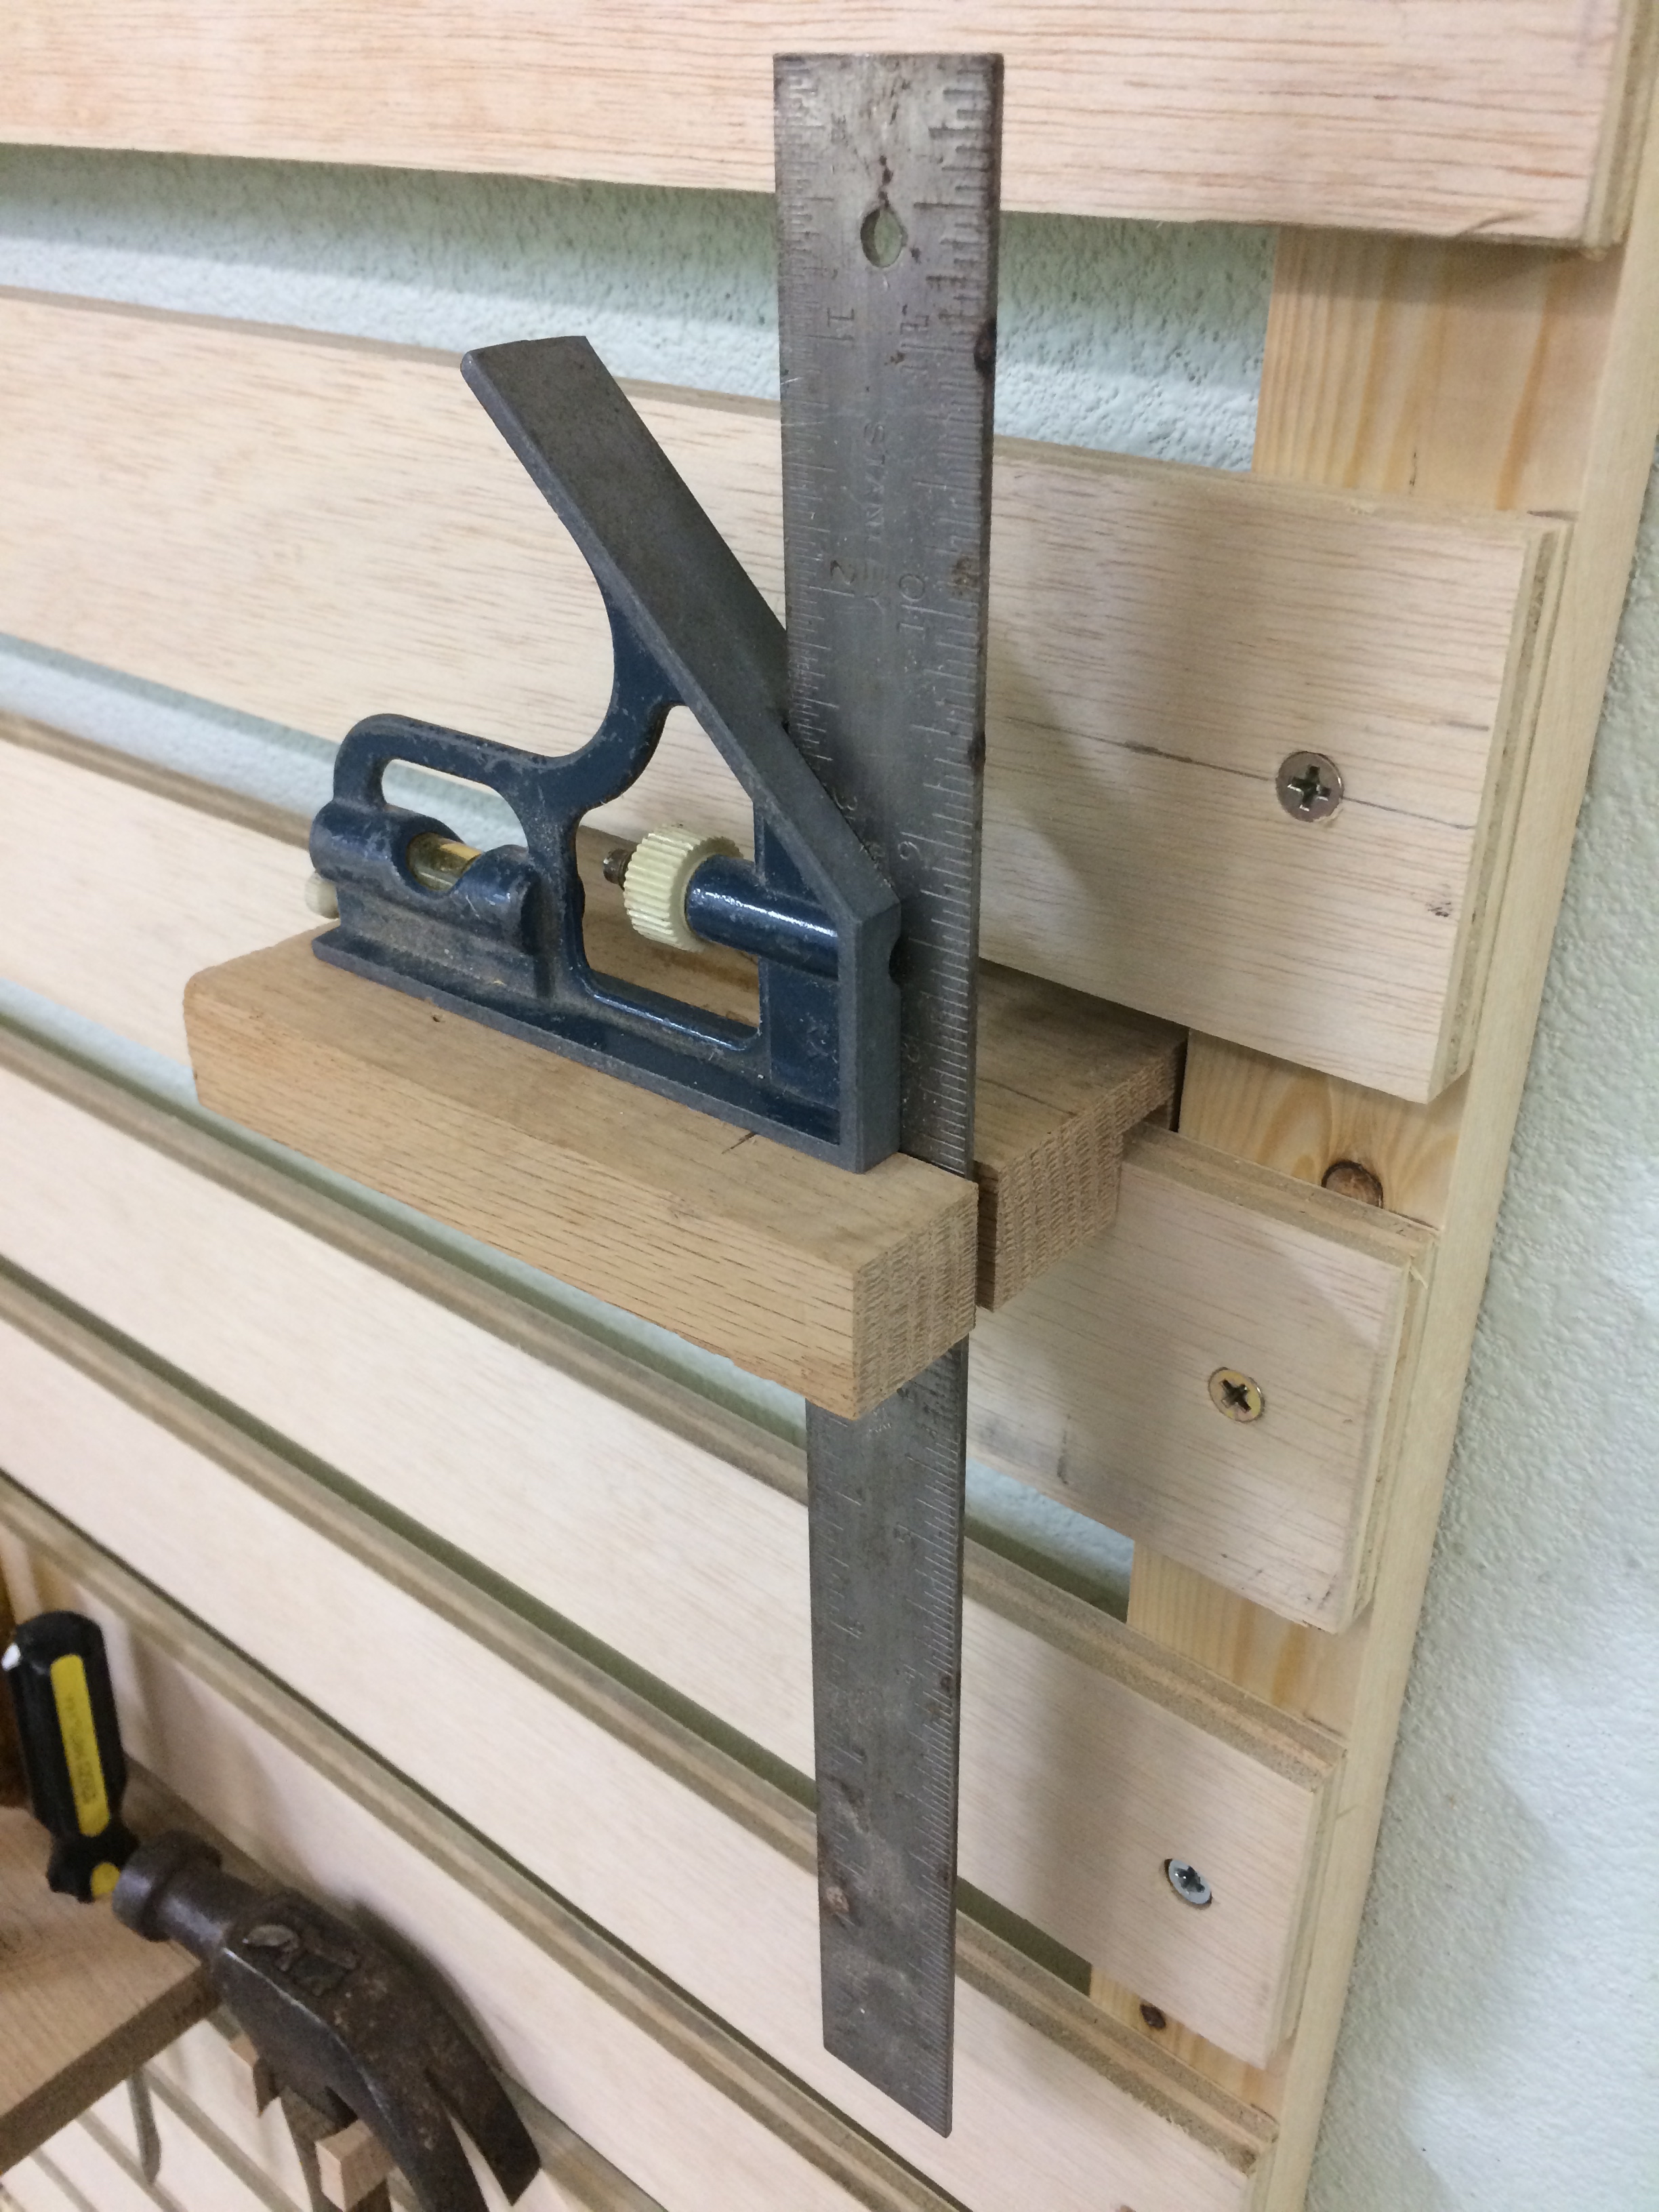
All this square needs to be happy is a slot for its straightedge.
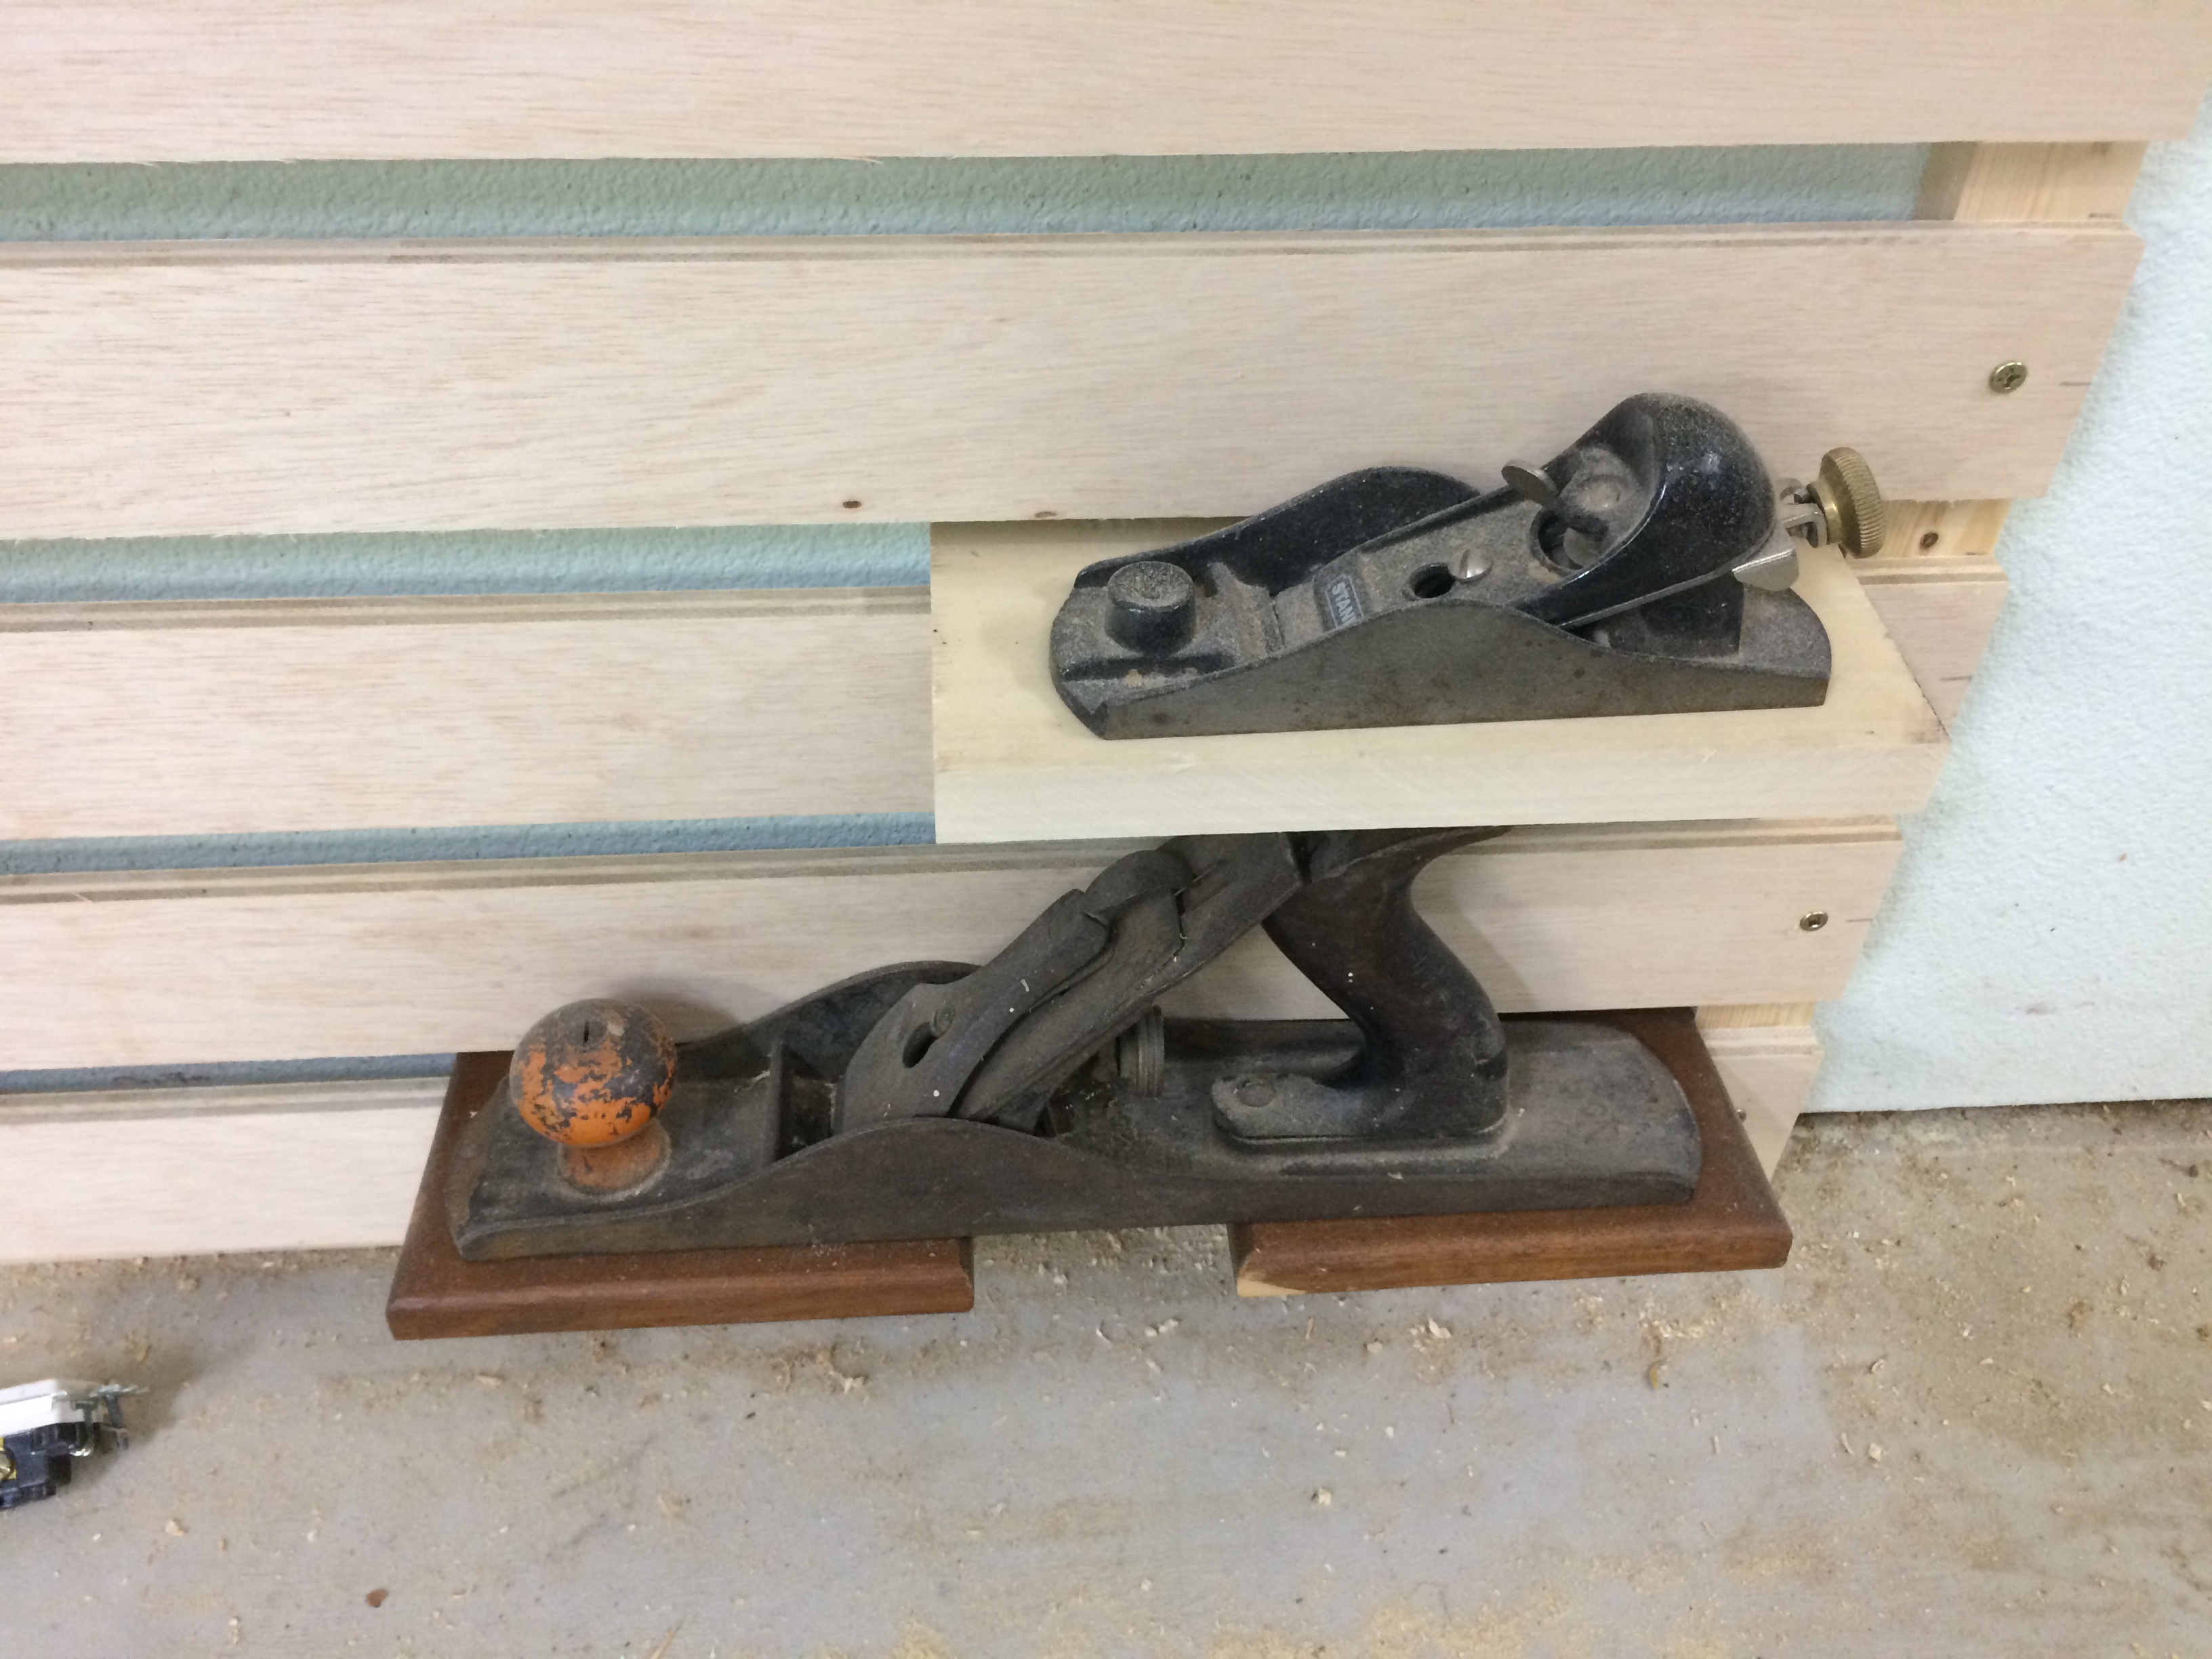
These planes are hanging out down at the bottom on simple shelves, but I have a feeling they’ll be movin’ on up real soon.
Every tool can get a custom-designed holder, which should help keep the rack organized and encourage me to actually put the tools back on the rack.
Speaking of the rack, here’s the current state of the rack. I’ve only built half of what I planned, and I’ll eventually get to the rest, but I got the workbench about half-cleared off, which was just enough for me to get distracted by the extra space and start some new projects, so the rack will have to wait.
really nice simple shelf system! cheers for having a dedicated wood shop. can’t wait to have one of my own someday
Thanks for sharing all these with us . Waiting for the new articles ; )
Pingback: Today’s CNC Carving: A Chisel Rack
I missed this project. Awesome work!